Aliexpress
 Hohem Official Store


教学视频
点击下方可观看iSteady MT2【微单相机安装与调平】教学视频。
安装快装板 & L型支架
• 安装阿卡快装板
取出阿卡快装板,安装至相机上,并拧紧螺丝。
Tips:
螺丝未拧紧,MT2开机有可能产生震动。
• 安装L型支架
取出L型快装支架,以及磁吸在支架上的迷你快拆扳手,用迷你扳手拧松支架底部螺丝。
将装有快装板的相机整体沿卡槽推入,通过在侧边扳手锁紧快装板。
• 调整相机宽度
根据相机宽度,将L型支架一侧紧贴相机侧面,再将底部螺丝旋紧。
• 扳手与安全锁
MT2安装座上设有扳手和安全锁。扳手用于锁紧L型快装支架,安全锁用于防止相机掉落。
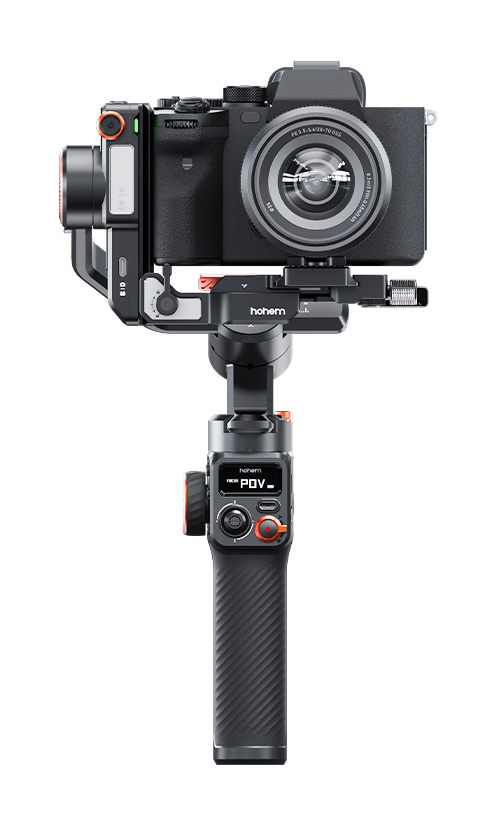
相机横屏安装
松开安装座扳手,将装有快装板和L型支架的相机整体,沿卡槽推入安装座,并锁紧扳手。

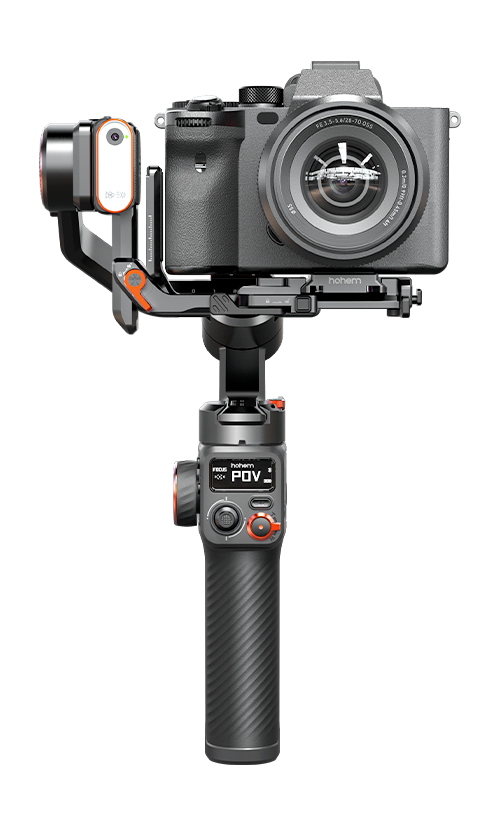
相机竖屏安装
Tips:
此处以索尼ZV-E10演示。
先松开安装座扳手,将装好L型快装支架的相机,旋转90°至竖屏,并沿卡槽推入安装座,锁紧扳手。
竖屏双向安装
L型支架支持双向安装,根据不同的竖拍需求,可安装不同方向,并以竖拍形式推入安装座,锁紧扳手。
• 左侧安装L支架(左图)
竖拍时,如索尼ZV-E10,可翻转屏幕看画面。
• 右侧安装L支架(右图)
竖拍时,如索尼A7R IV,热靴可朝外加装配件。
相机俯仰轴重心调平
Tips:
伸缩镜头的相机,开始调平前,请启动相机使镜头伸长。
• 竖直方向调平
解锁俯仰轴。

扶住横滚臂杆,将相机镜头朝上,查看镜头重心方向。
松开扳手,前后移动相机整体,直到相机静止不晃动时,且能与地面保持垂直平衡状态,即可锁紧扳手。
• 水平方向调平
将相机镜头放平,查看镜头重心方向。
松开扳手,前后移动相机整体,直到相机静止不晃动时,且能与地面保持平行状态,即可锁紧扳手。

相机横滚轴重心调平
Tips:
伸缩镜头的相机,开始调平前,请启动相机使镜头伸长。
解锁横滚电机,查看镜头重心方向。

向左松开扳手,左右移动横滚臂杆,至相机整体大概平衡后,锁紧扳手。
相机航向轴重心调平
Tips:
伸缩镜头的相机,开始调平前,请启动相机使镜头伸长。
解锁航向电机。

紧握手柄倾斜MT2,并观察相机重心是否左右旋转偏移。

松开航向臂杆锁紧扳手,移动臂杆、相机和MT2上半部分整体,至航向臂大概平衡后,锁紧扳手。