Beginner Tutorial
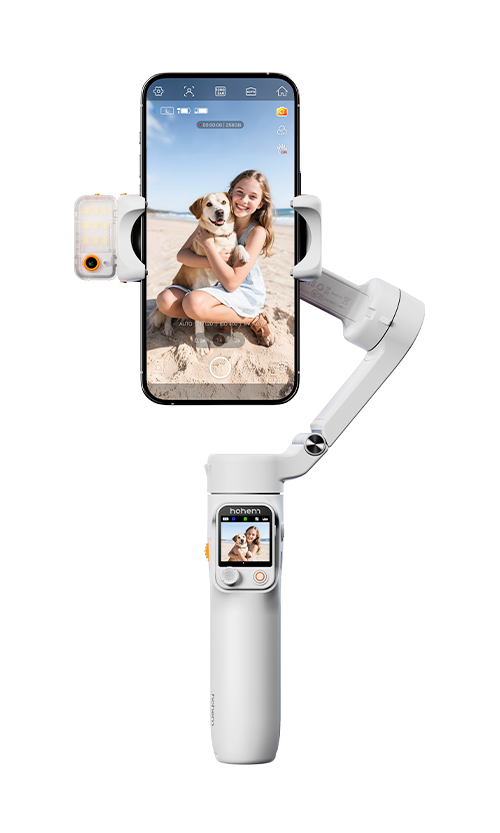
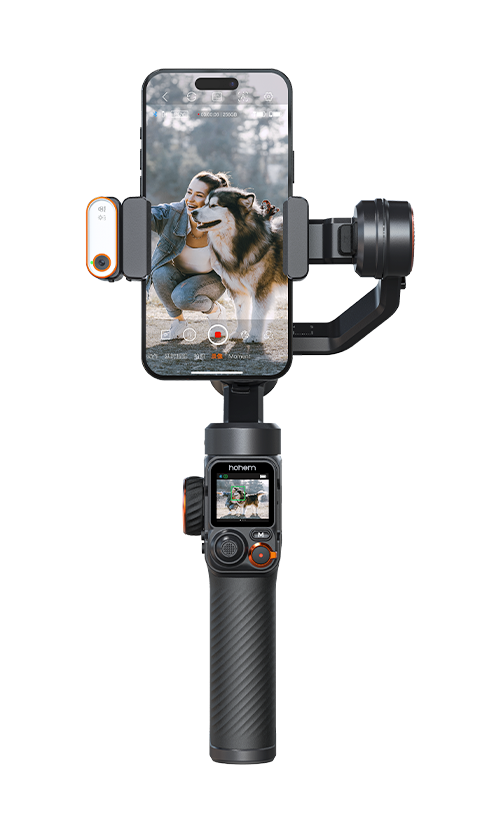
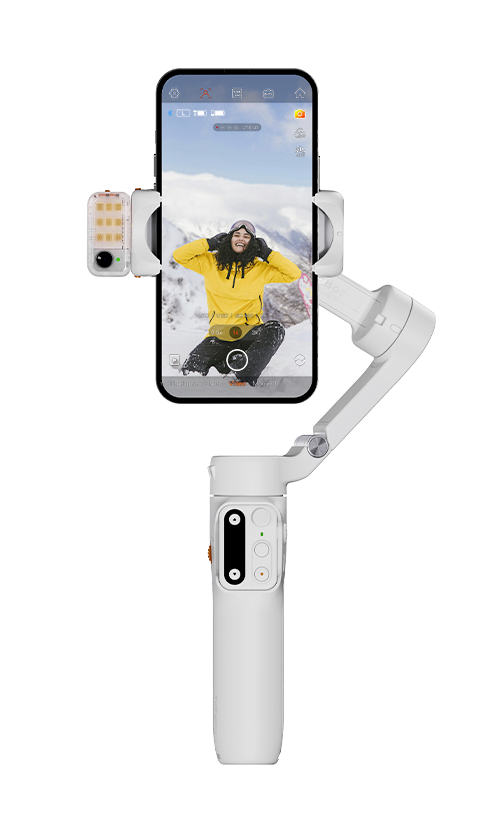
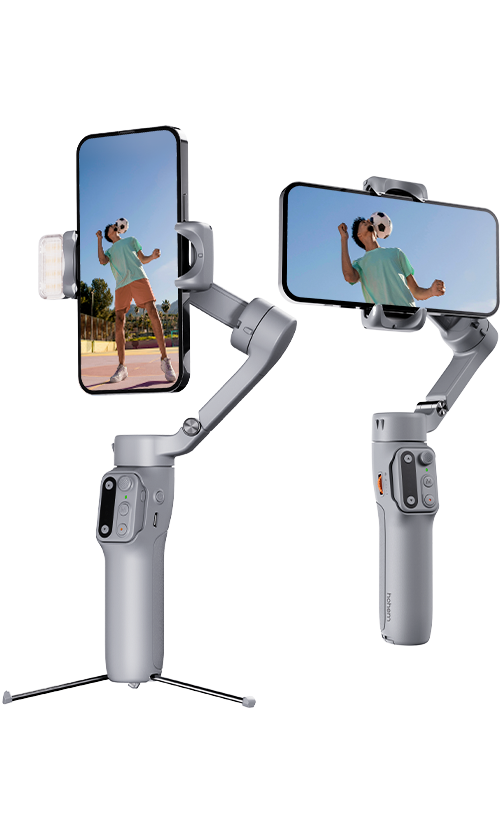
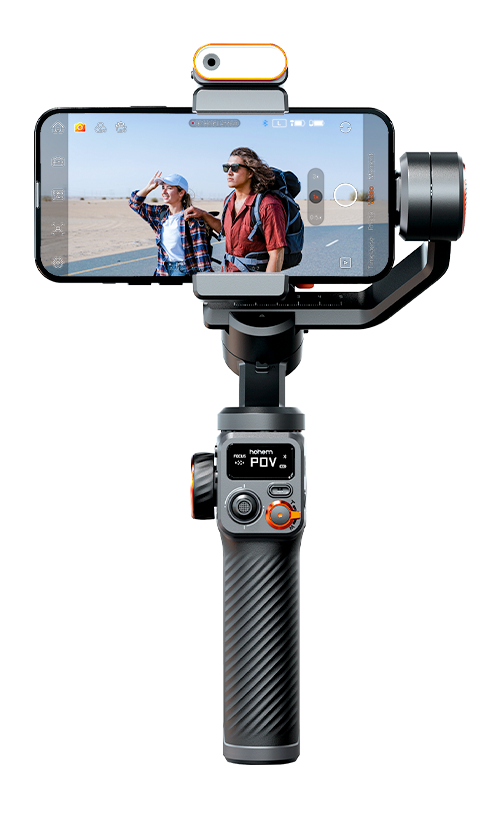
Welcome to Hohem iSteady X3 beginner tutorial.
Unboxing
Open the box, you'll see iSteady X3 gimbal and its accessories.
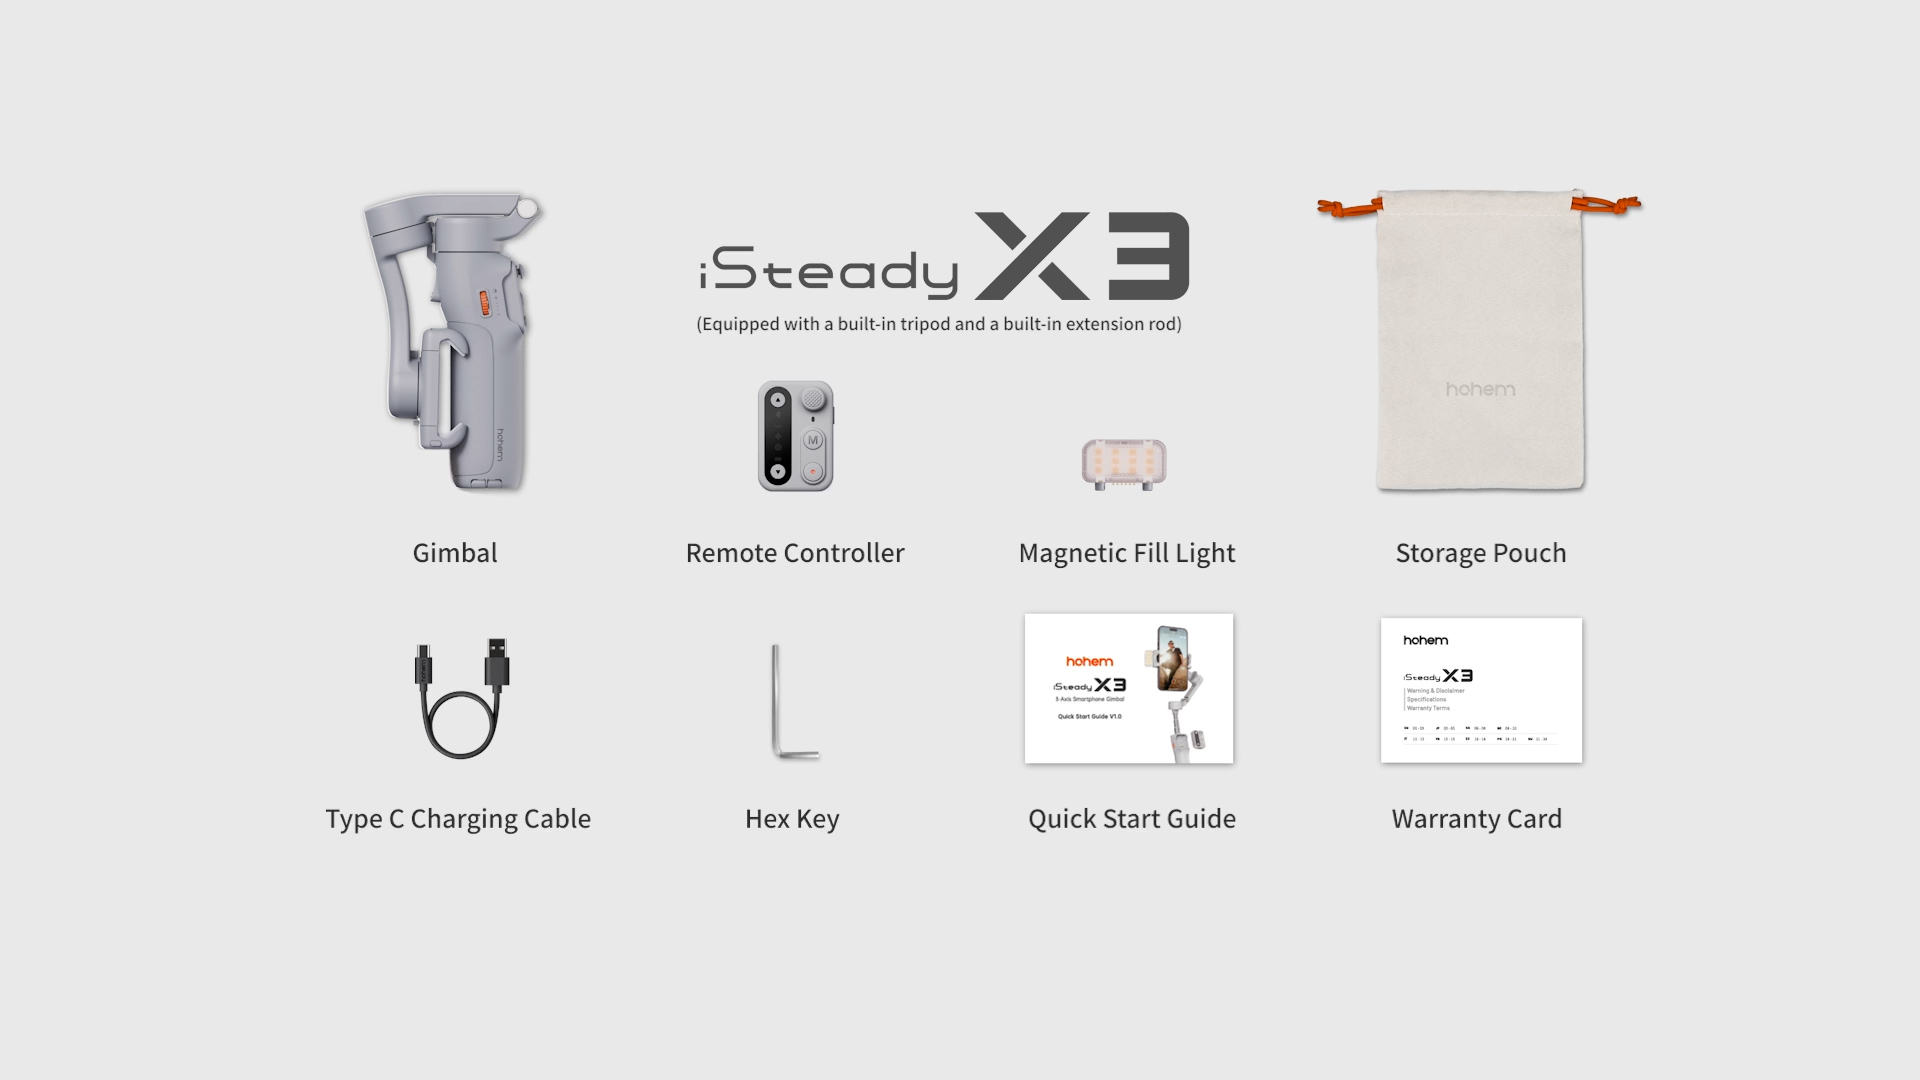
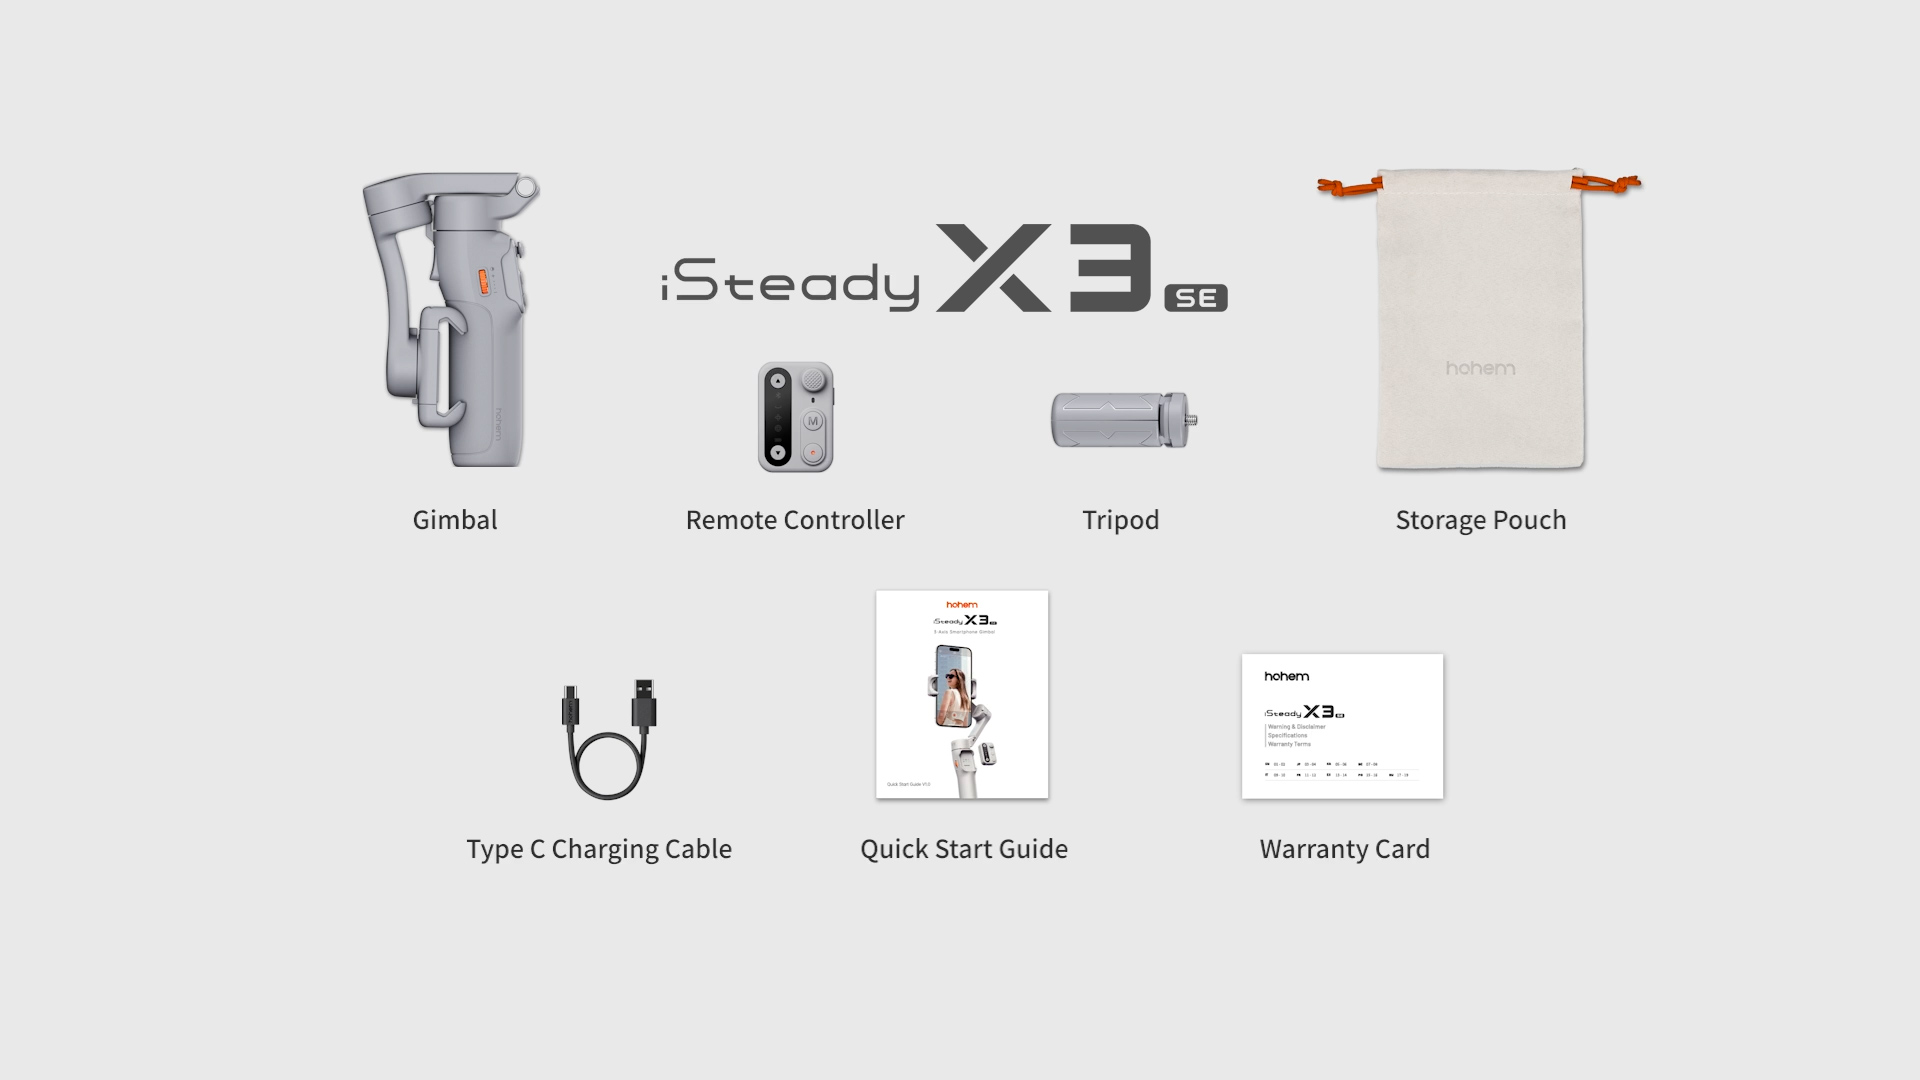
In this video, iSteady X3 is used as an example below, features and configurations may vary between iSteady X3 and iSteady X3 SE.
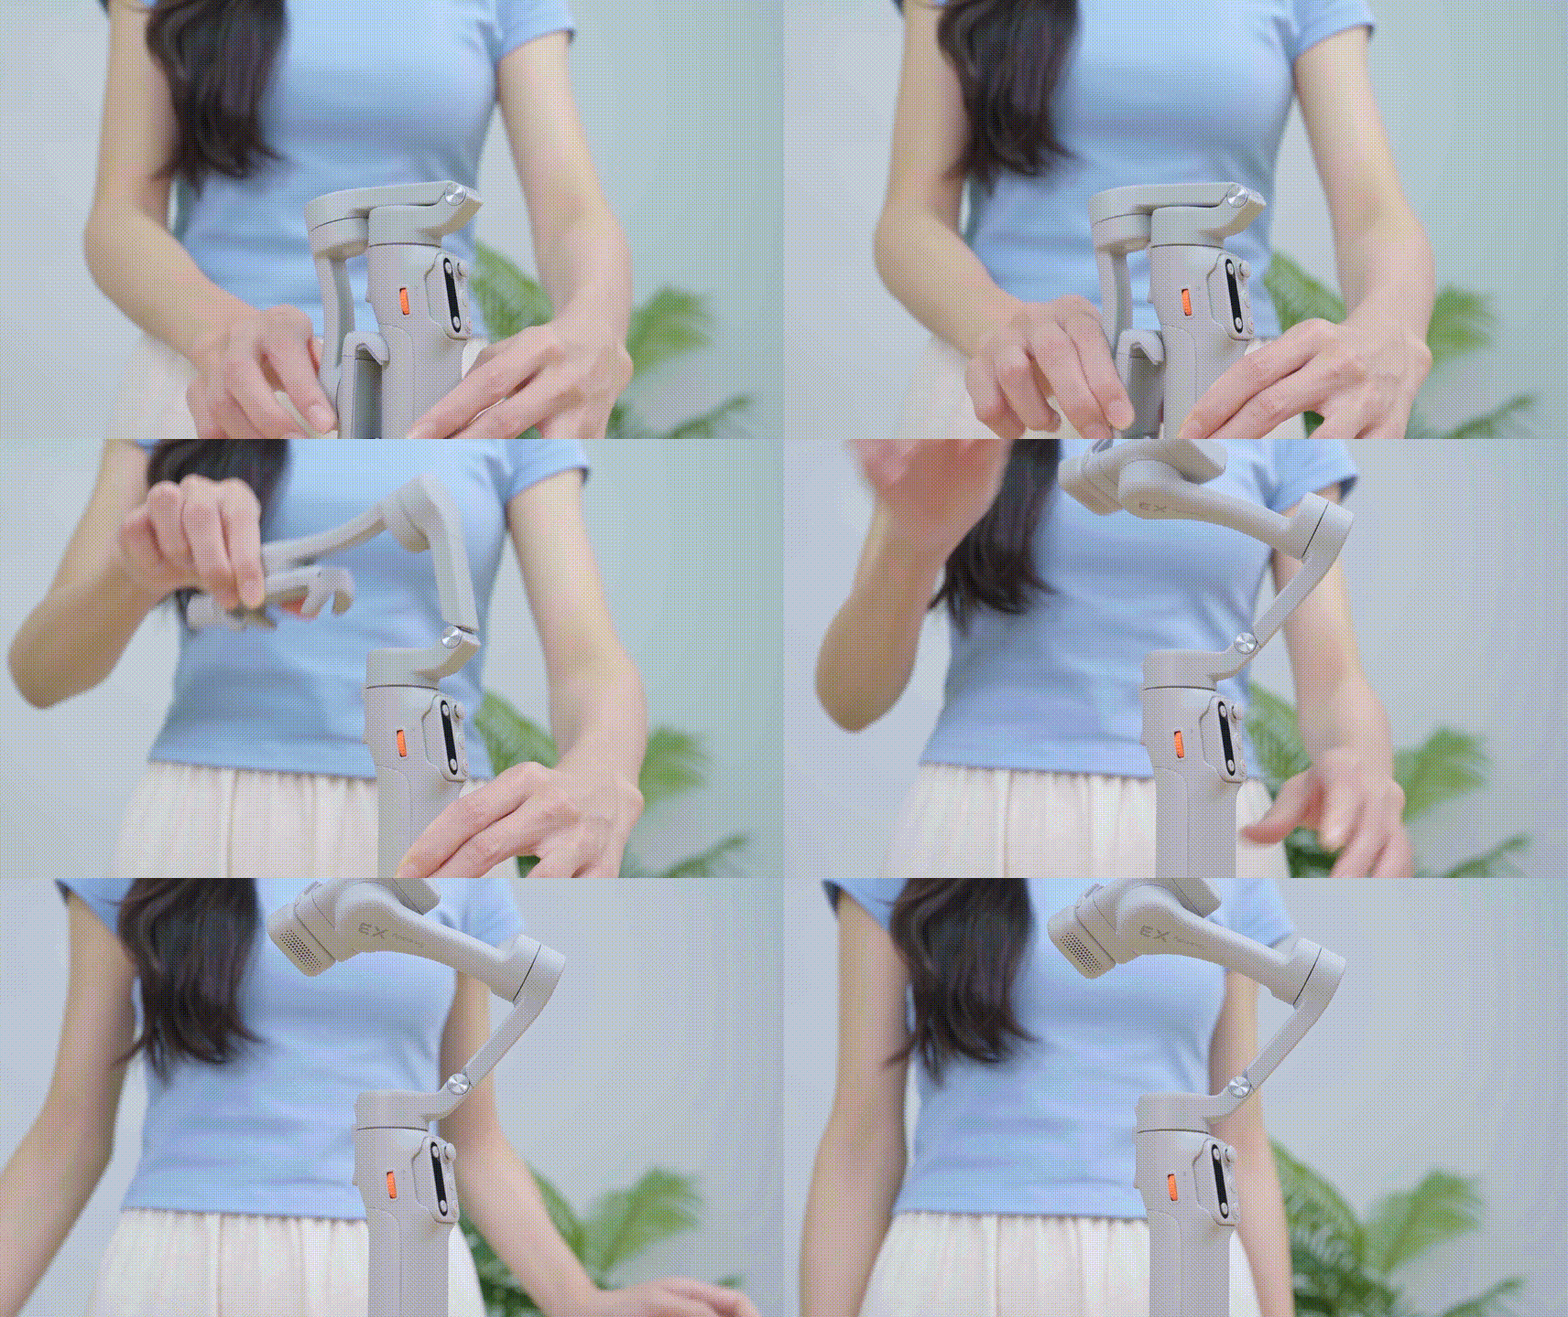
Unfold the Gimbal
Take out the gimbal, pull out the tripod, and put the gimbal on a flat surface.

Unfold the gimbal arm.
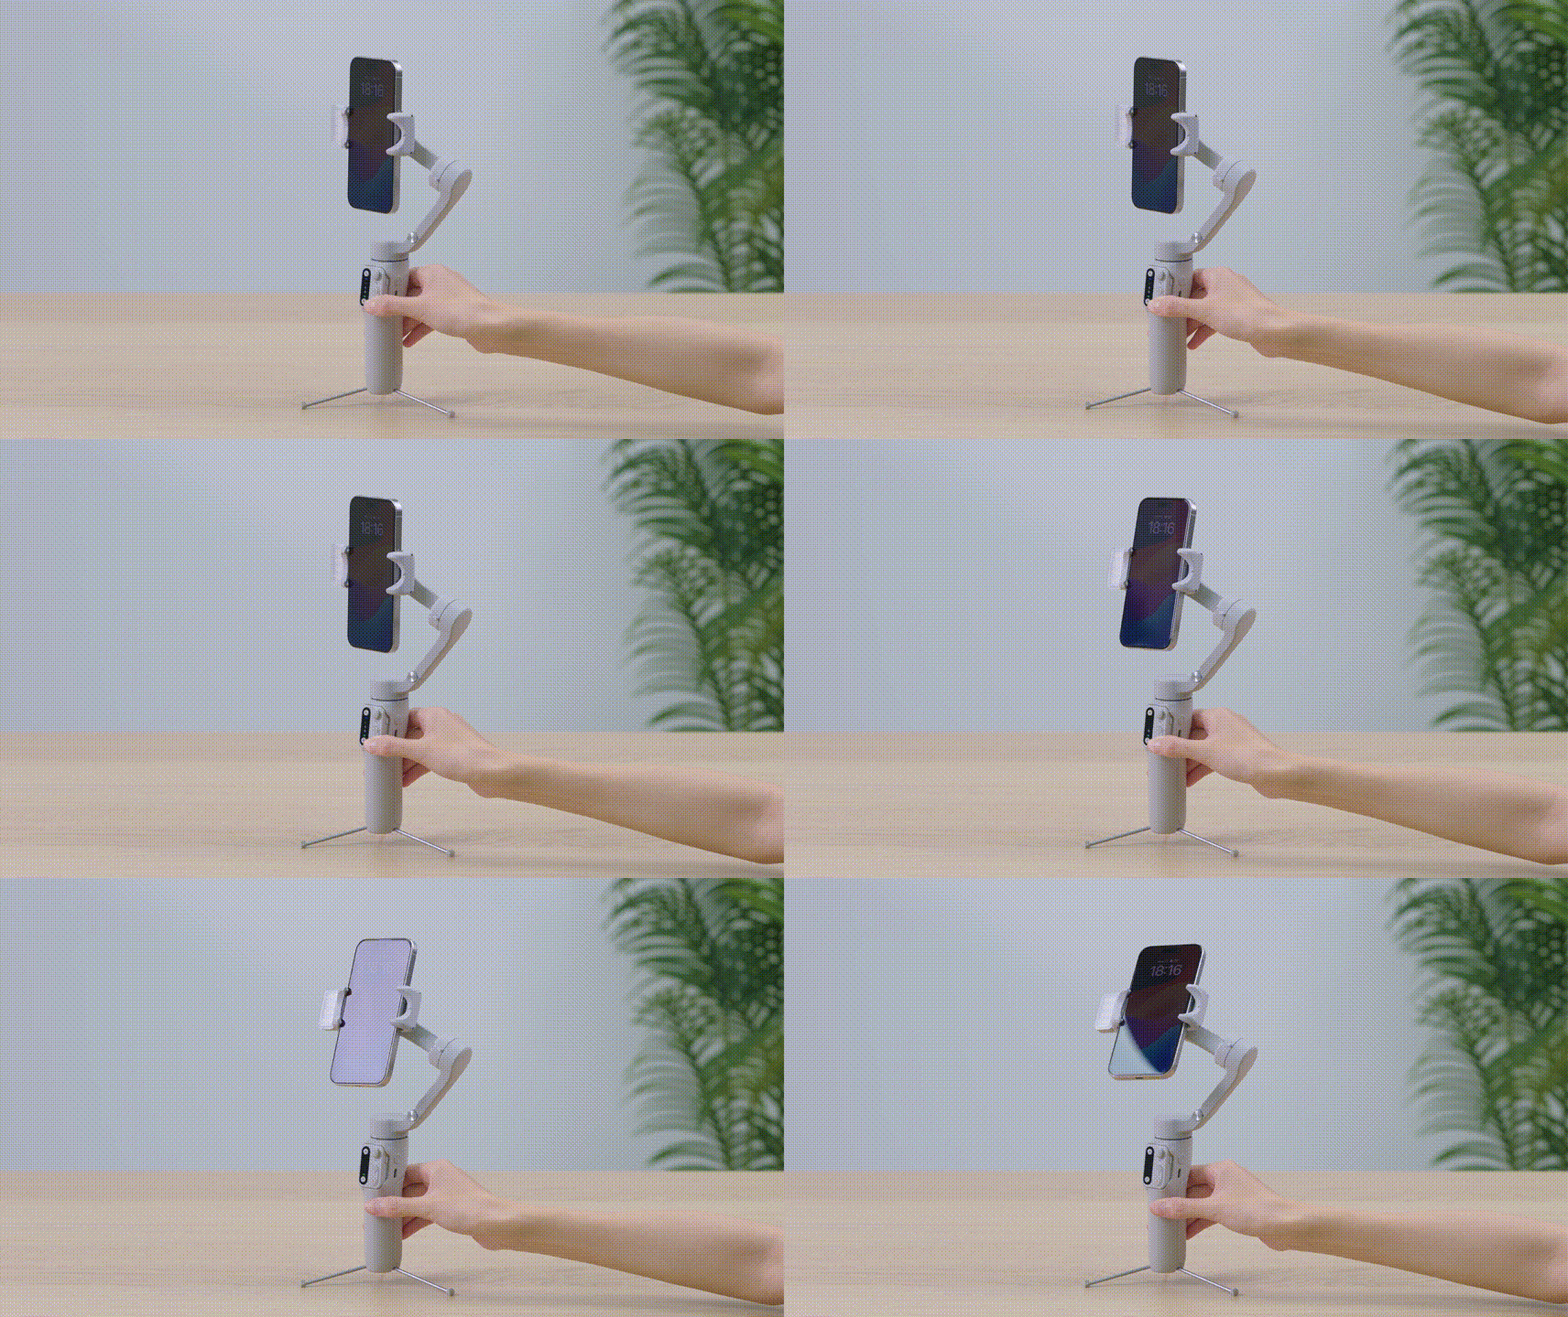
Mount the Phone
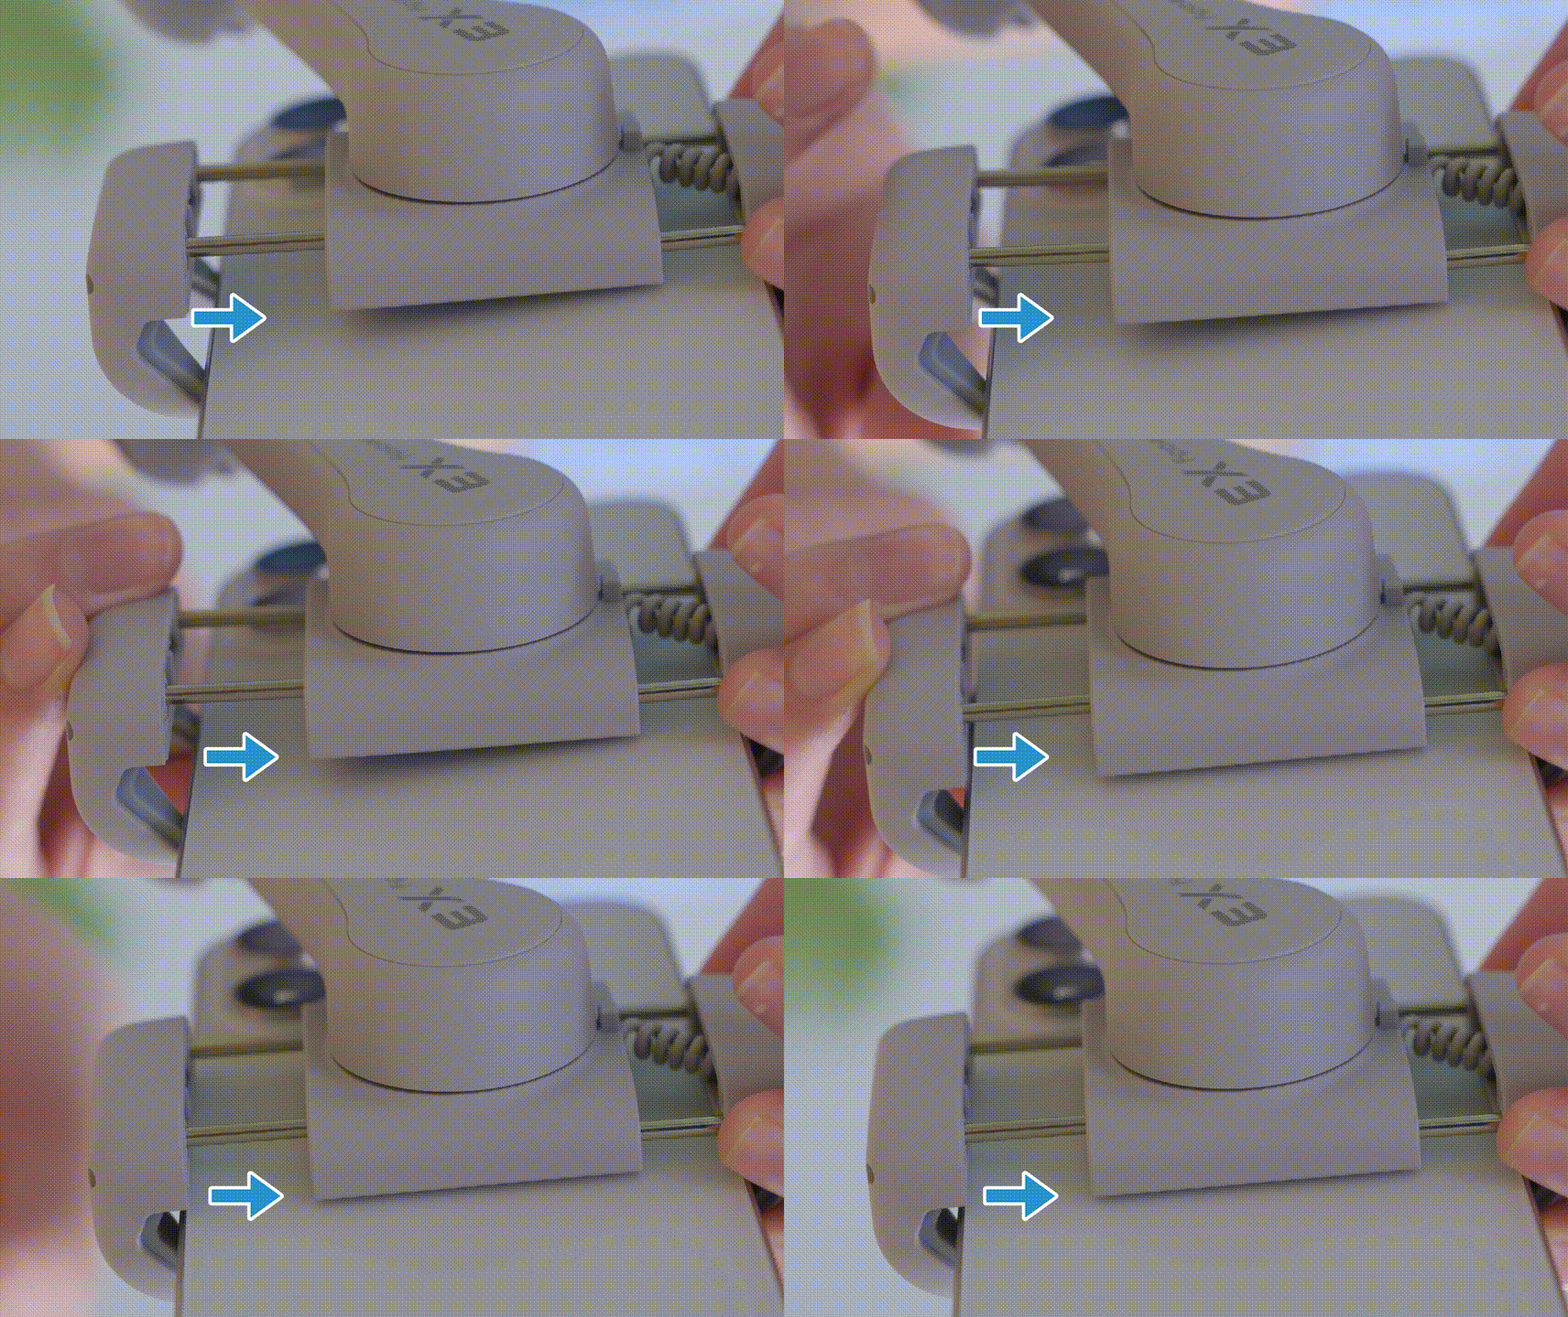
Attach the smartphone to the phone clamp with the phone camera pointing up.
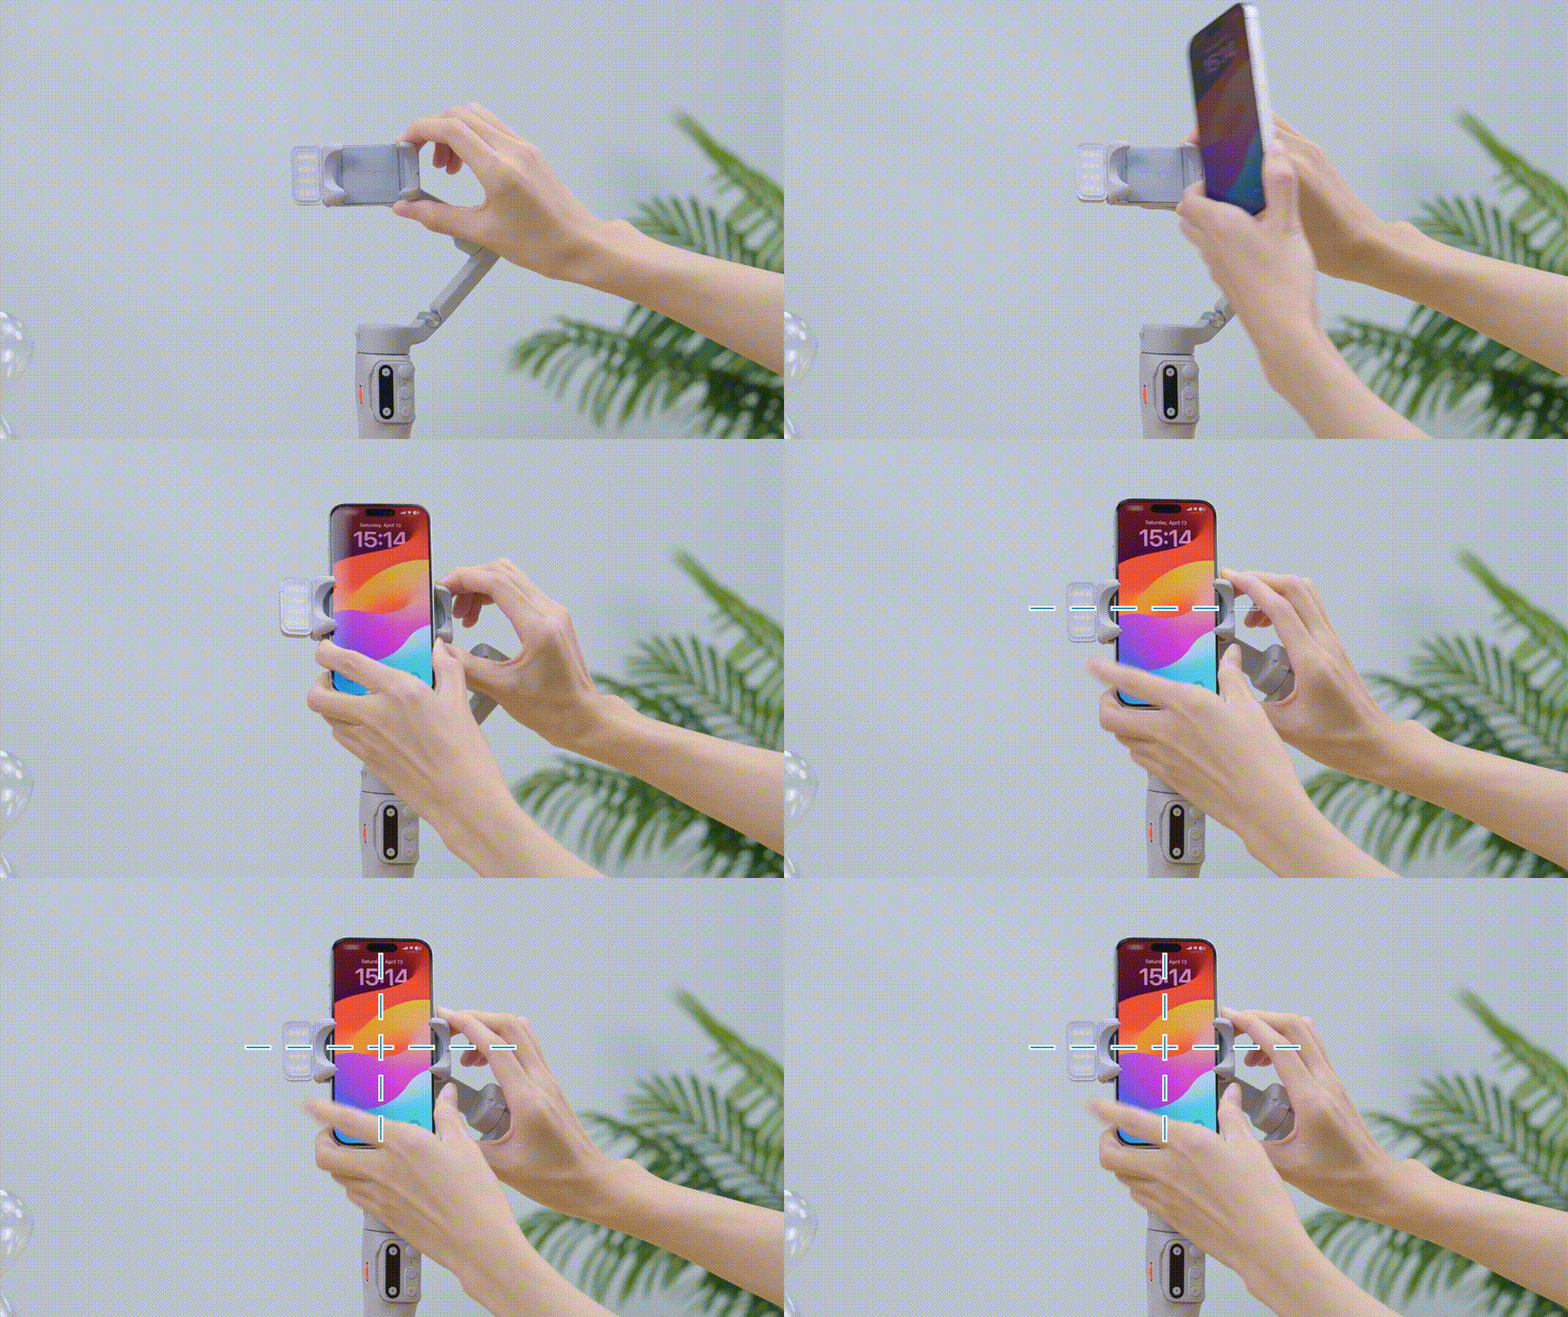
Make sure the phone clamp is in the center of your smartphone, and the back of the smartphone is tightly pressed against the phone clamp.
Power on
• Remote on Handle
When the remote is on the handle, long press the shutter button to power on the gimbal and the remote.
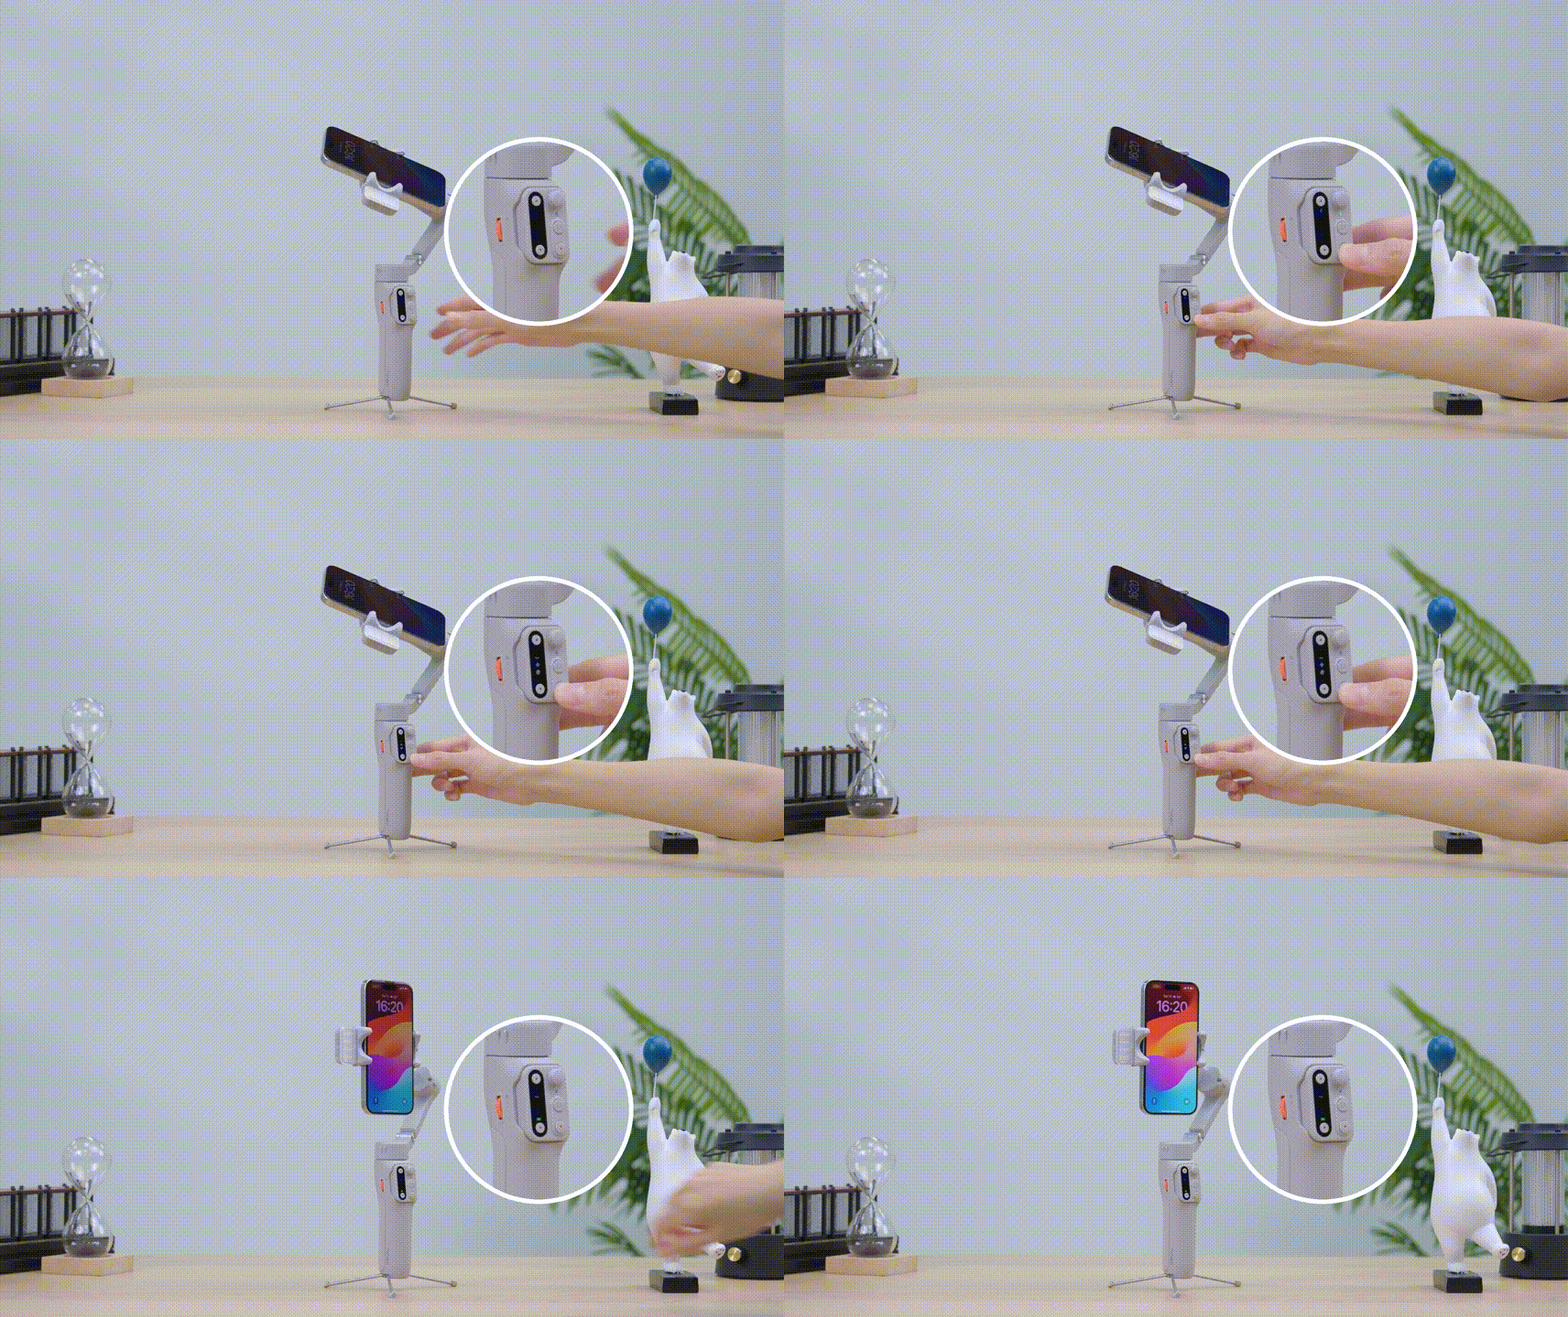
• Remote Detached
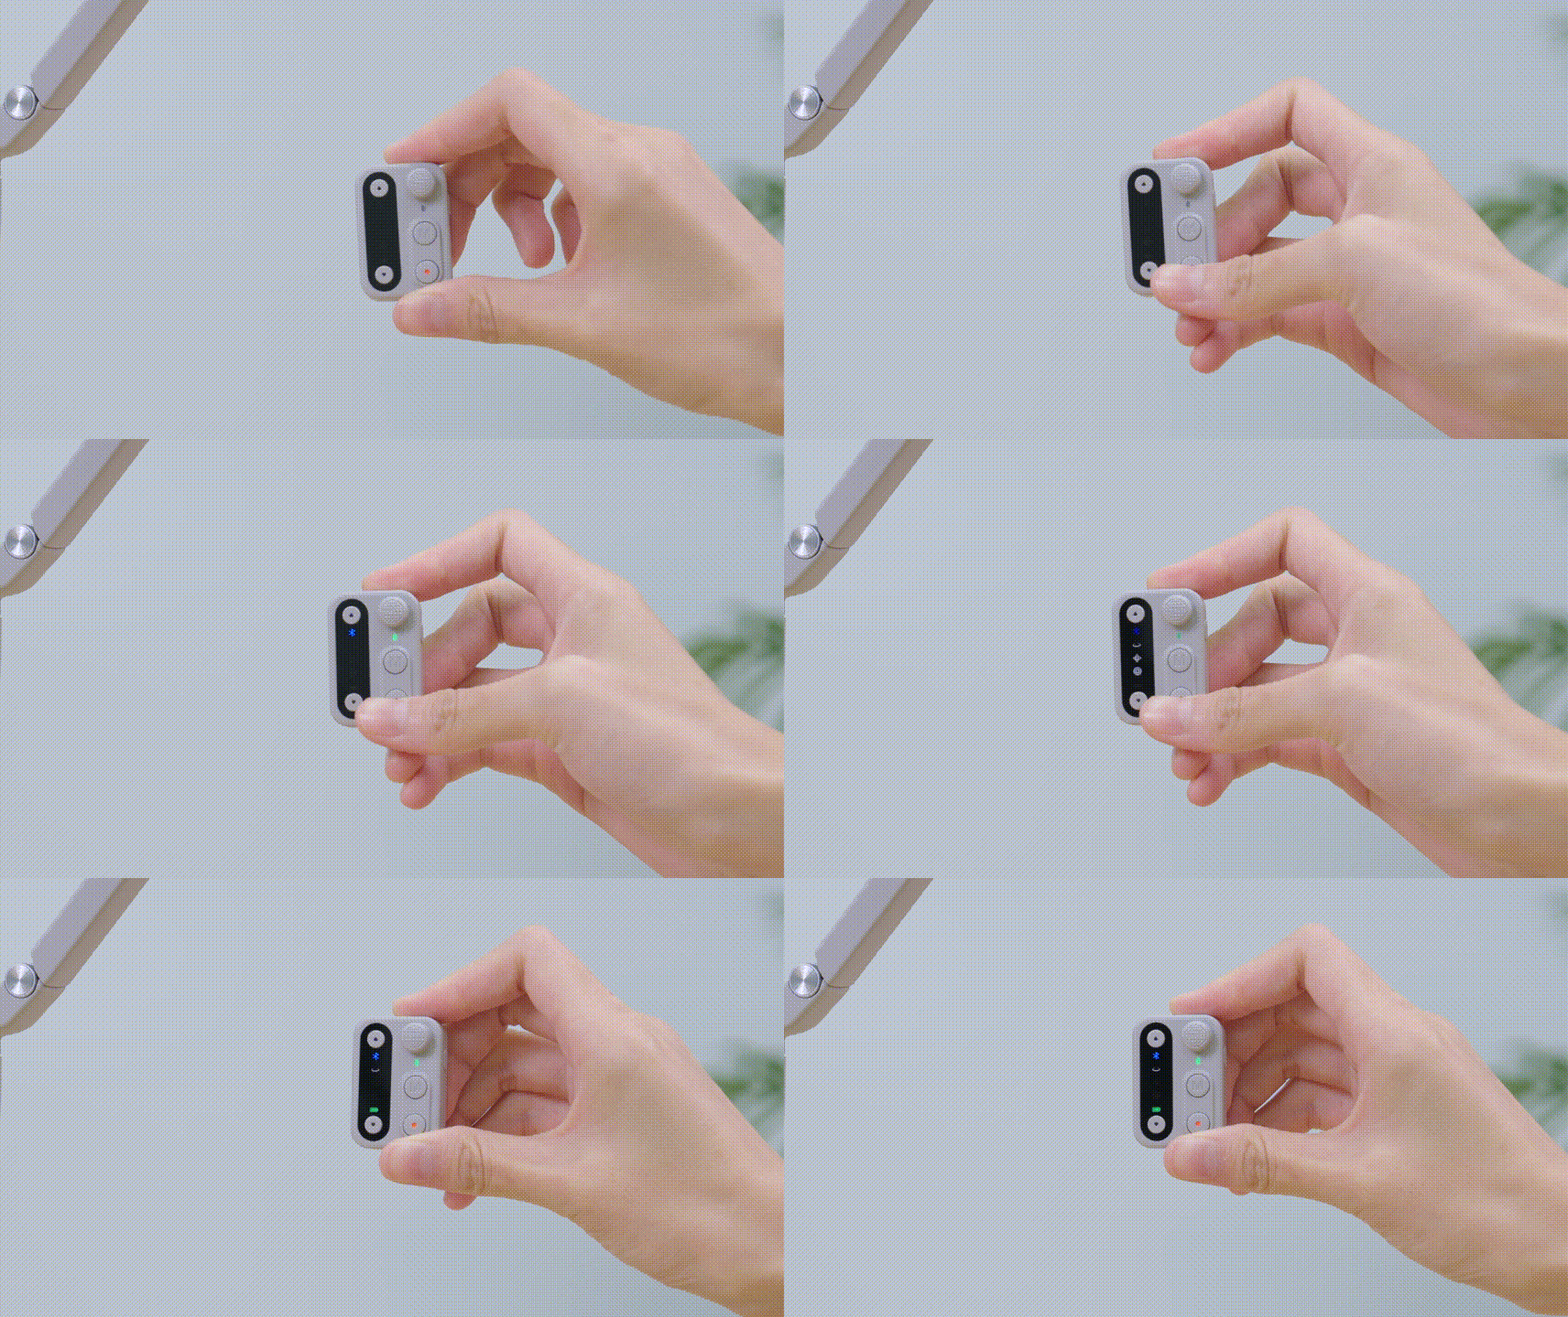
When the remote is detached, long press the power button on the handle to power on the gimbal.
Then long press the shutter button on the remote to power on the remote.
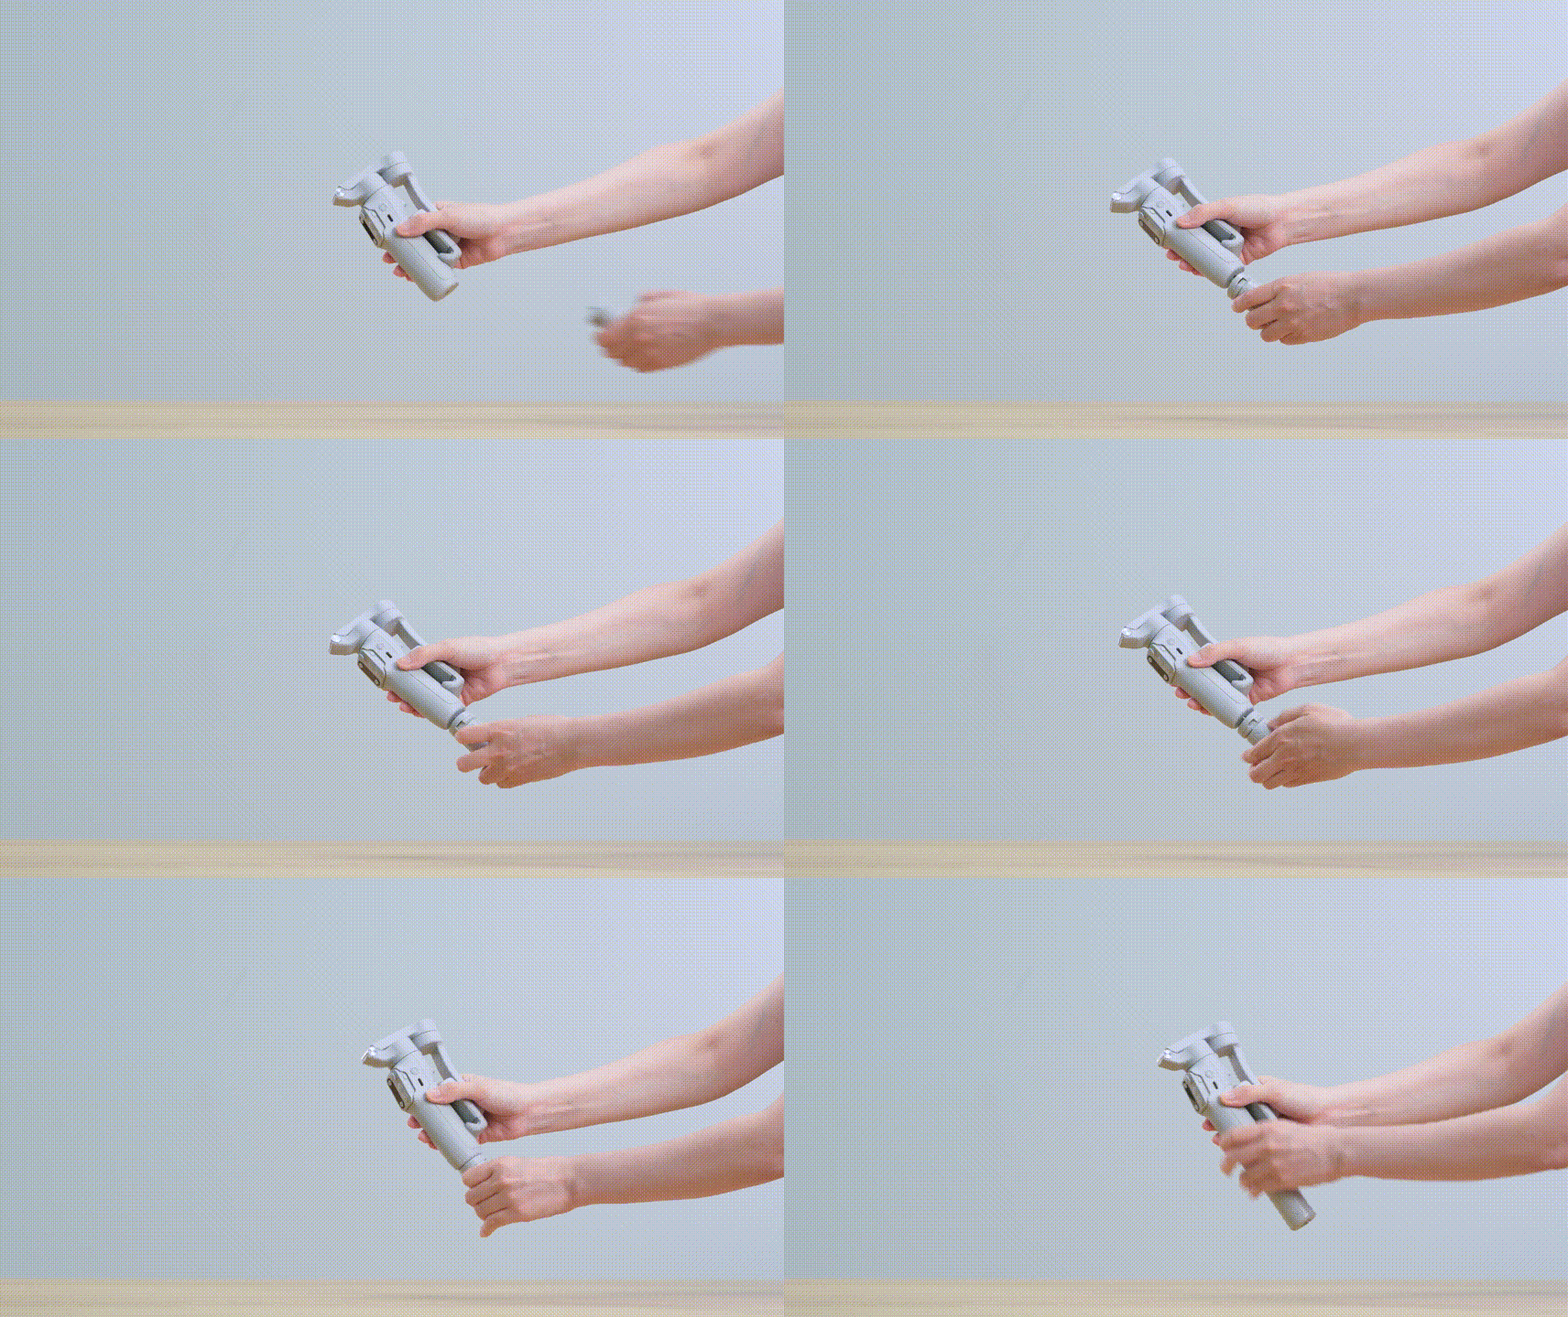
Unfold the Gimbal (iSteady X3 SE)
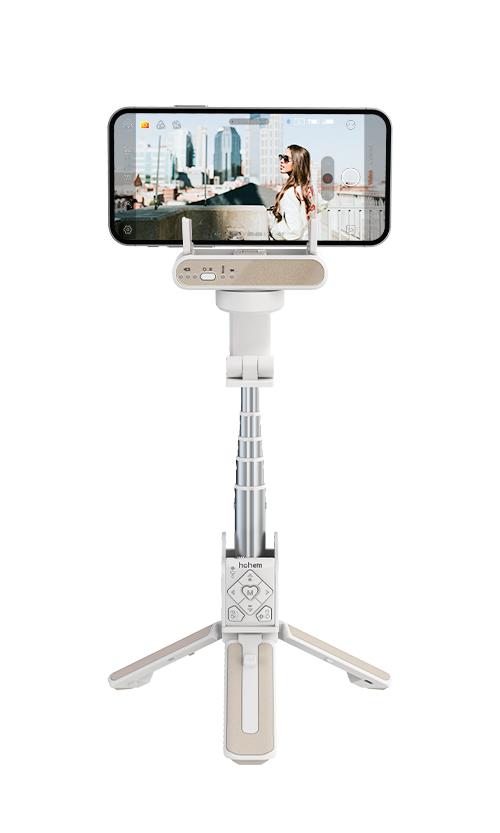
Take out the gimbal, and attach the tripod.
Unfold the gimbal arm, and put the gimbal on a flat surface.
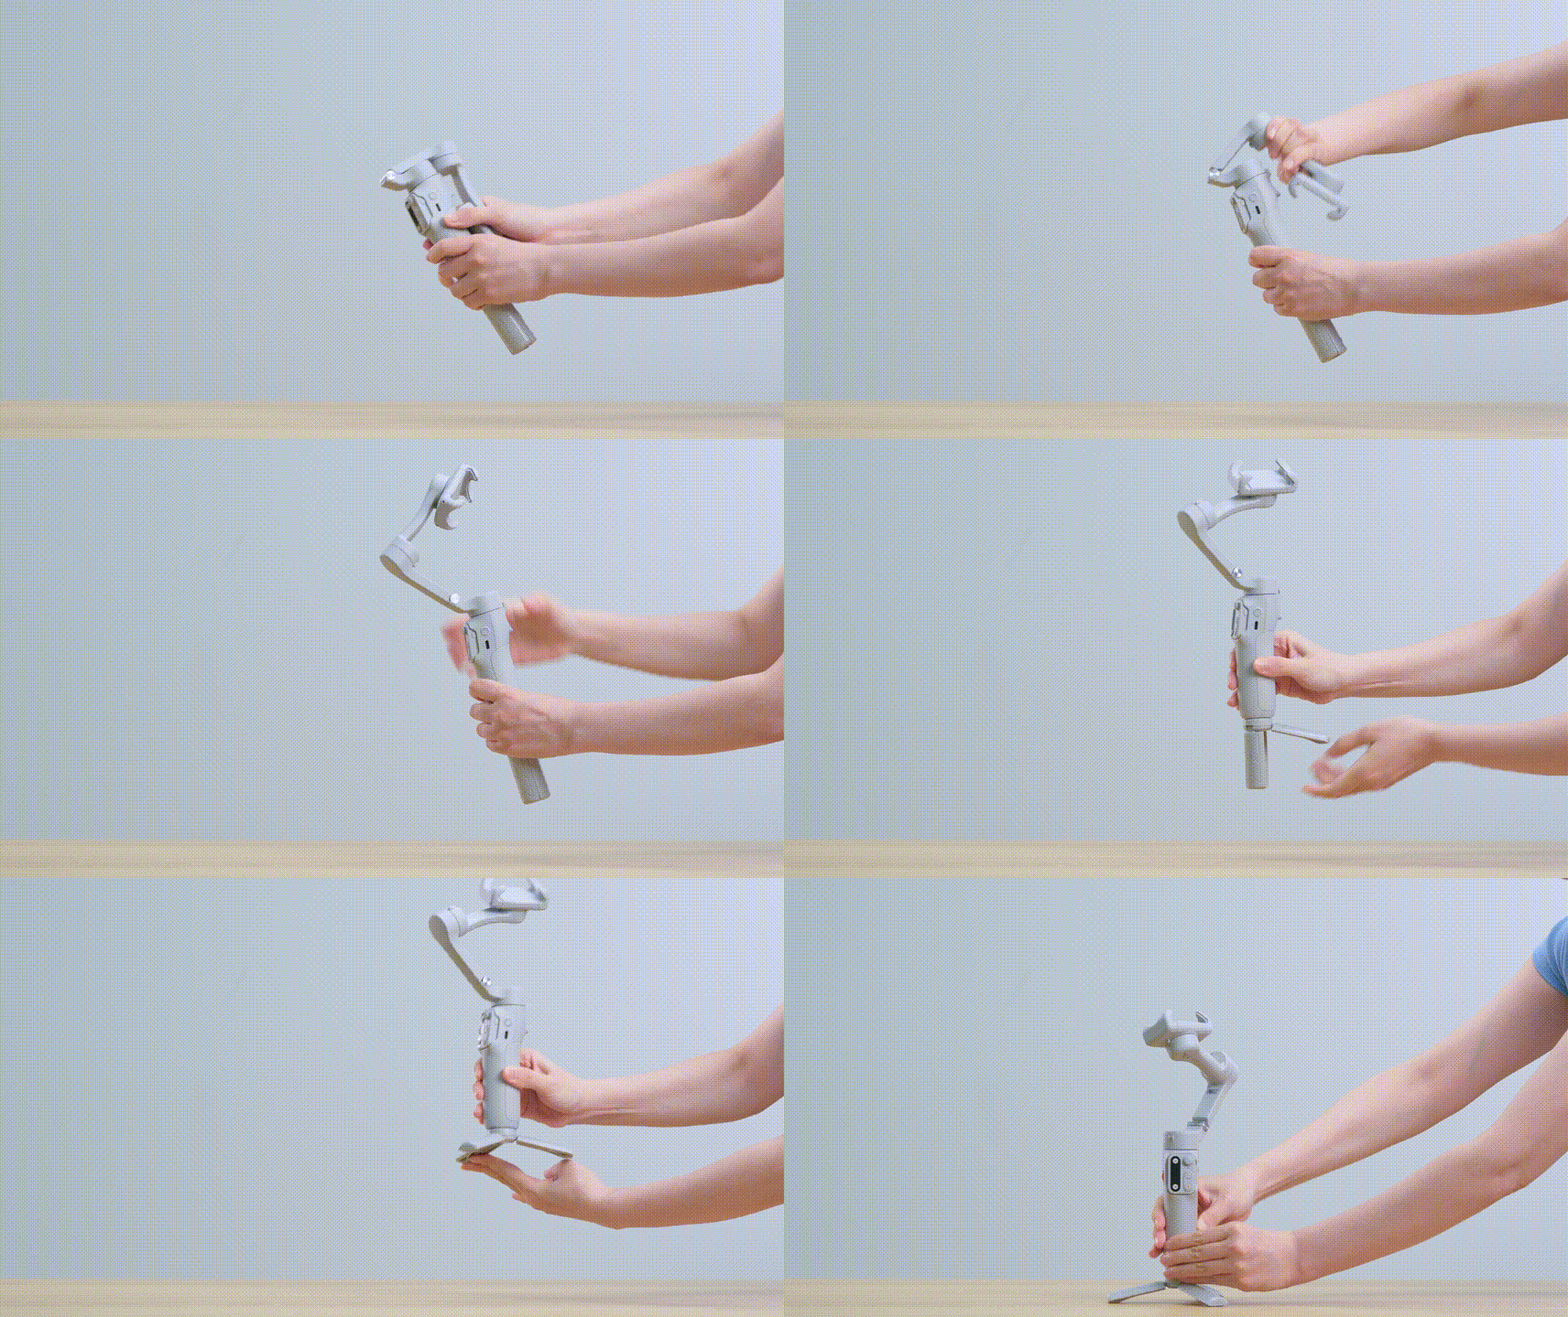
Mount the Phone (iSteady X3 SE)
Rotate the phone clamp to turn the “hohem” logo upward.
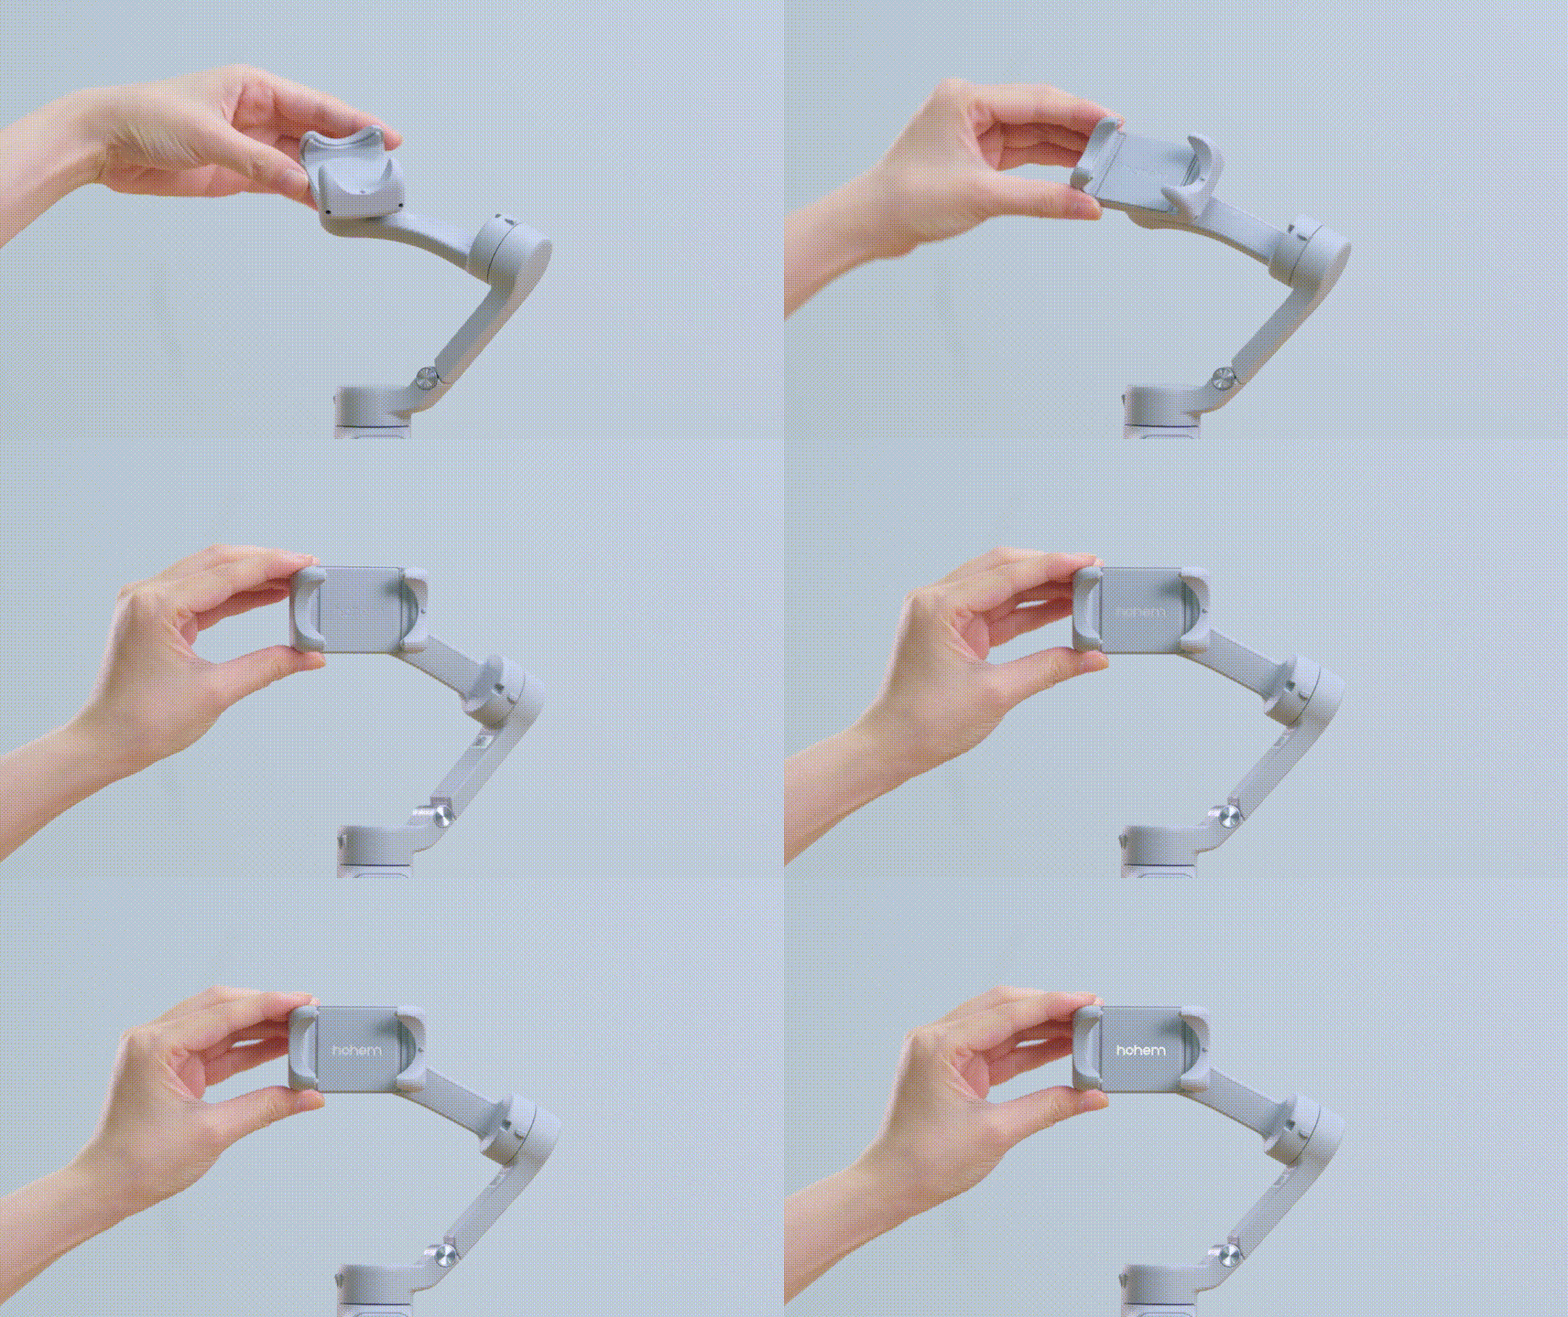
Make sure the phone camera is on the top side, then insert your mobile phone by putting it stuck in the phone clamp.
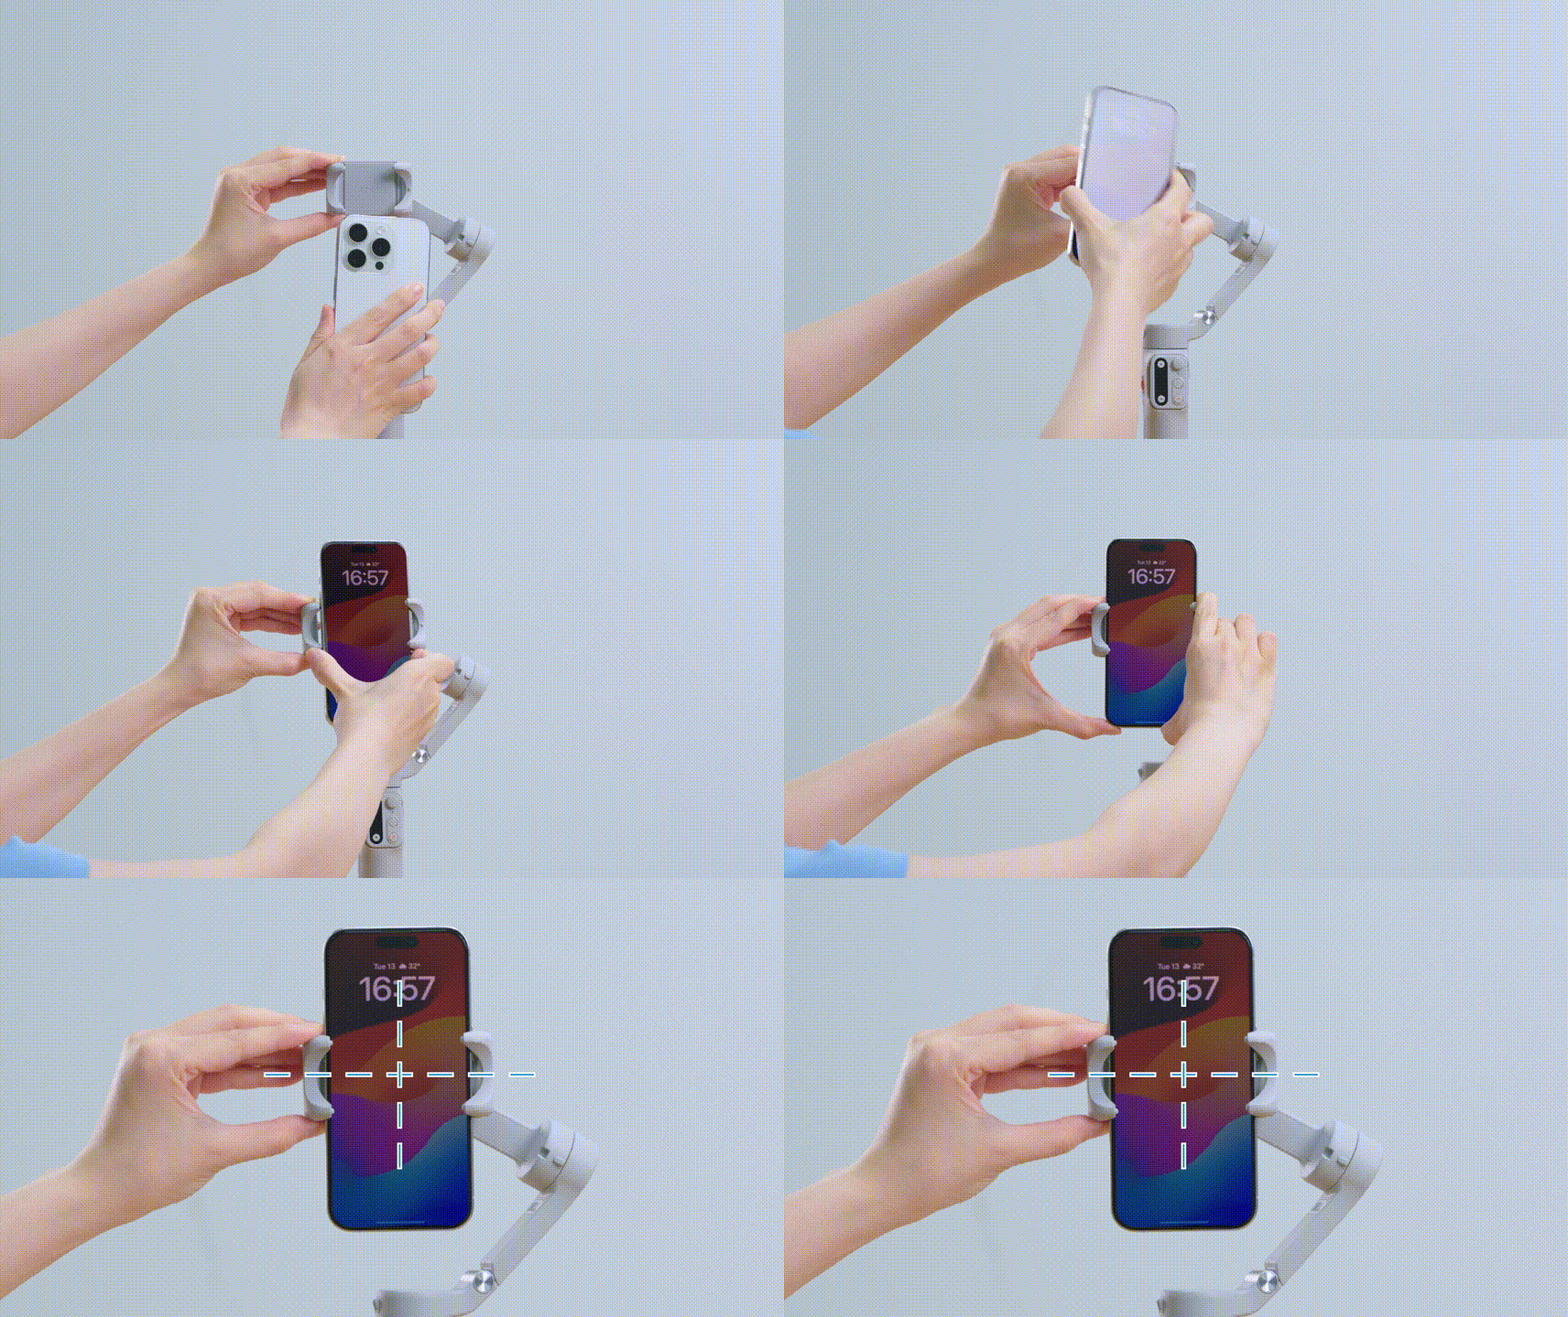
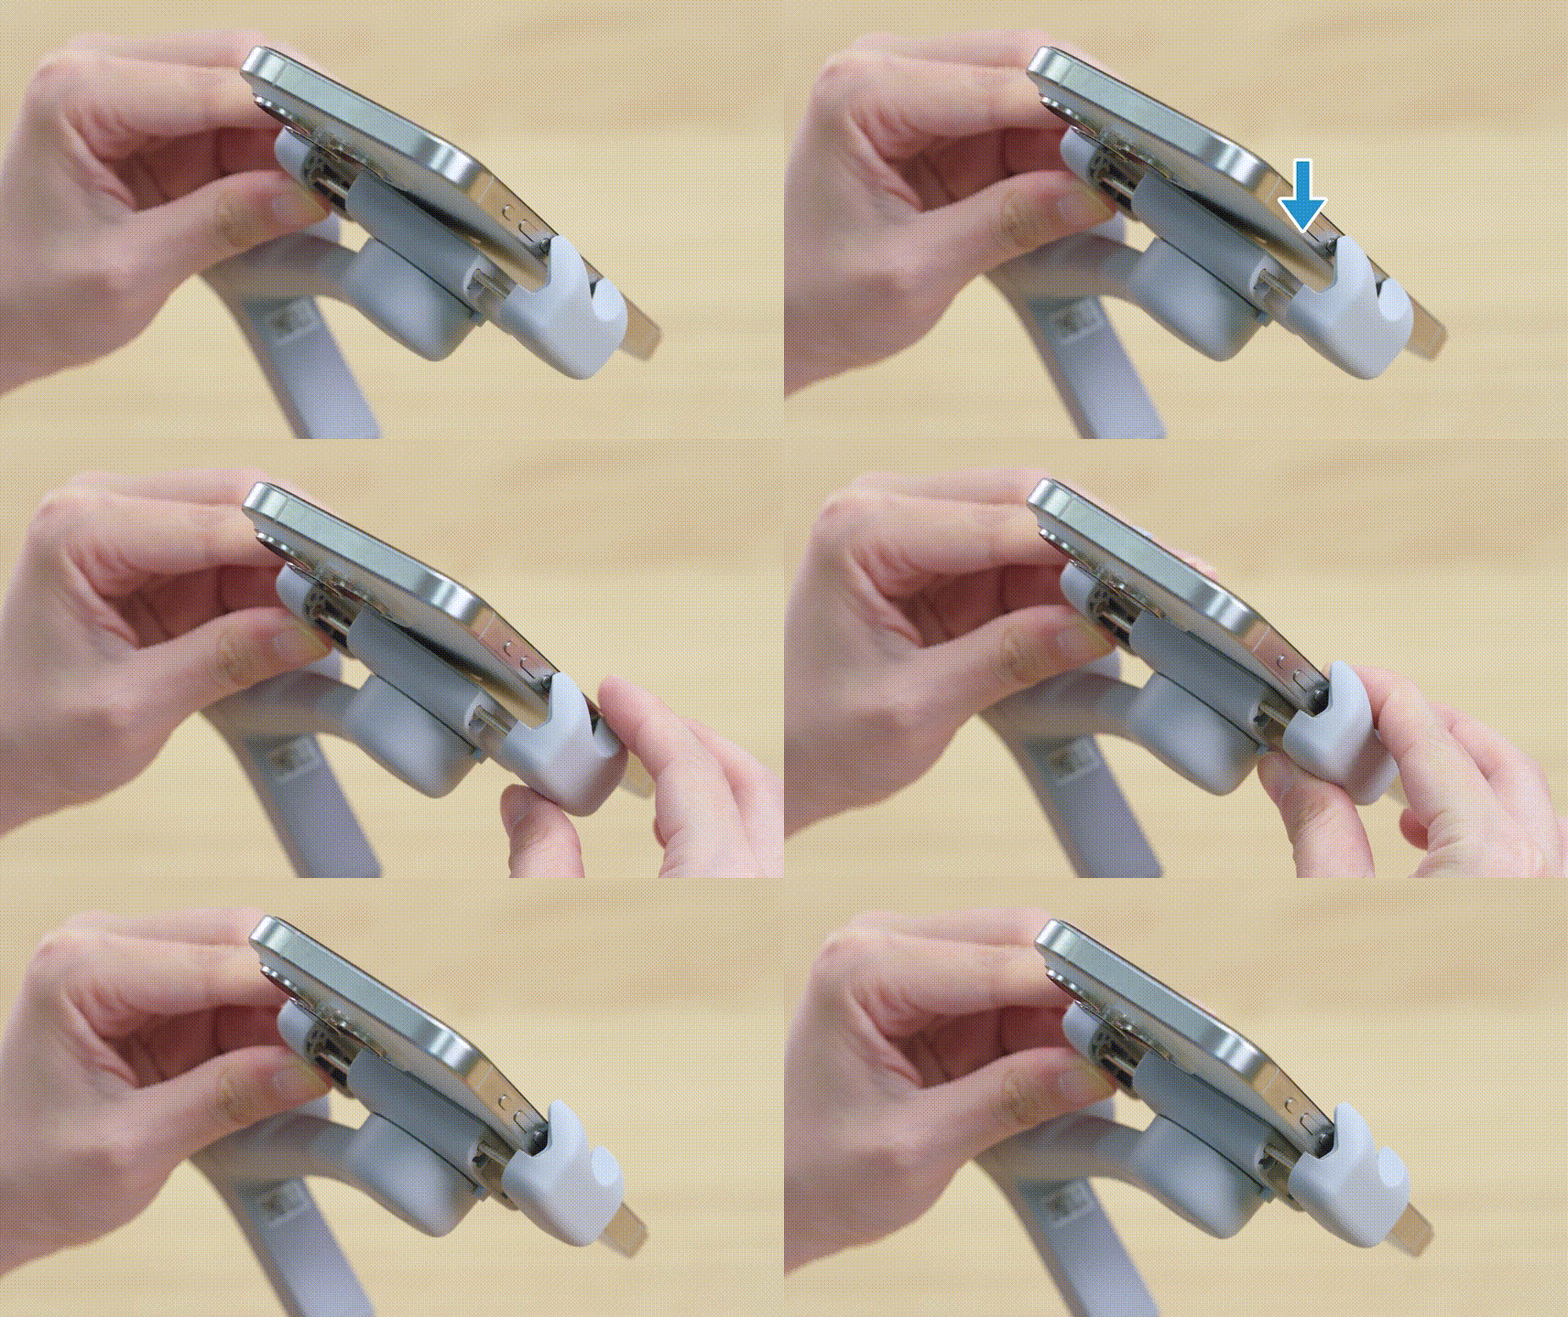
Keep your mobile phone balanced centrally. Ensure that the back of the smartphone is tightly pressed against the phone clamp.
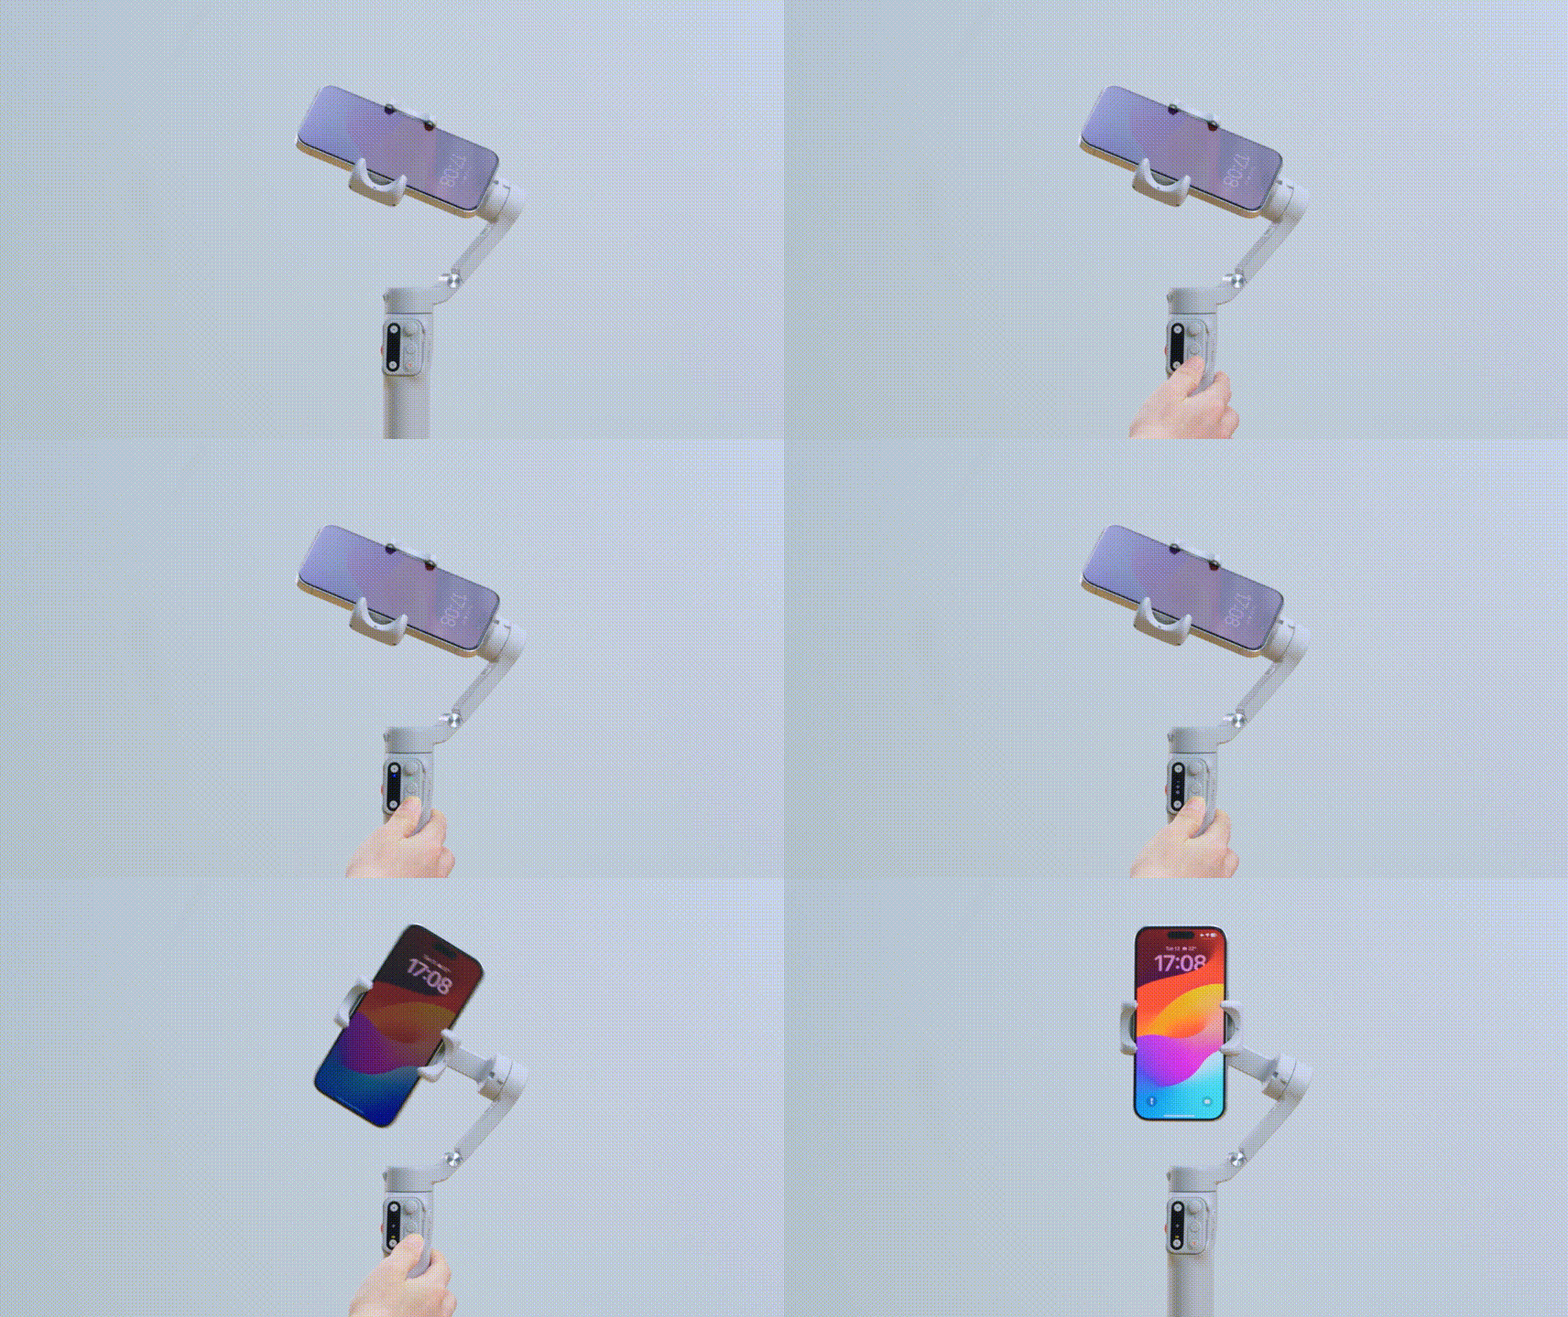
Long press the shutter button to power on the gimbal and the remote.
Fill Light
Mounting
The fill light is only available on iSteady X3.
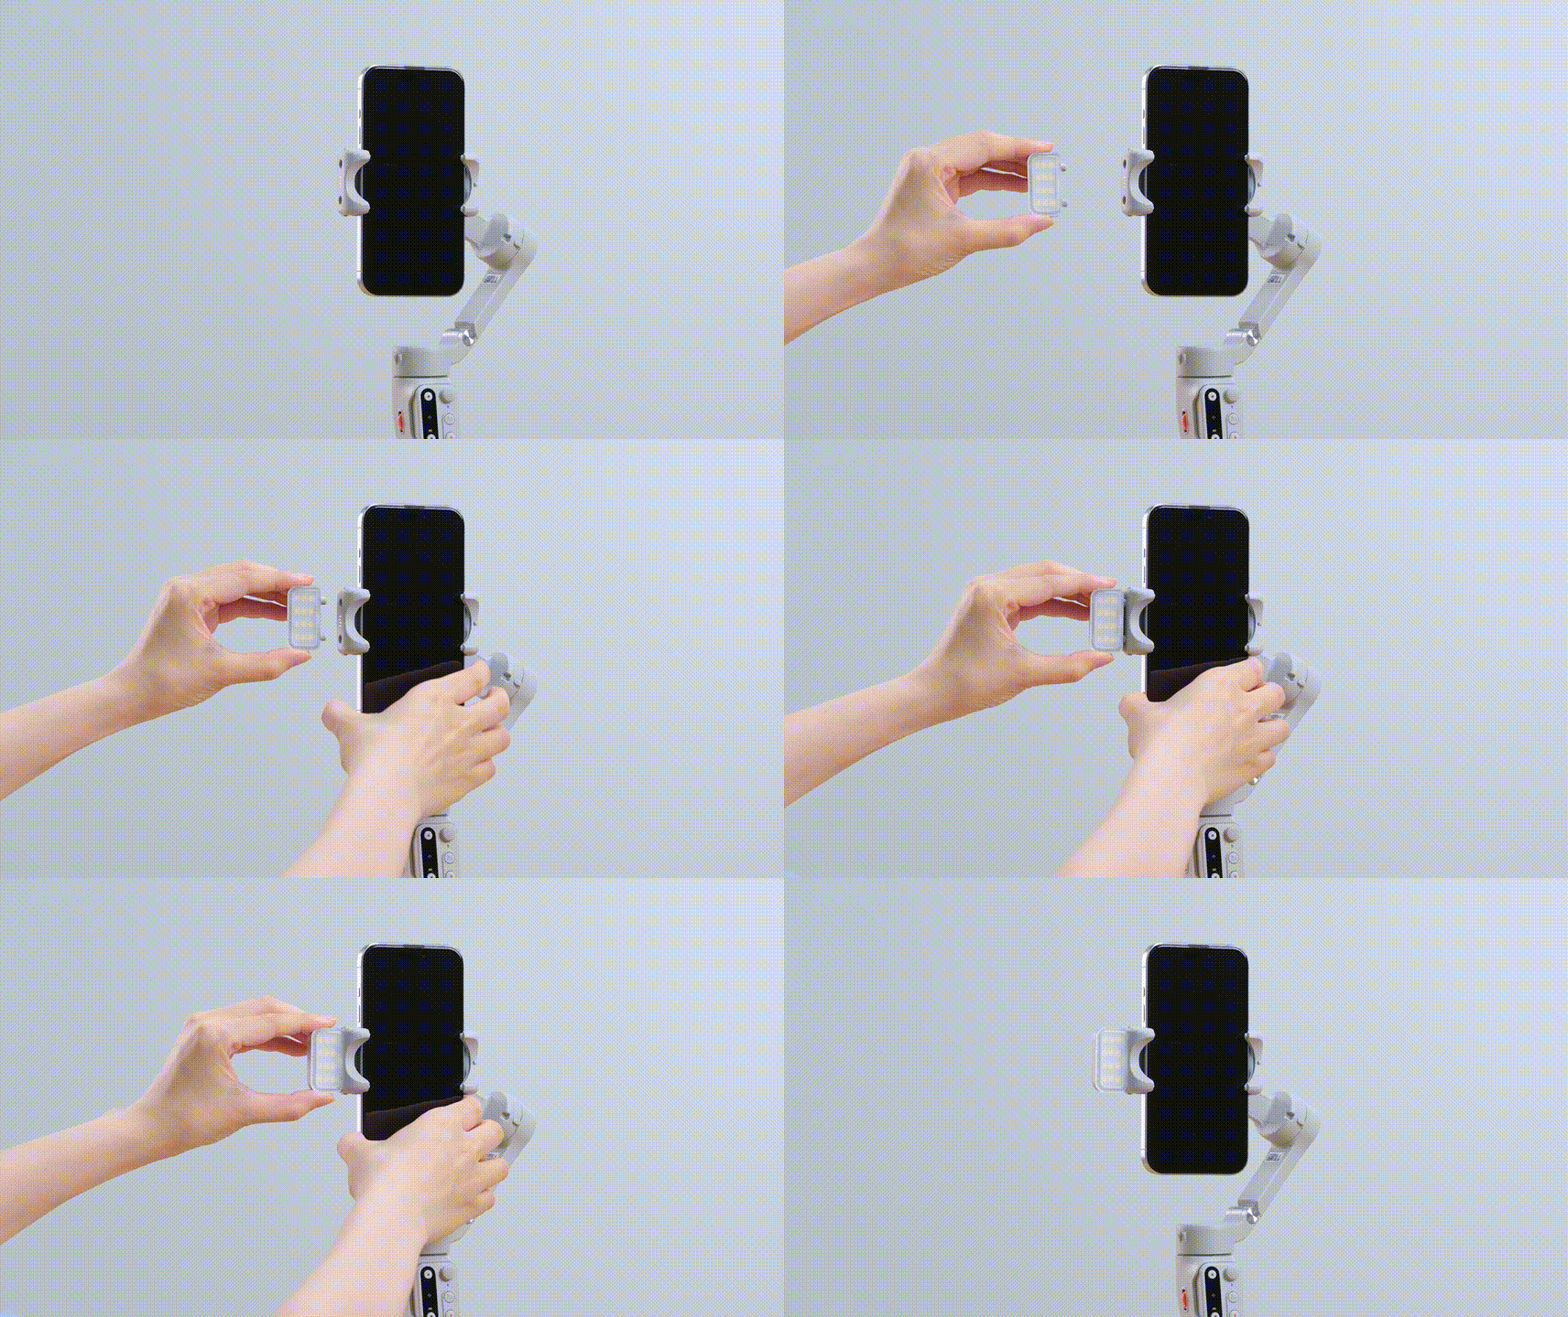
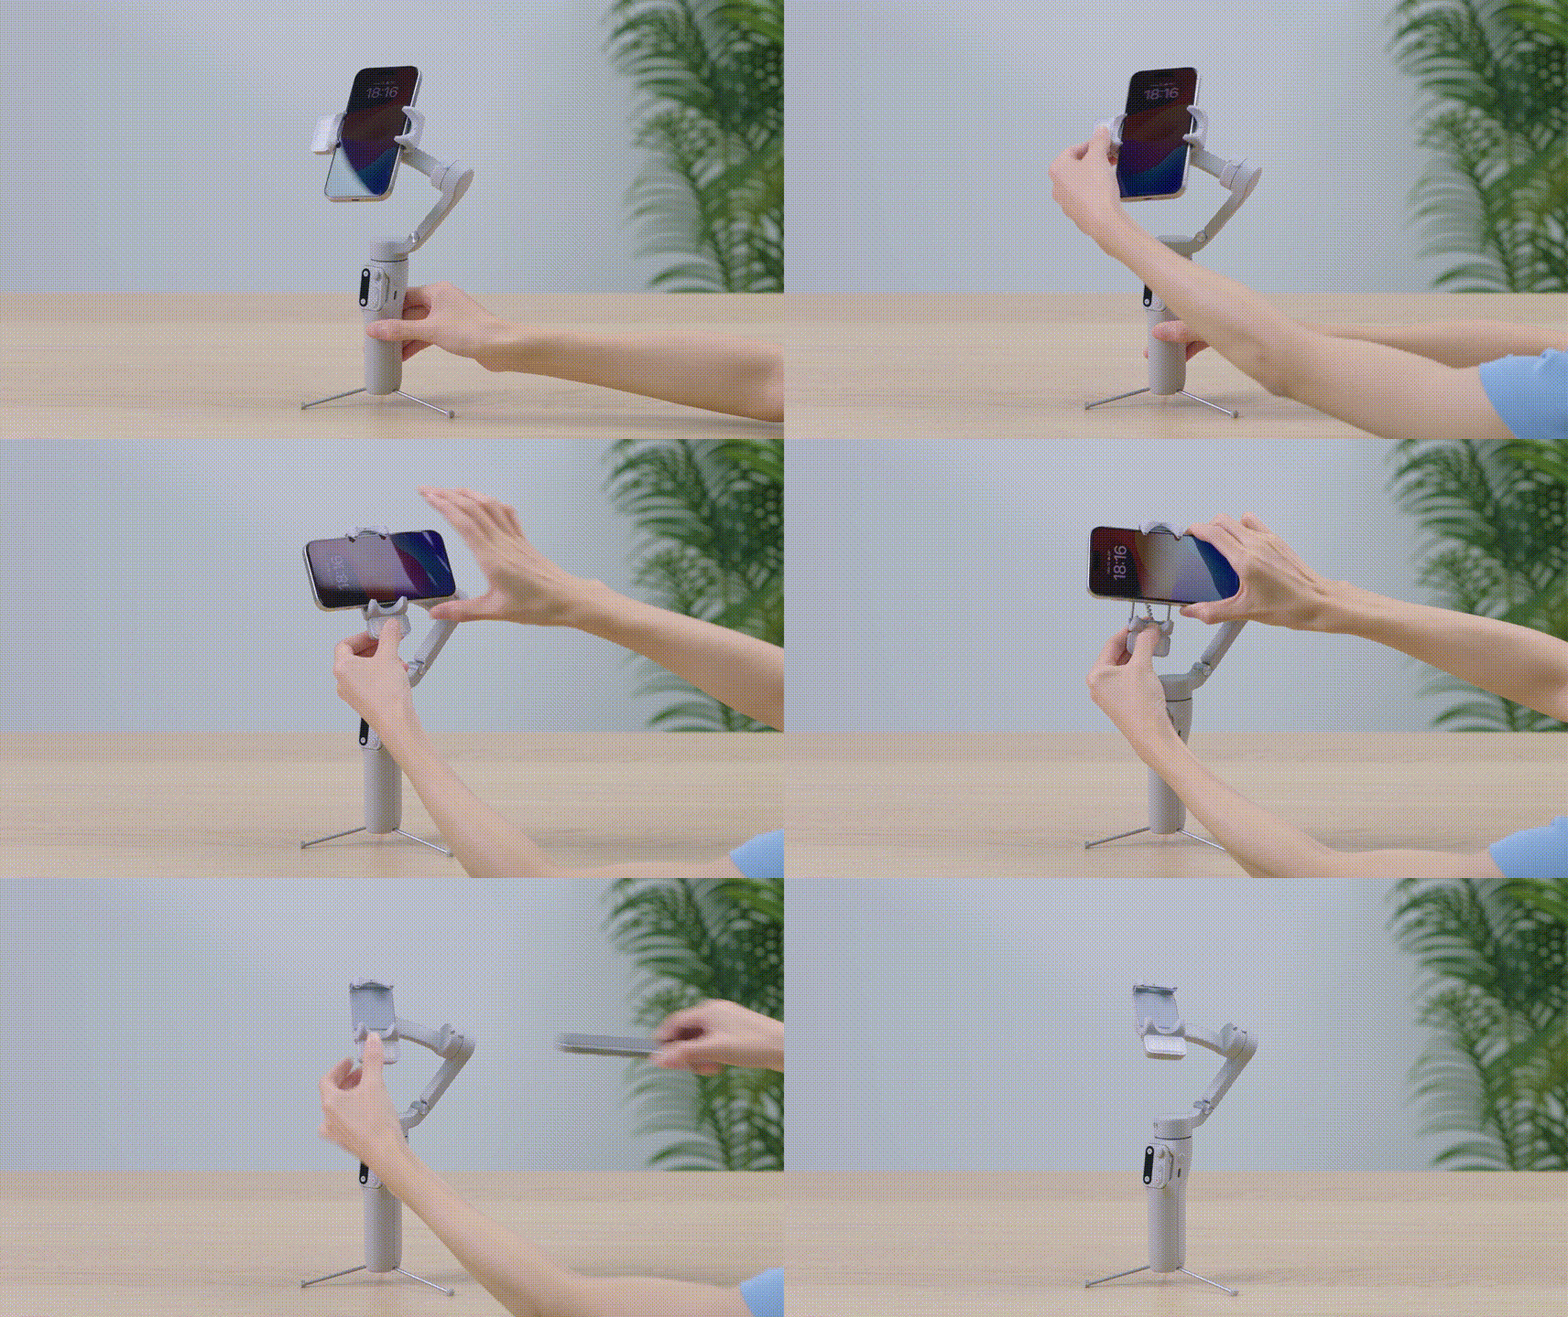
Attach the magnetic fill light, make sure it is aligned with the magnetic mount.
Press and hold the safety locks on both sides of the phone clamp at the same time to unlock it.
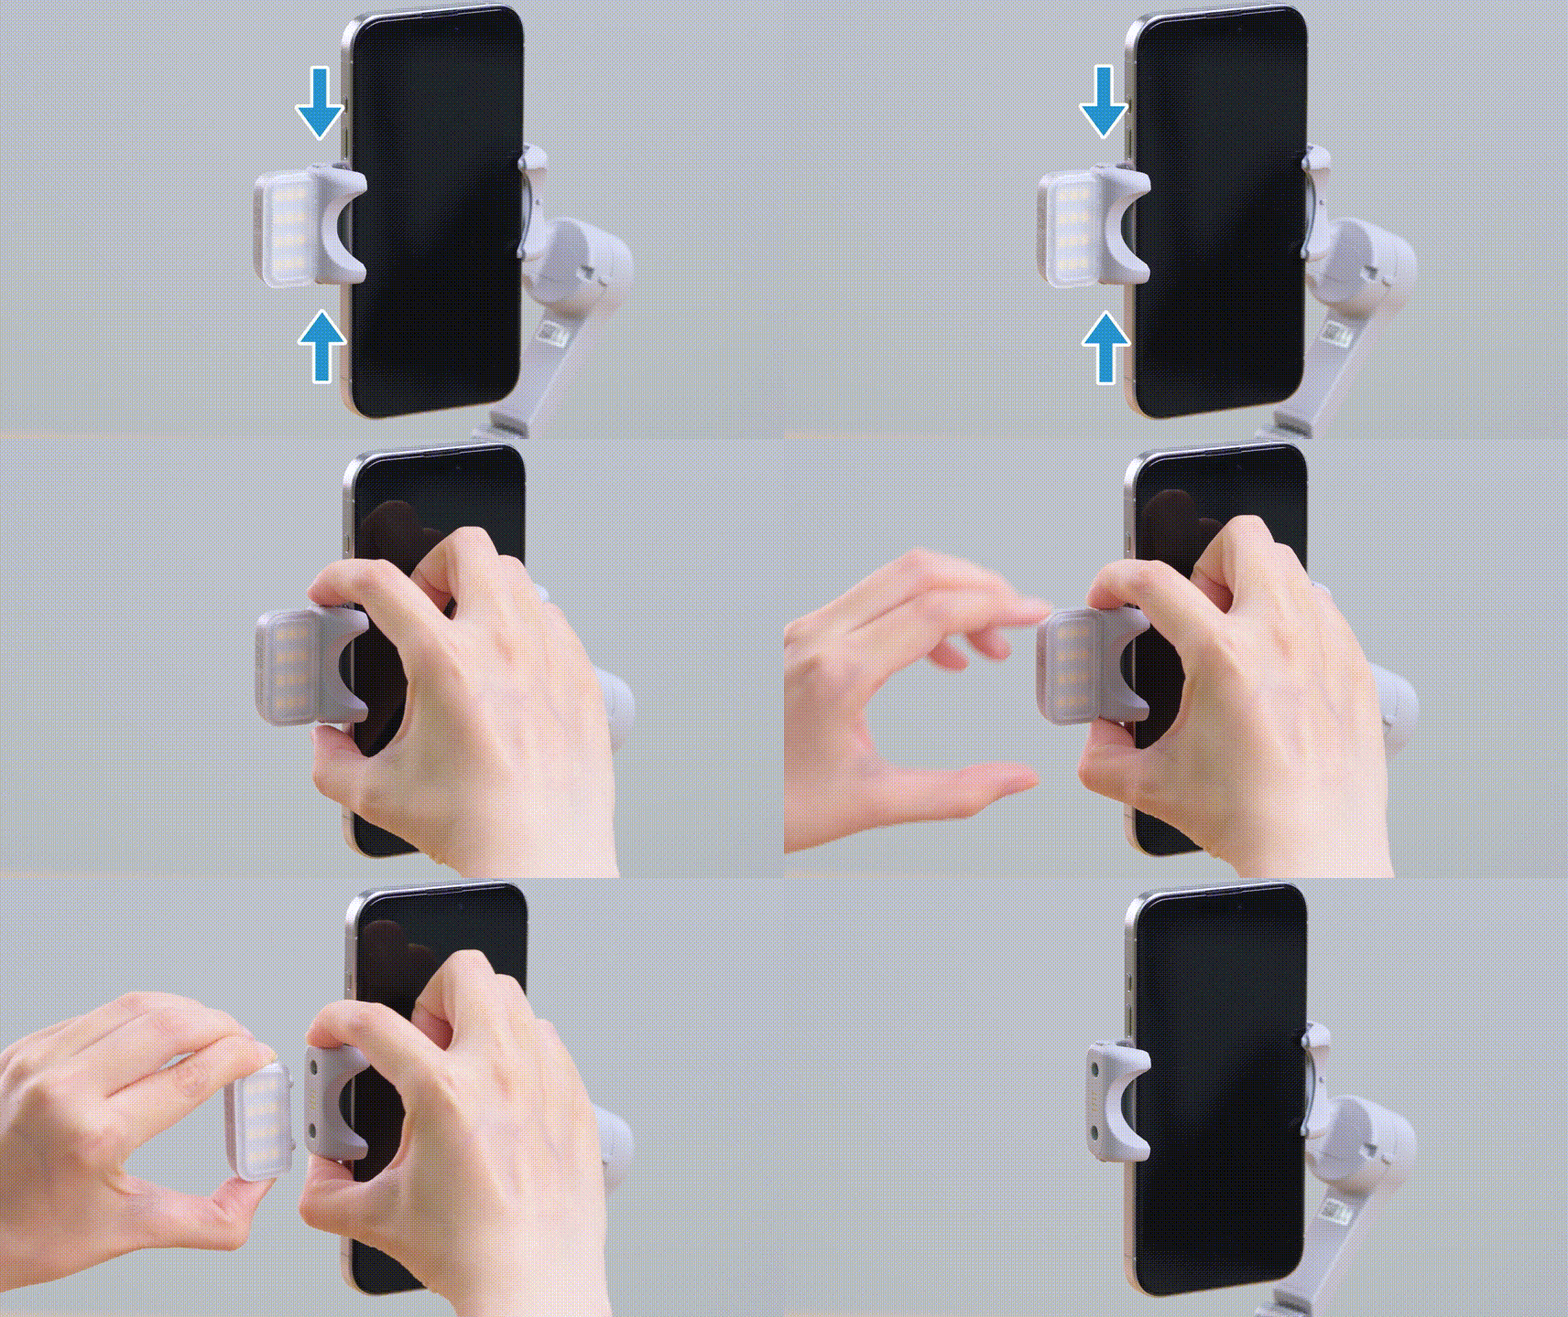
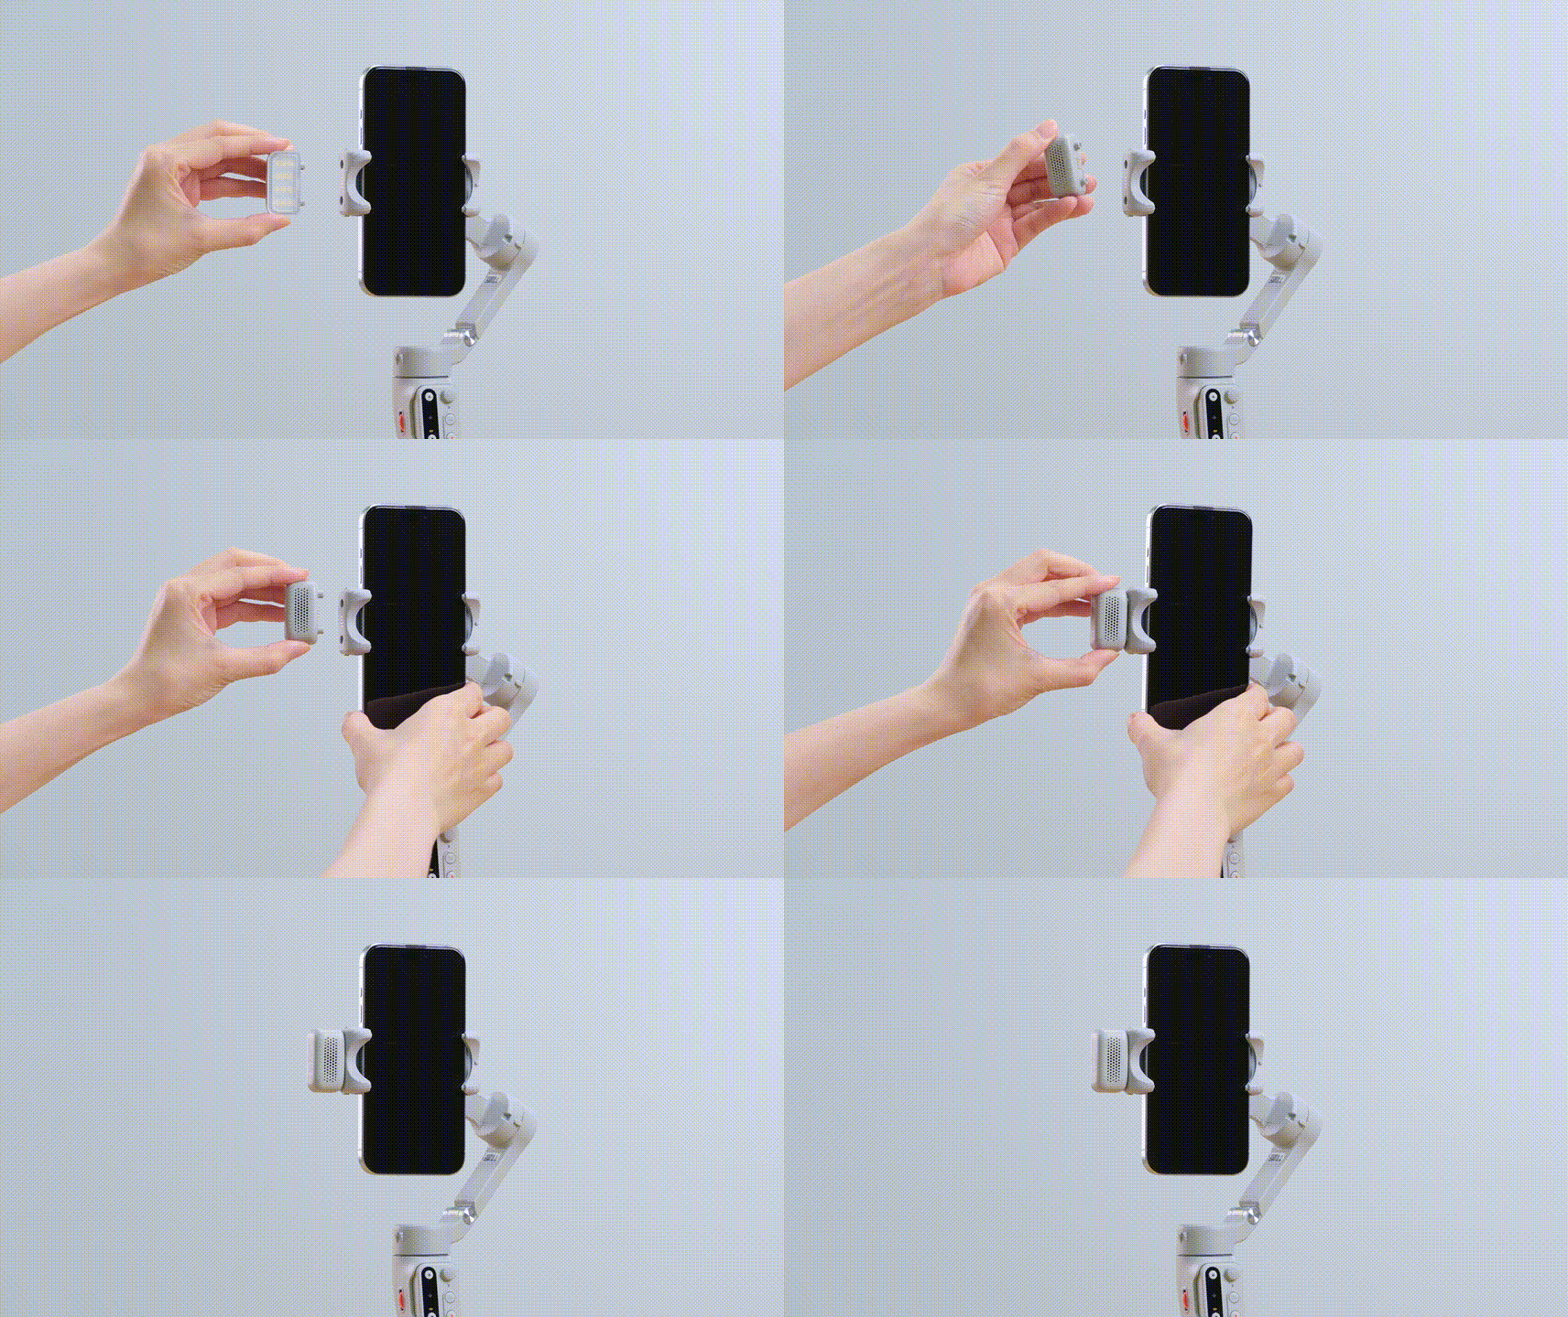
Remove the fill light, rotate it 180° and then mount the fill light for rear shooting.
Operation
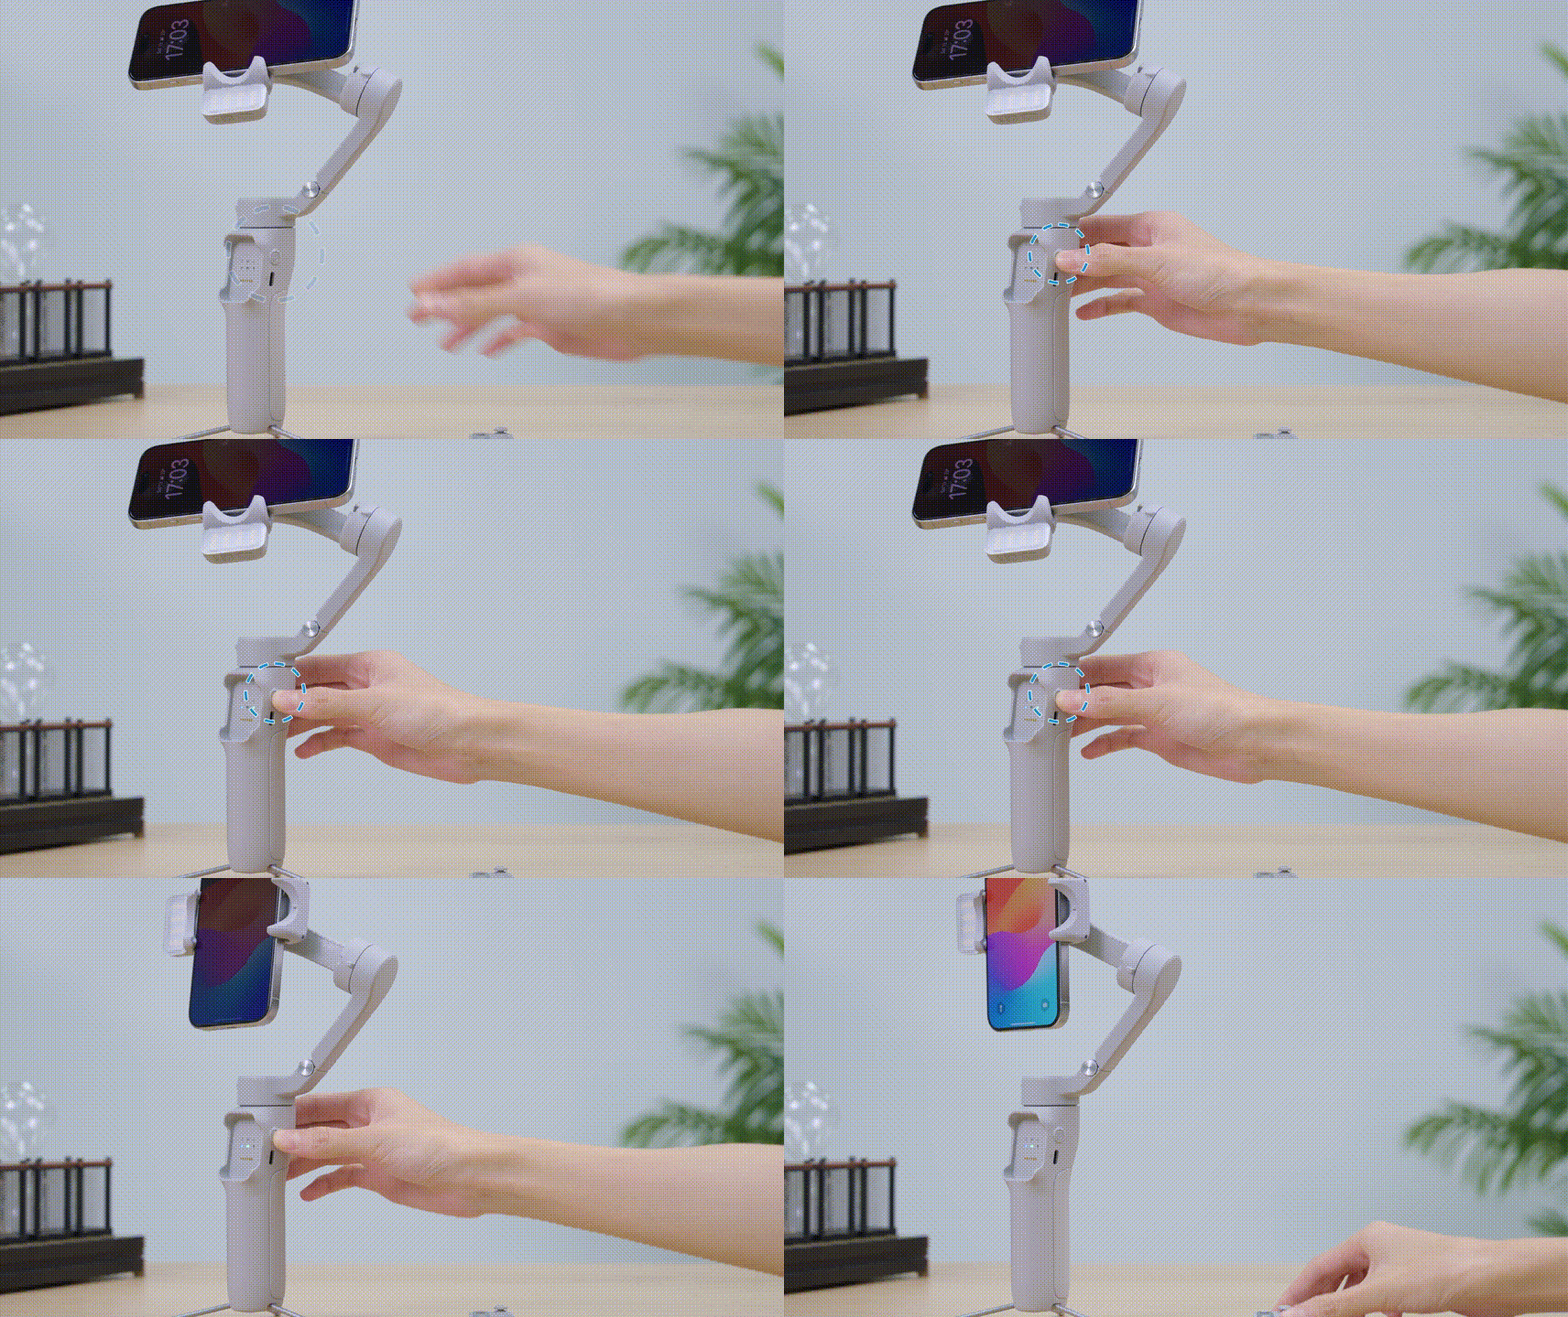
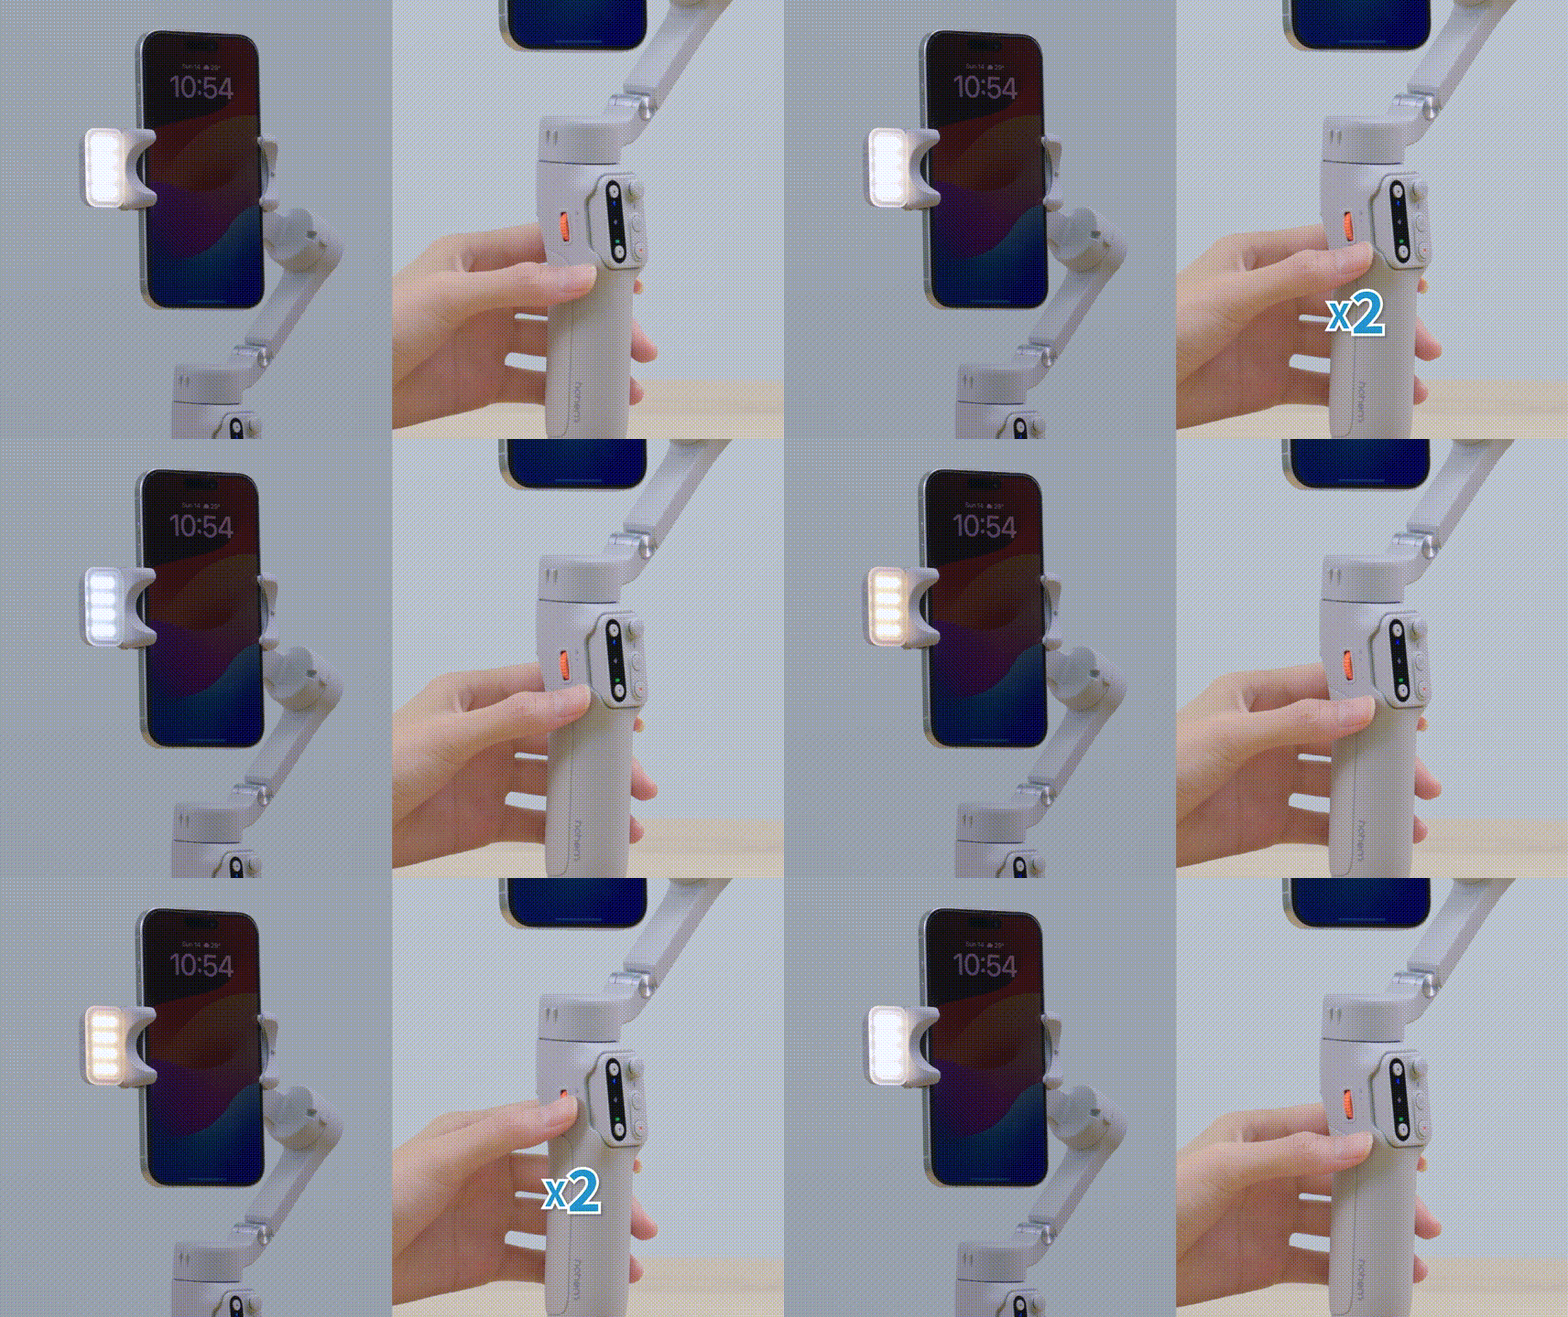
Control the fill light through the side wheel on the handle.
Long press: Turn the fill light on or off
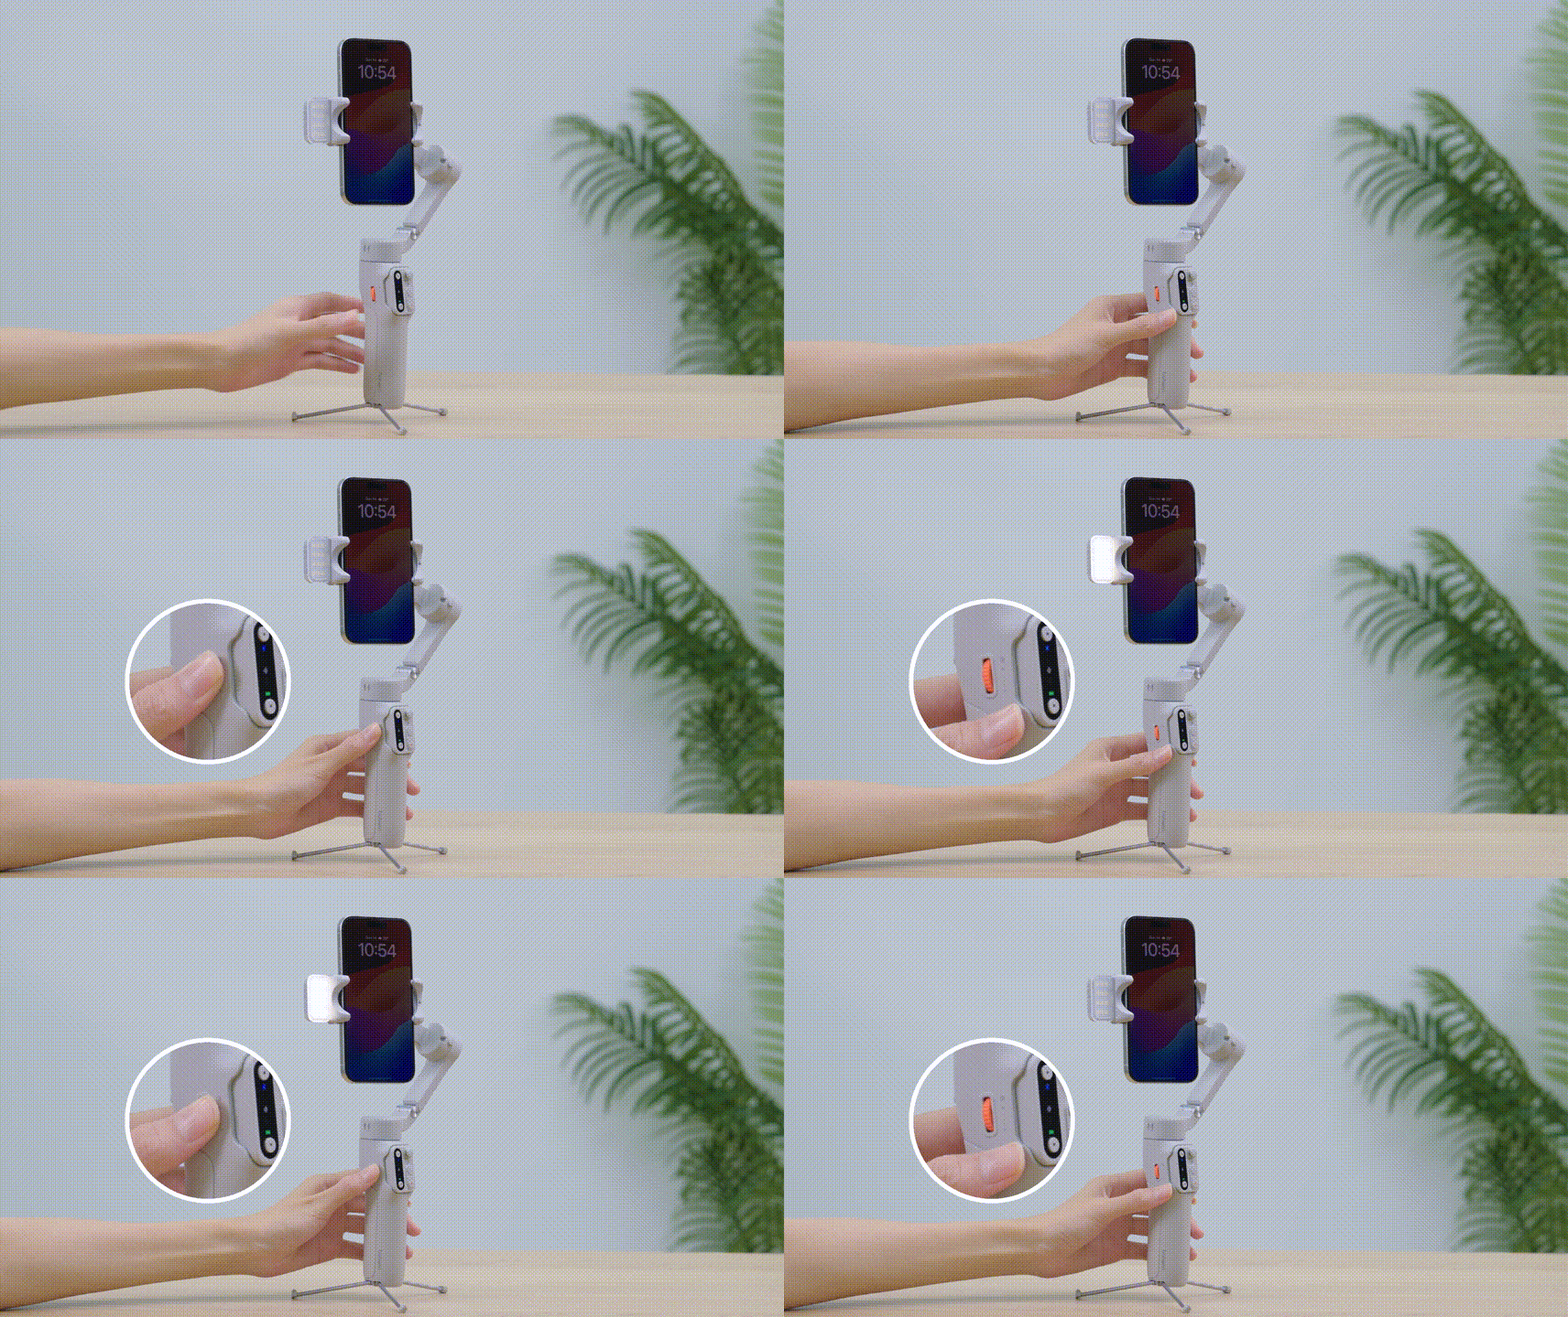
Double press: Switch between cool, warm, and neutral light
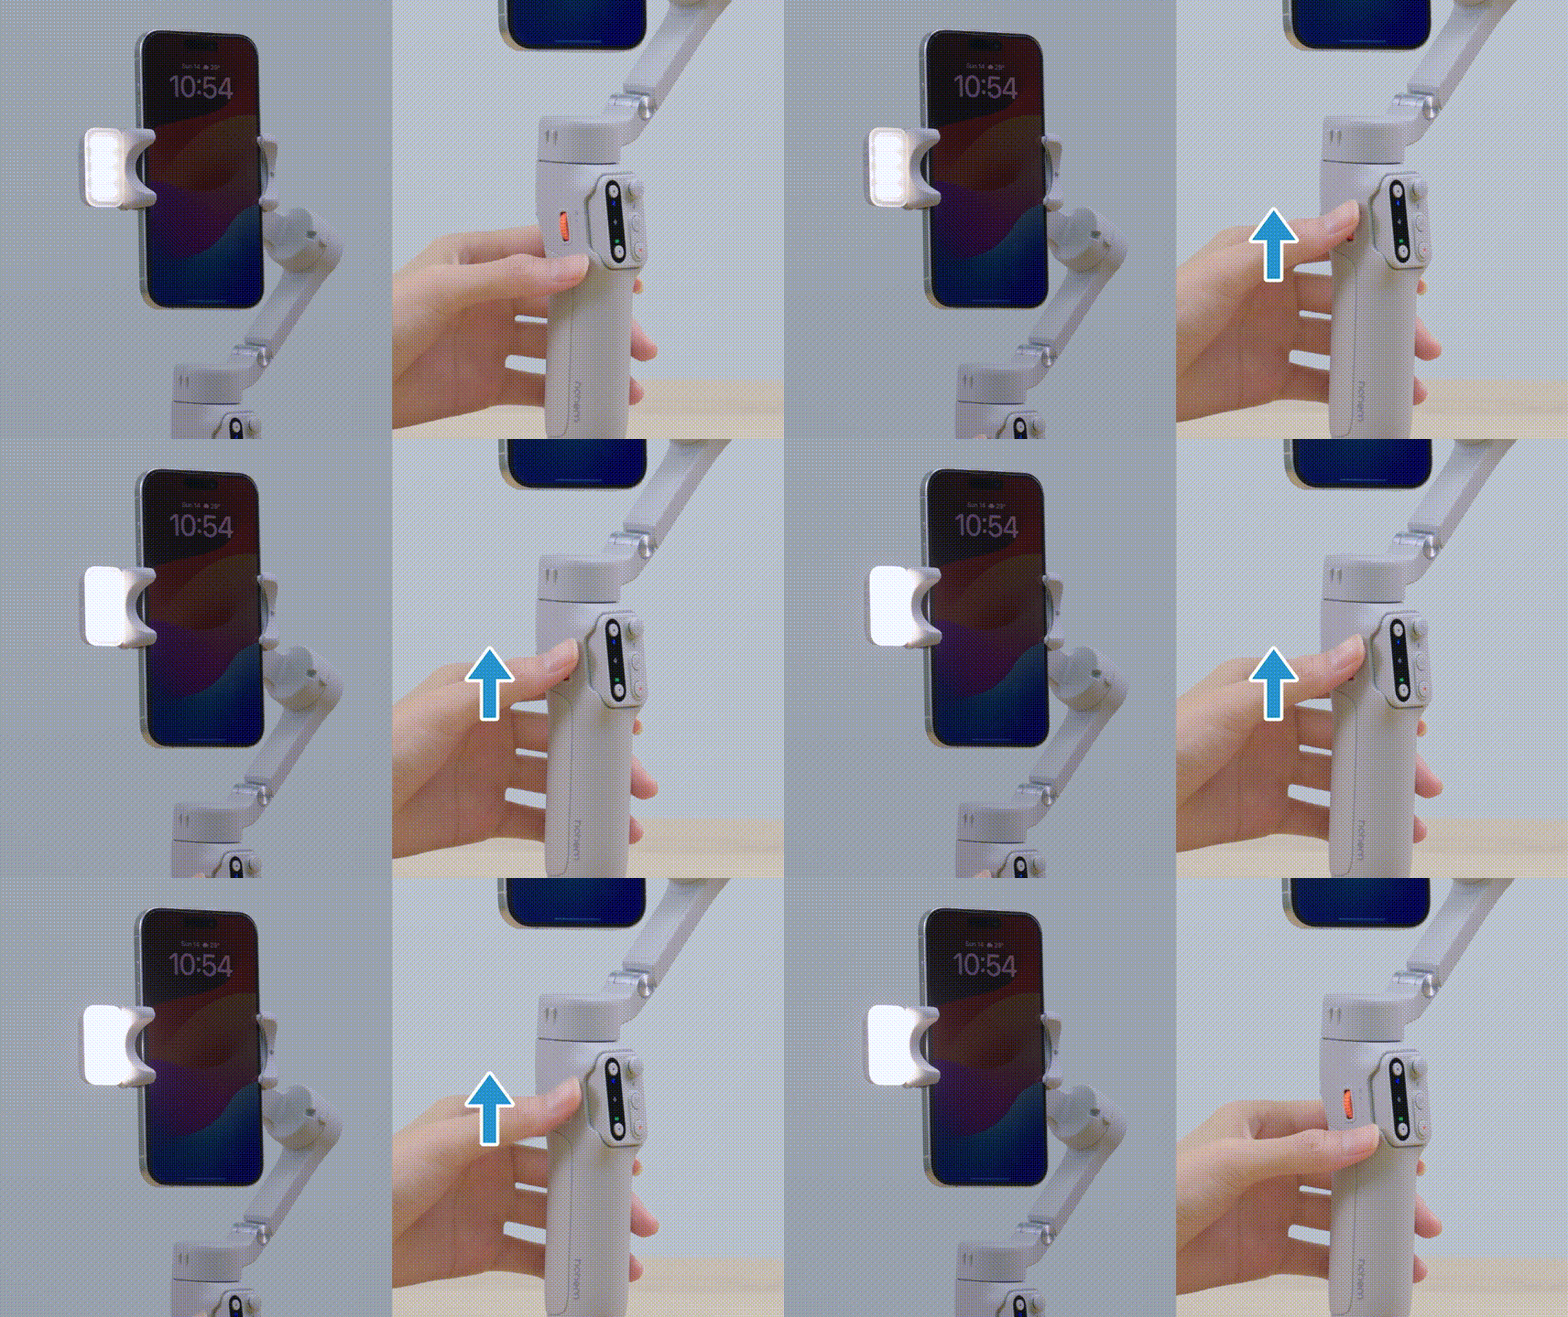
Scroll up: Increase the brightness
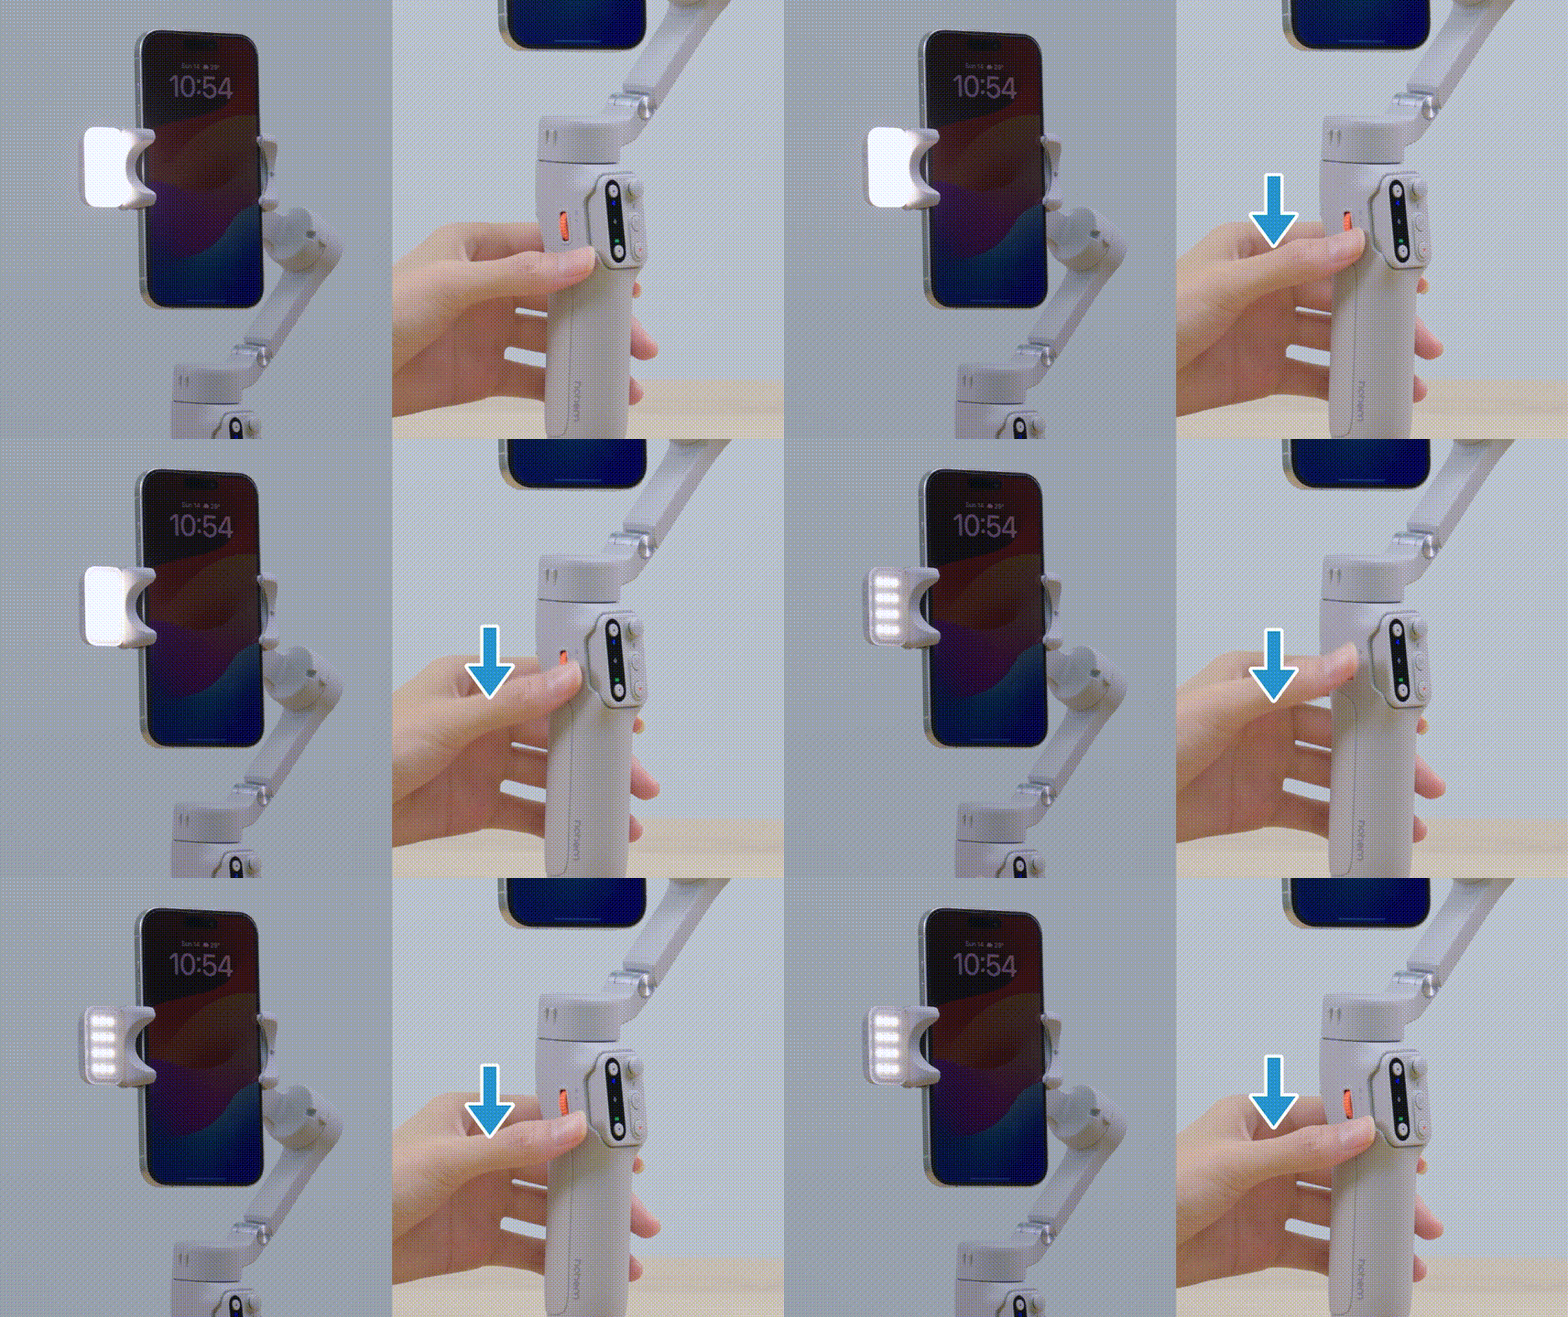
Scroll down: Decrease the brightness
Bluetooth & Hohem Joy App
Bluetooth Connection
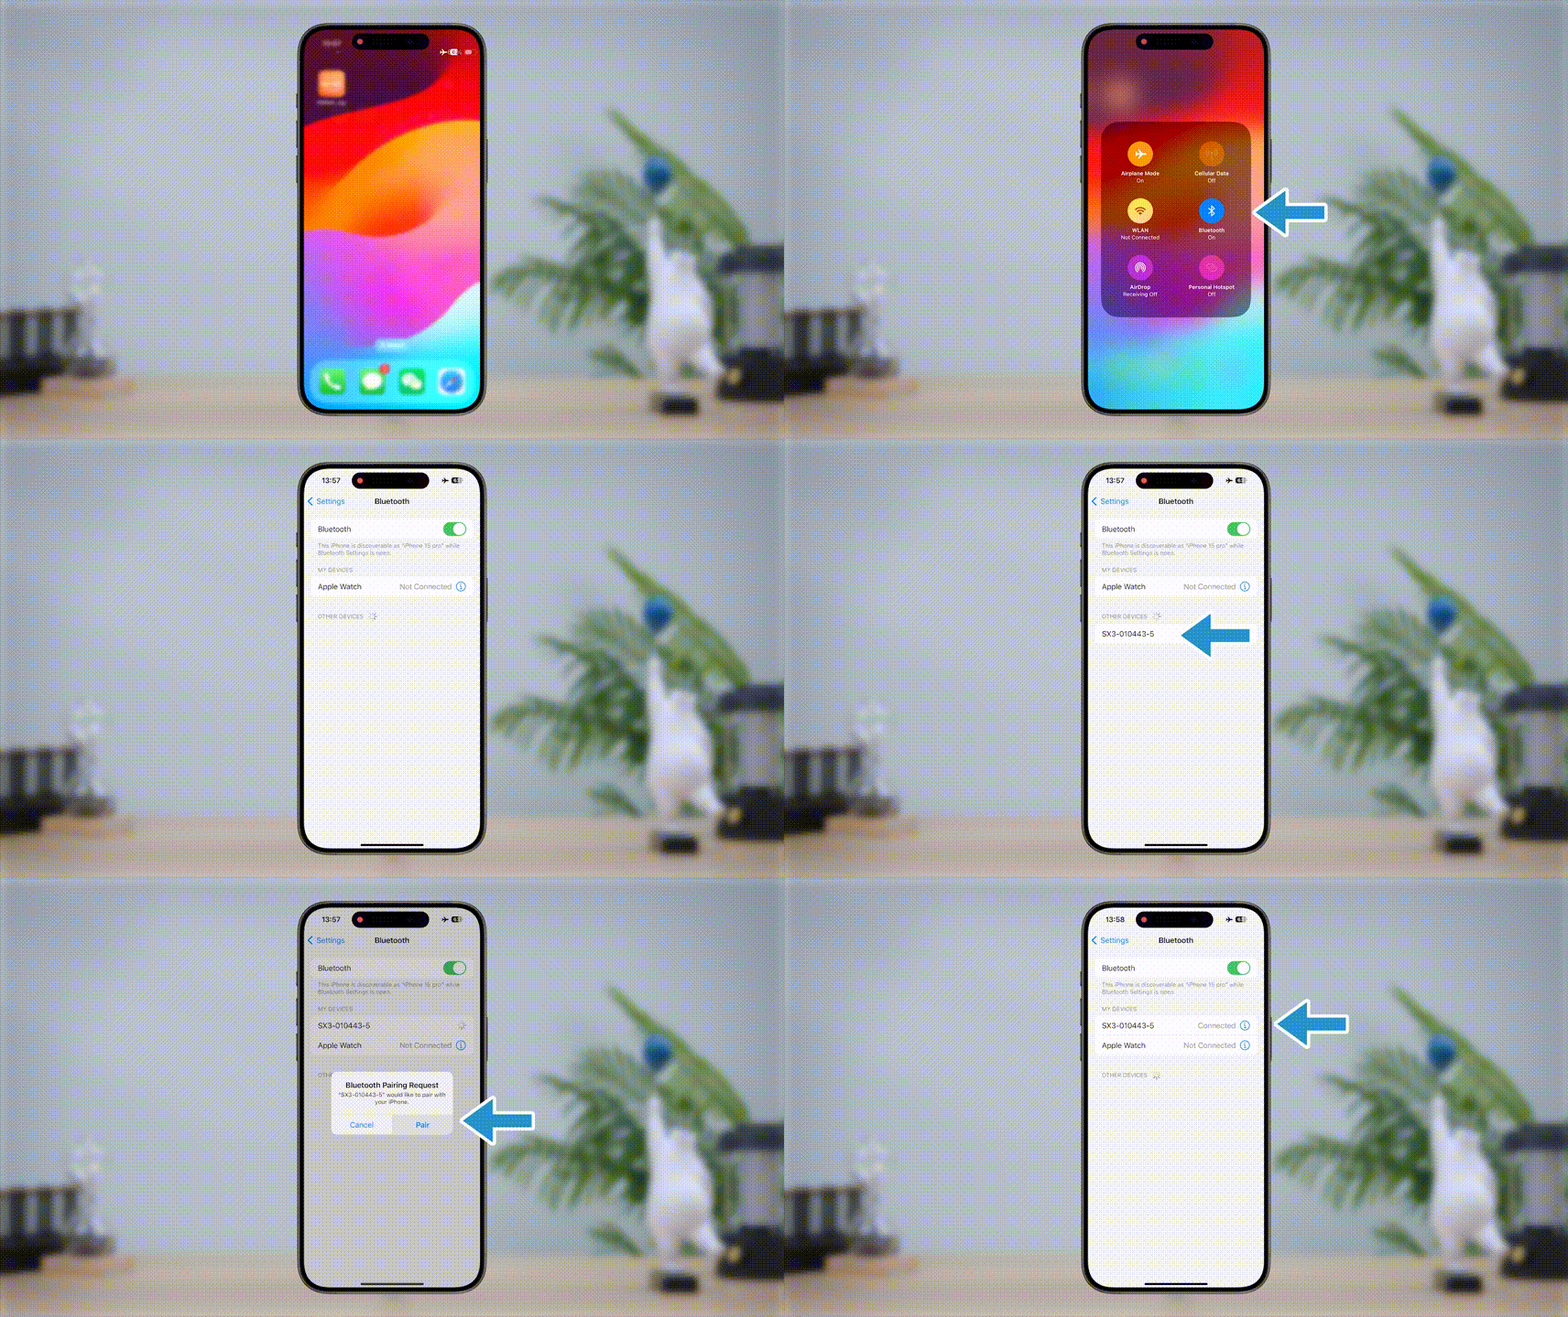
Activate Bluetooth on your smartphone and select the device named "SX3-XXXXXX" from the list of available devices. Follow the on-screen instructions to connect and pair. A steady light on the Bluetooth indicator signifies a successful connection.
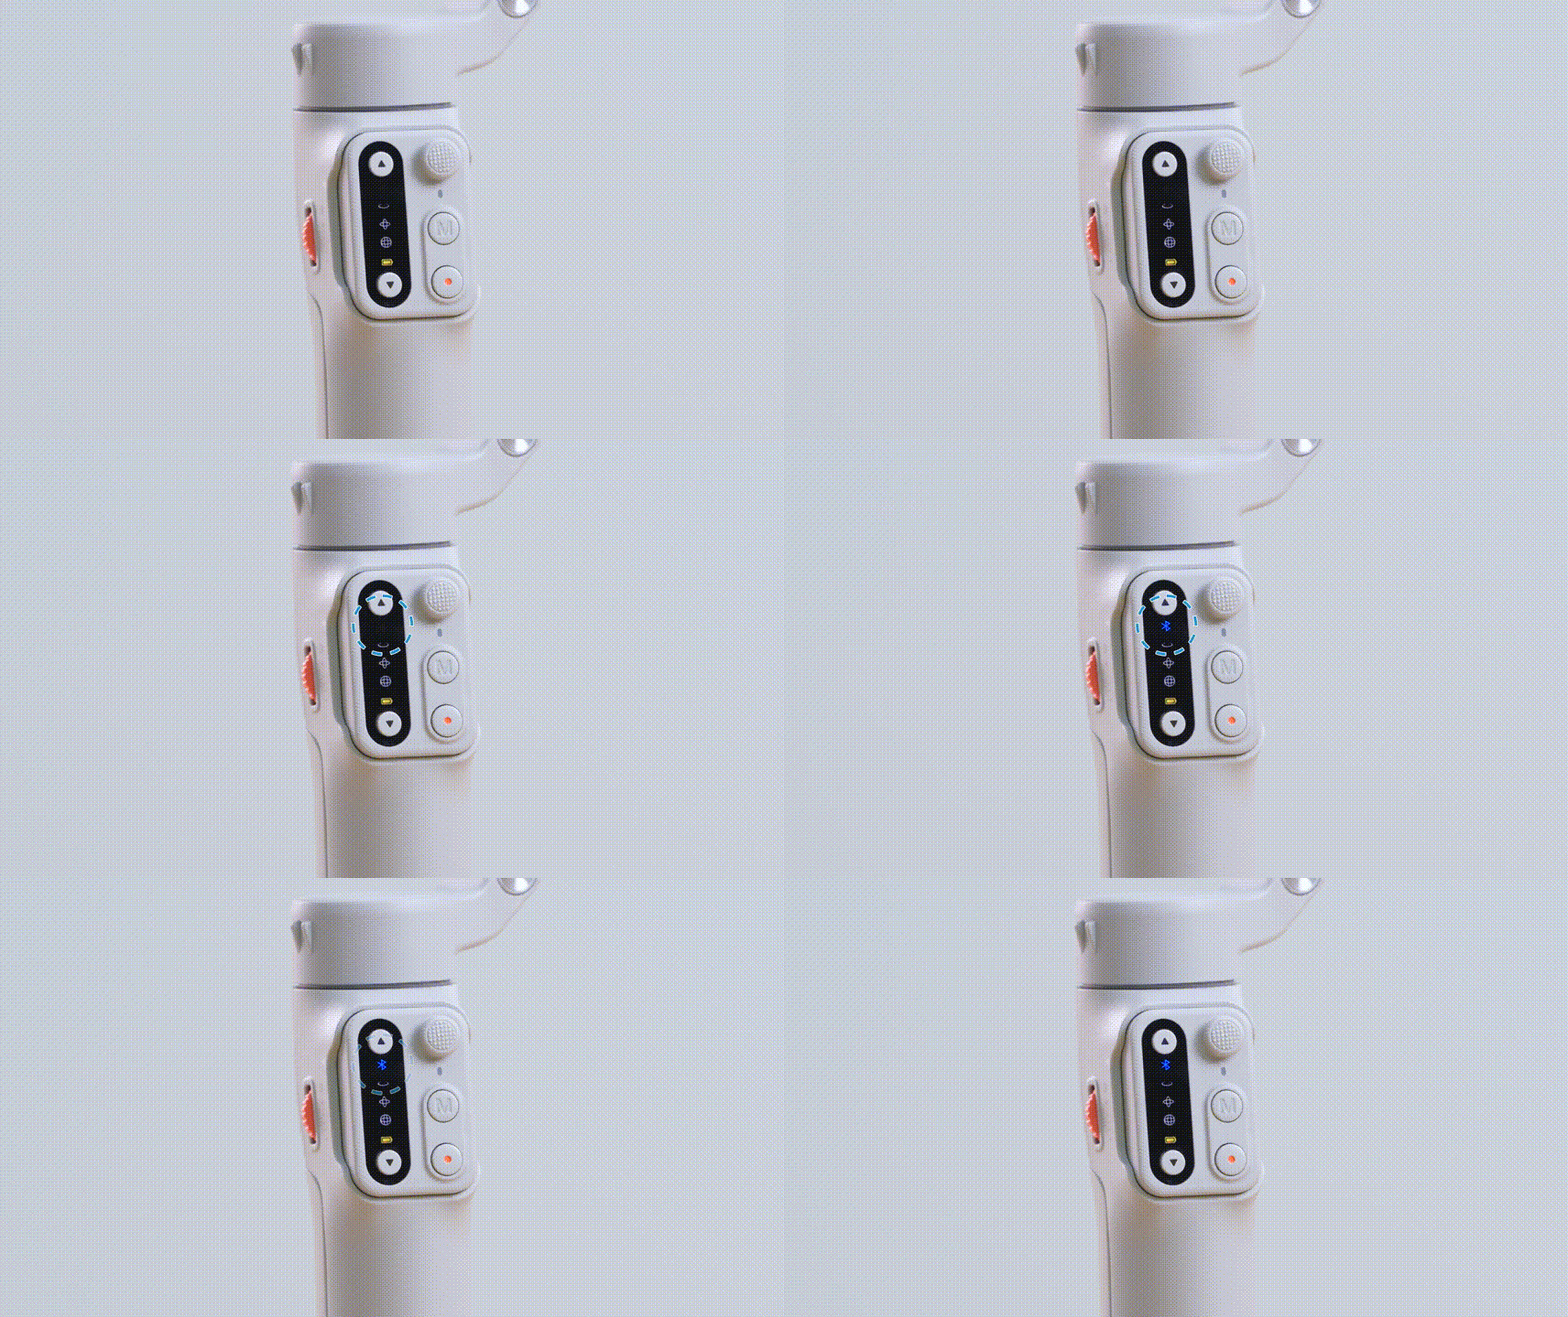
Hohem Joy App
Scan the QR code or search "Hohem Joy" in App Store / Google Play to download Hohem Joy App for more creative shots.

• Creative Studio
For Creative Studio, it provides shooting tutorials and ideas.
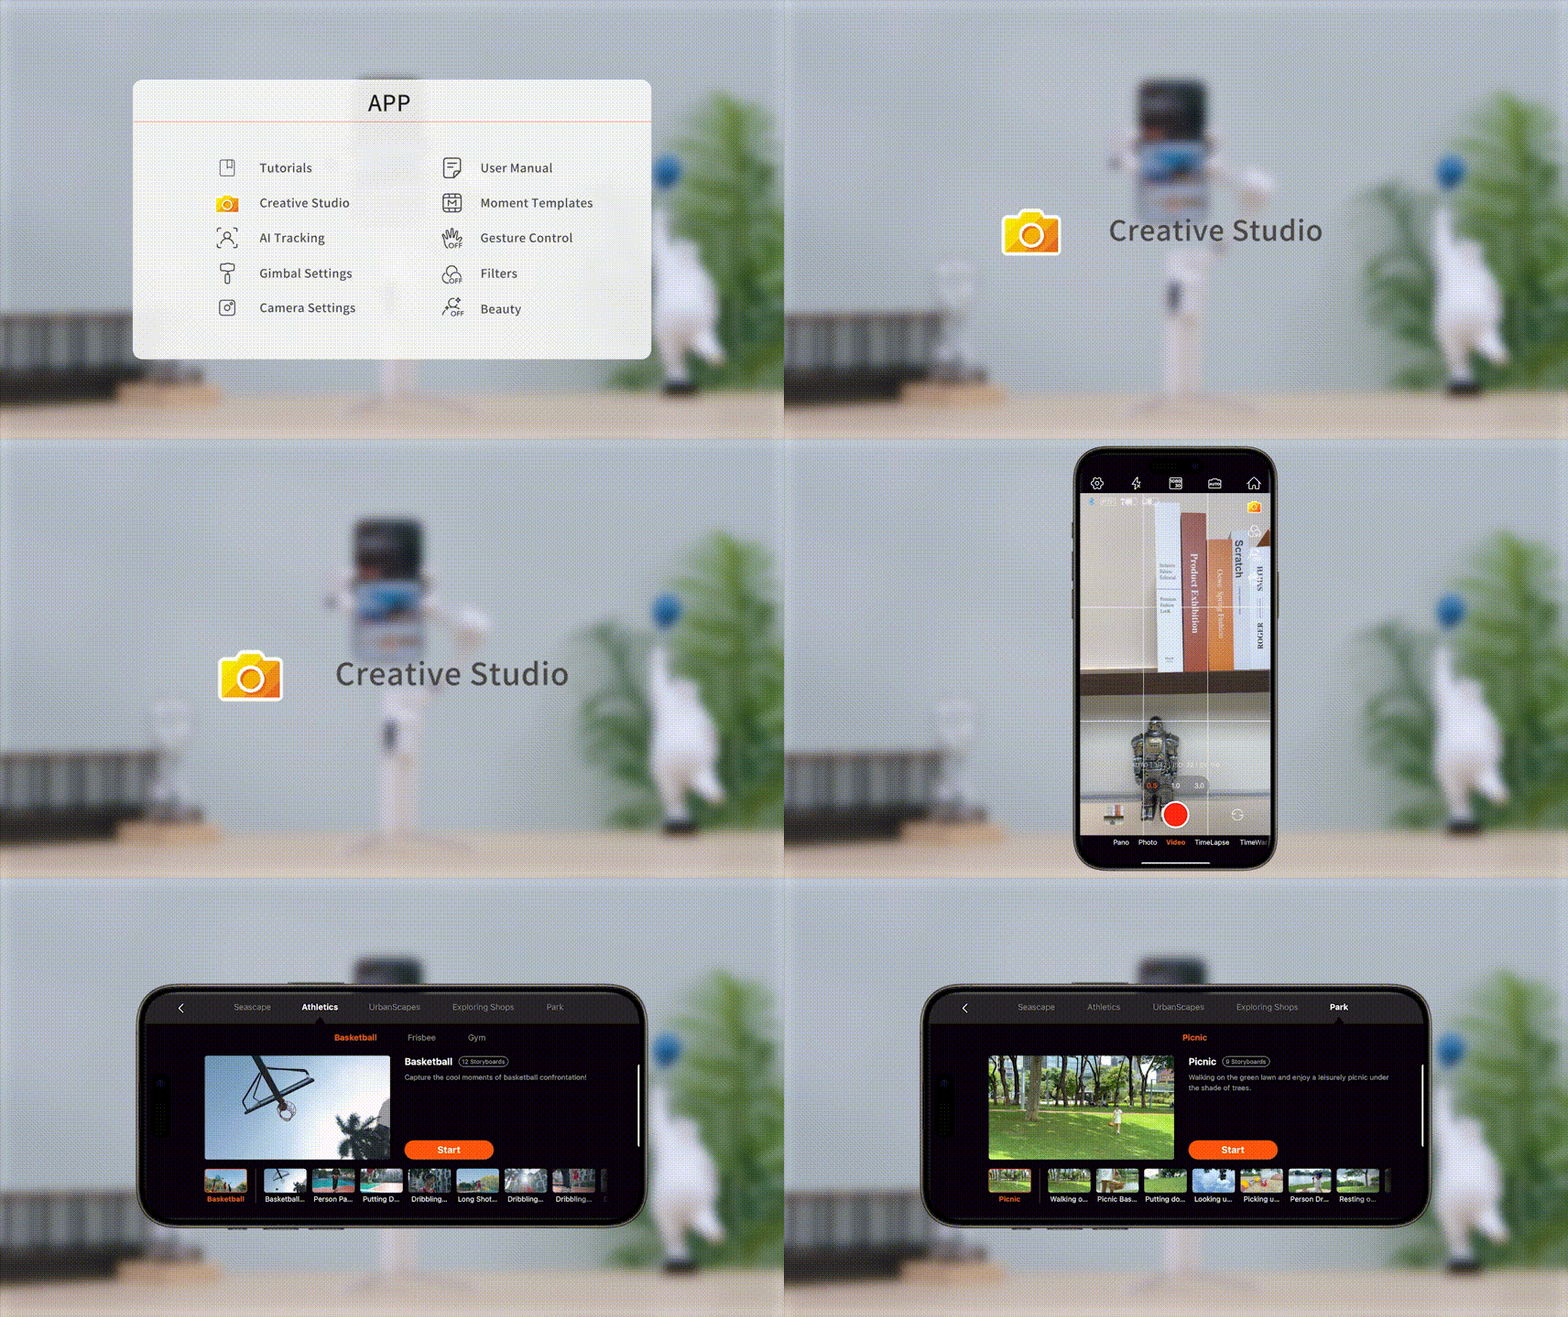
• Moment Mode
Moment has various cinematic templates.
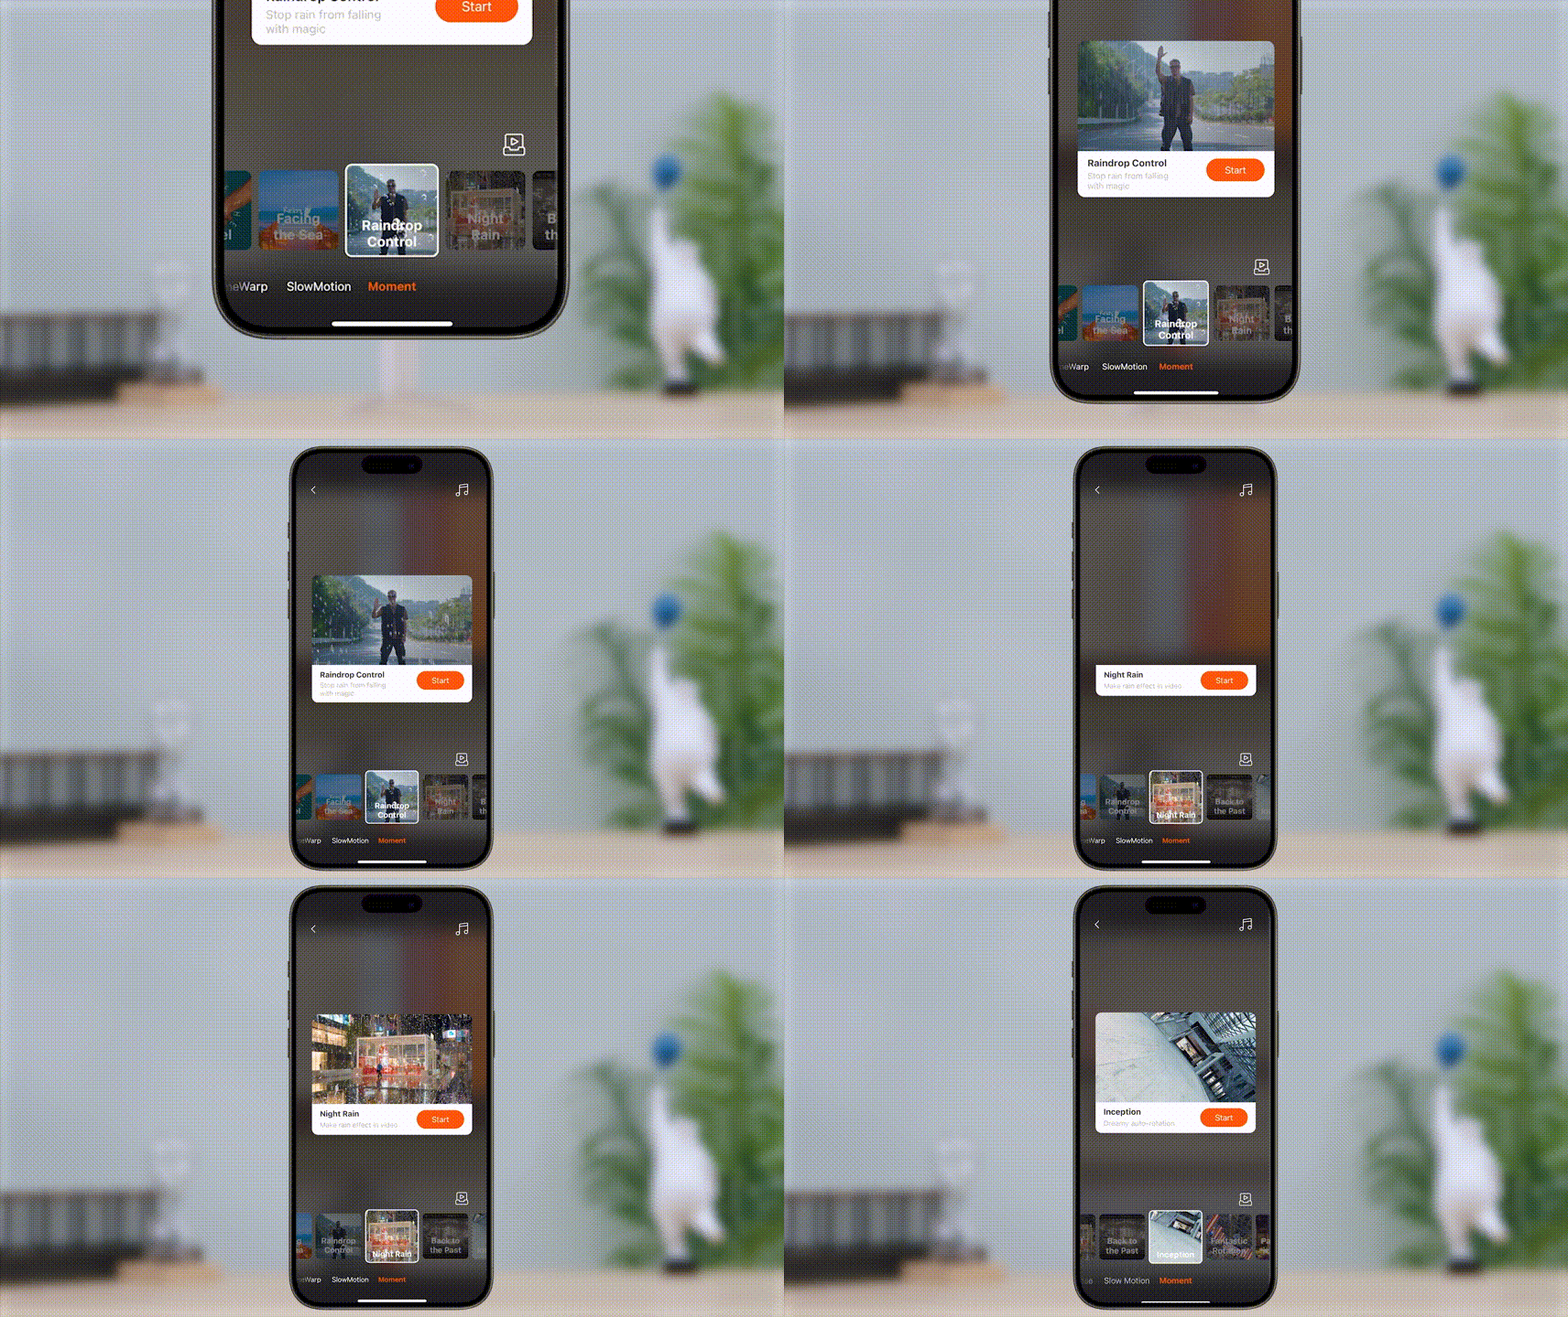
Buttons & Indicators
Buttons on the Handle
• Power Button
Long press: Power on/off
Double press: Enter/Exit standby mode
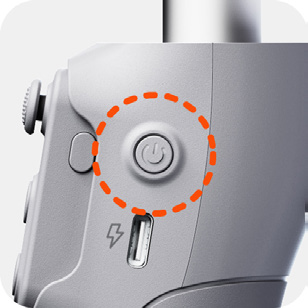
Press five times: Enter auto calibration
• Trigger
Double press: Recenter the gimbal
Triple press: Change the phone between forward-facing and backward-facing
Long press: Enter all lock mode (release the trigger to exit)
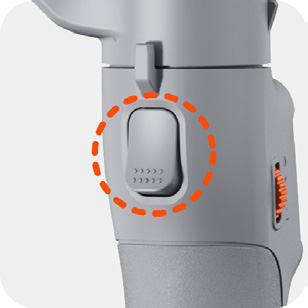
• Side Wheel
Long press: Turn the fill light on or off
Double press: Switch between cool, warm, and neutral light
Scroll up: Increase the brightness
Scroll down: Decrease the brightness
Press seven times: Clear the Bluetooth connection between gimbal and mobile phone
When the remote is detached, the connection between the gimbal and remote is also cleared.
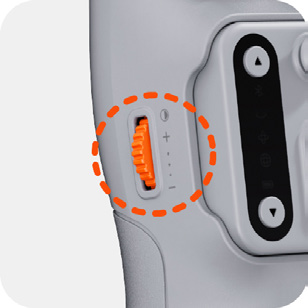
• Side Wheel (iSteady X3 SE)
Scroll up: Zoom in (Used in Hohem Joy App)
Scroll down: Zoom out (Used in Hohem Joy App)
Press seven times: Clear the Bluetooth connection between the gimbal and mobile phone
When the remote is detached, the connection between the gimbal and remote is also cleared.
Buttons on the Remote
When attached to the gimbal, the remote control automatically powers on and pairs once the gimbal is on. The gimbal also charges the remote during this time.
If detached from the gimbal, the remote needs to be powered on separately. It will automatically pair with the gimbal upon powering on.
• Adjustment Button
The adjustment button supports controlling three functions: zoom, roll rotation, and fill light. You can switch between these functions with the joystick. The default at startup is zoom control.
Zoom Control
Long press to control zoom in/zoom out (Used in Hohem Joy App).
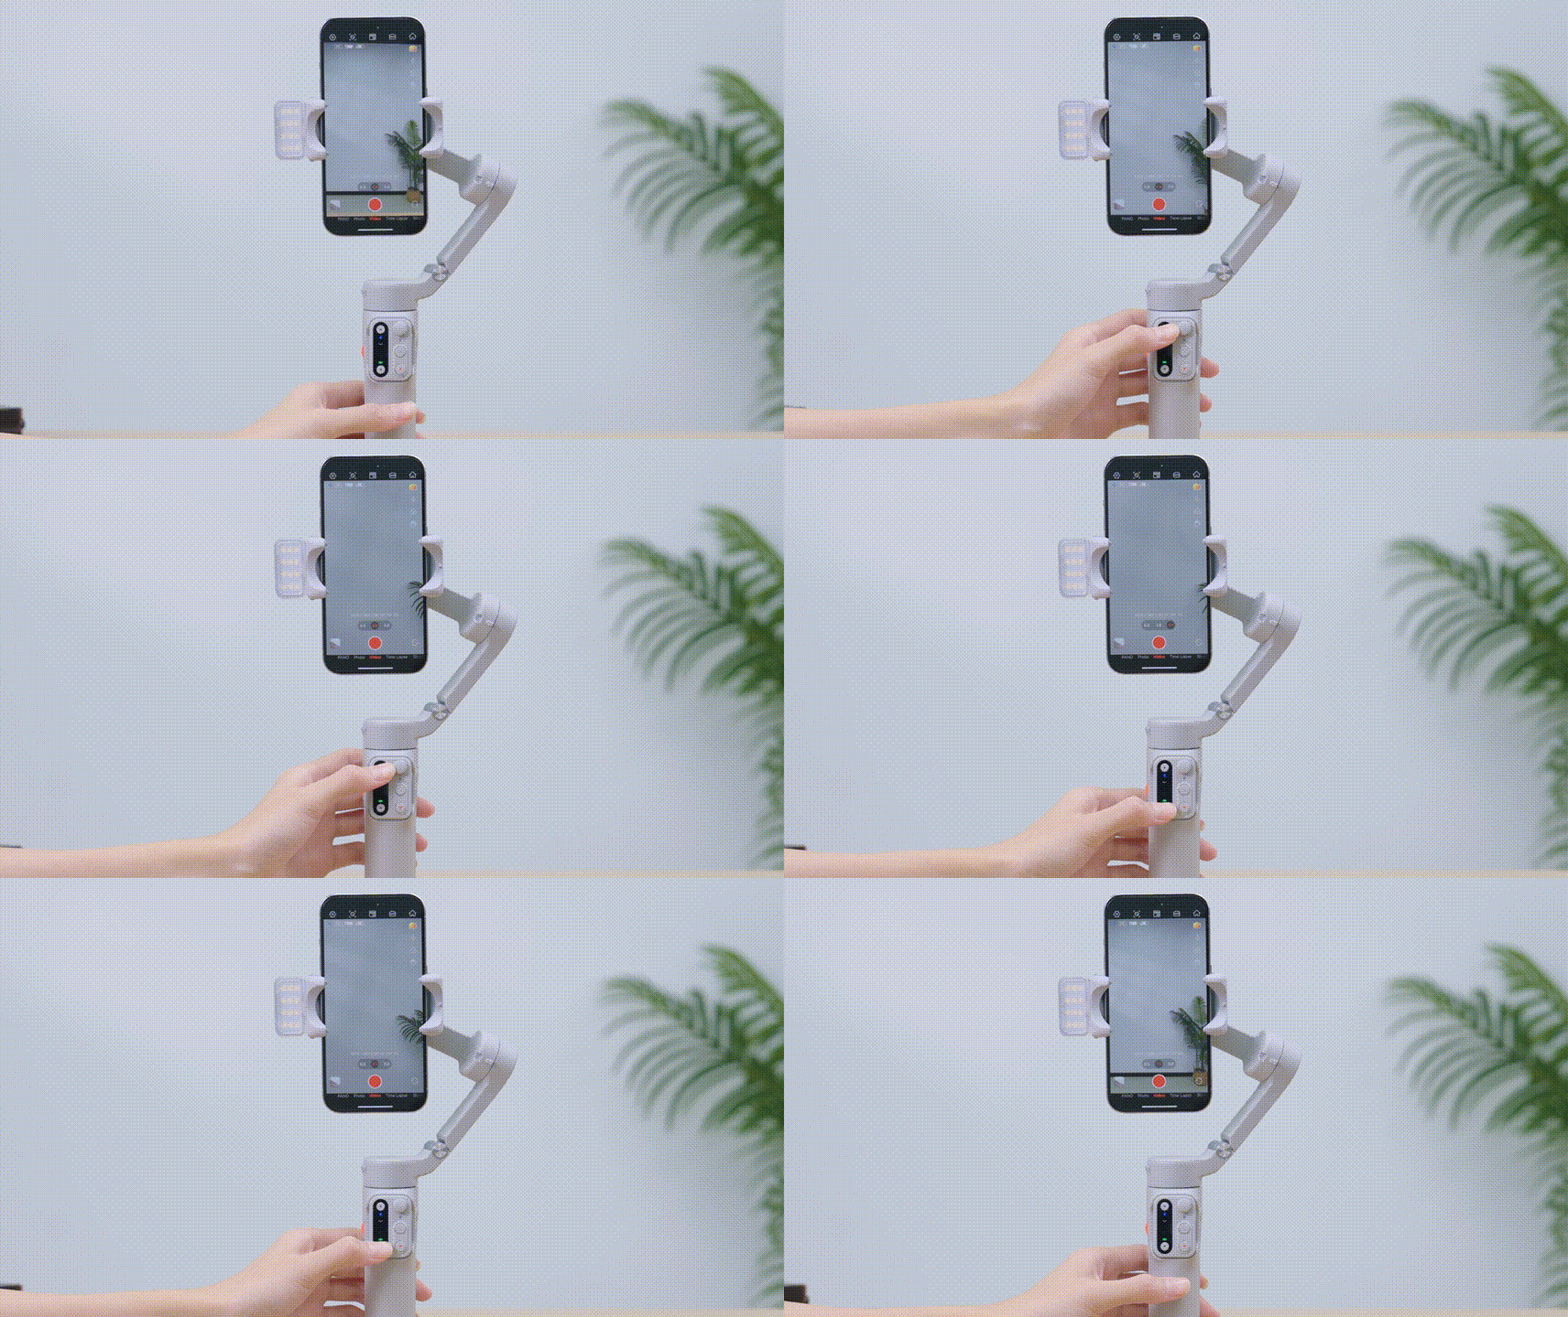
Roll Rotation Control
Double press the joystick, switch to roll rotation control.
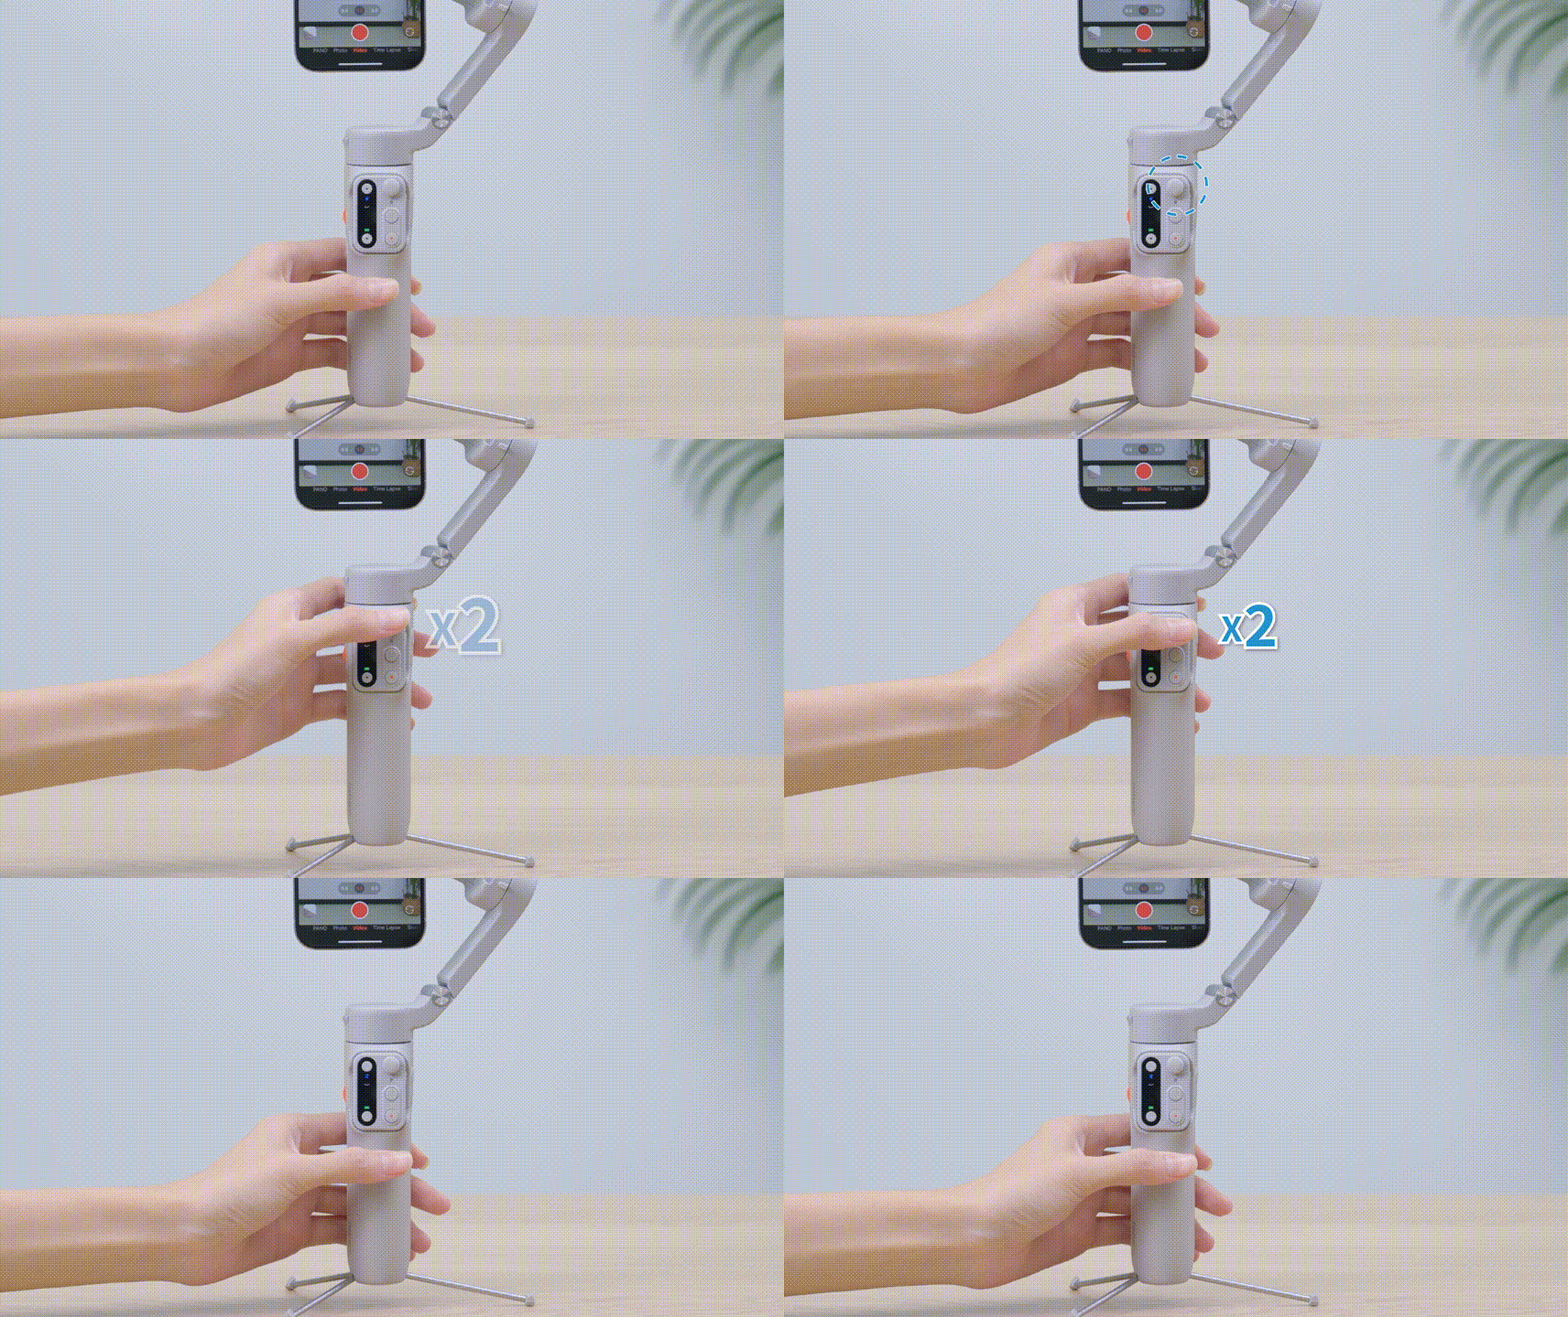
Long press to control roll rotation by clockwise or counterclockwise.
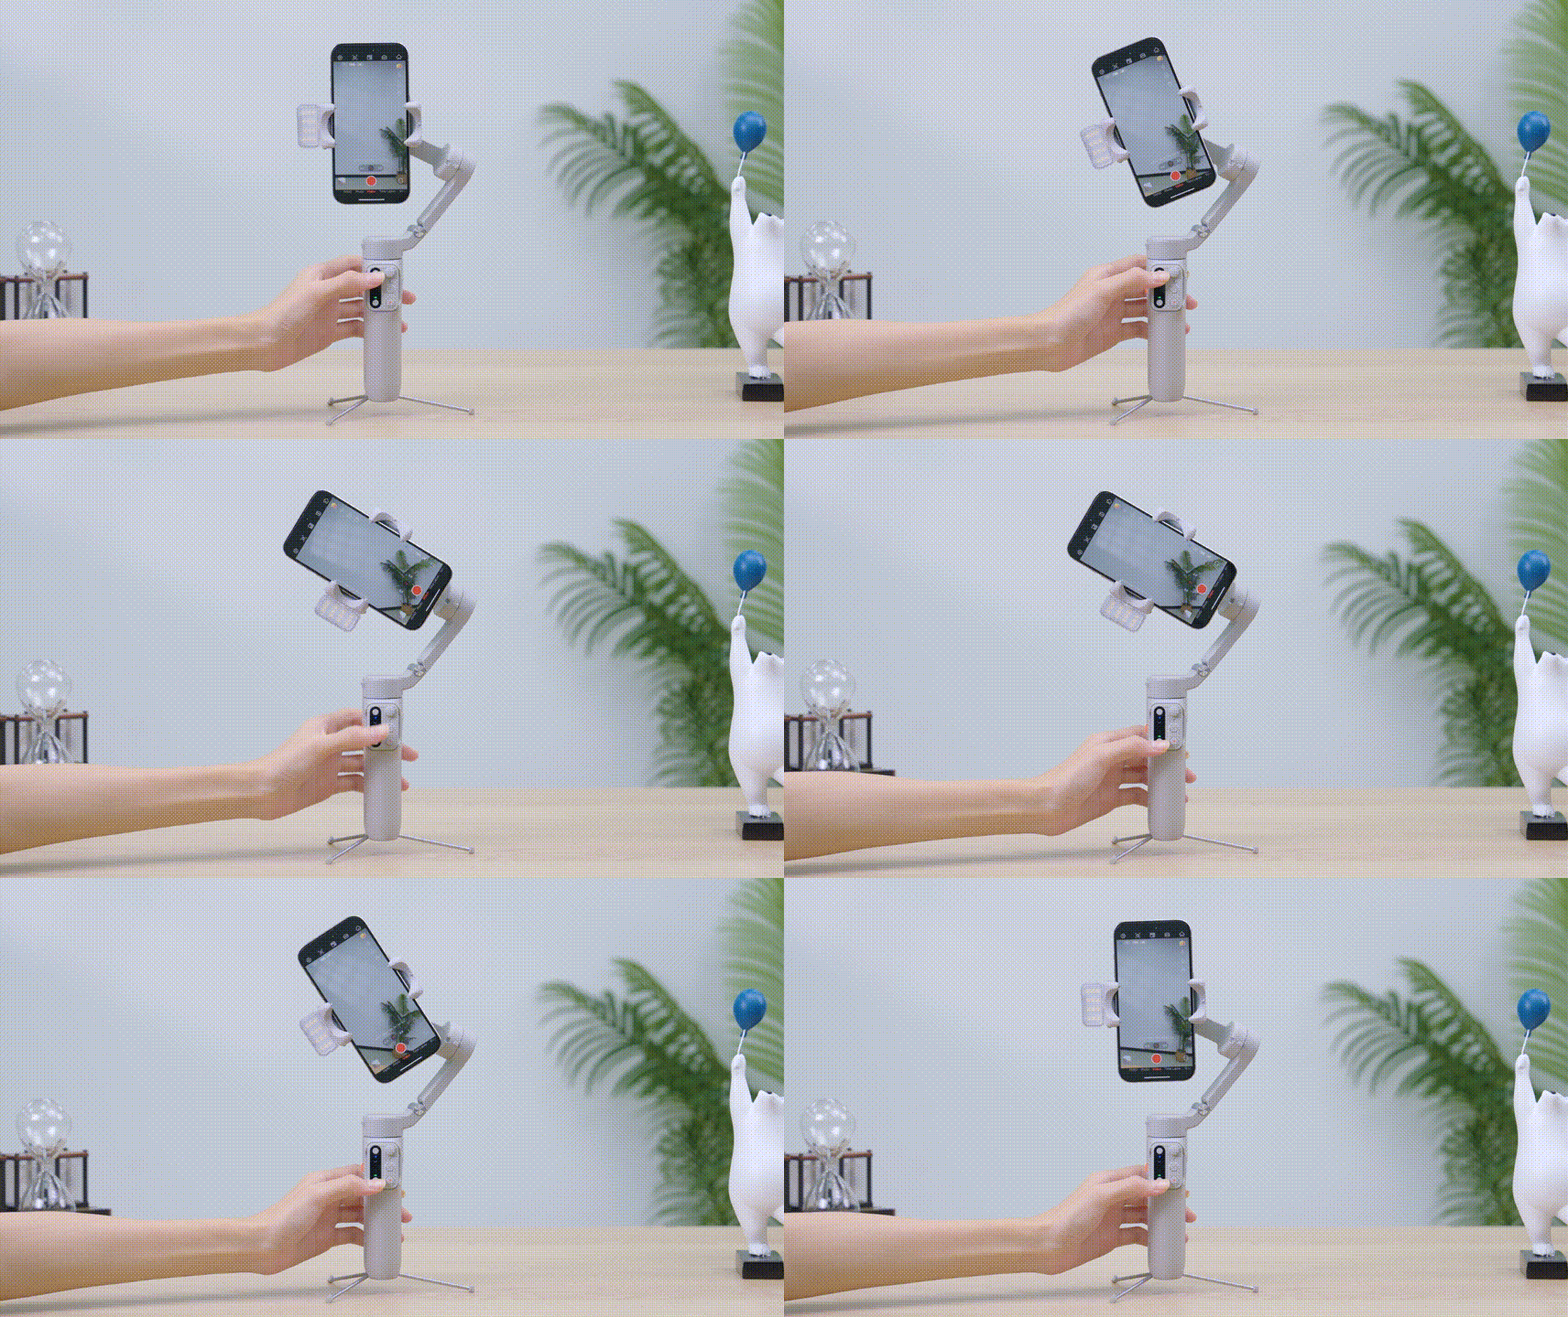
Fill Light Control
Double press the joystick, switch to fill light control.
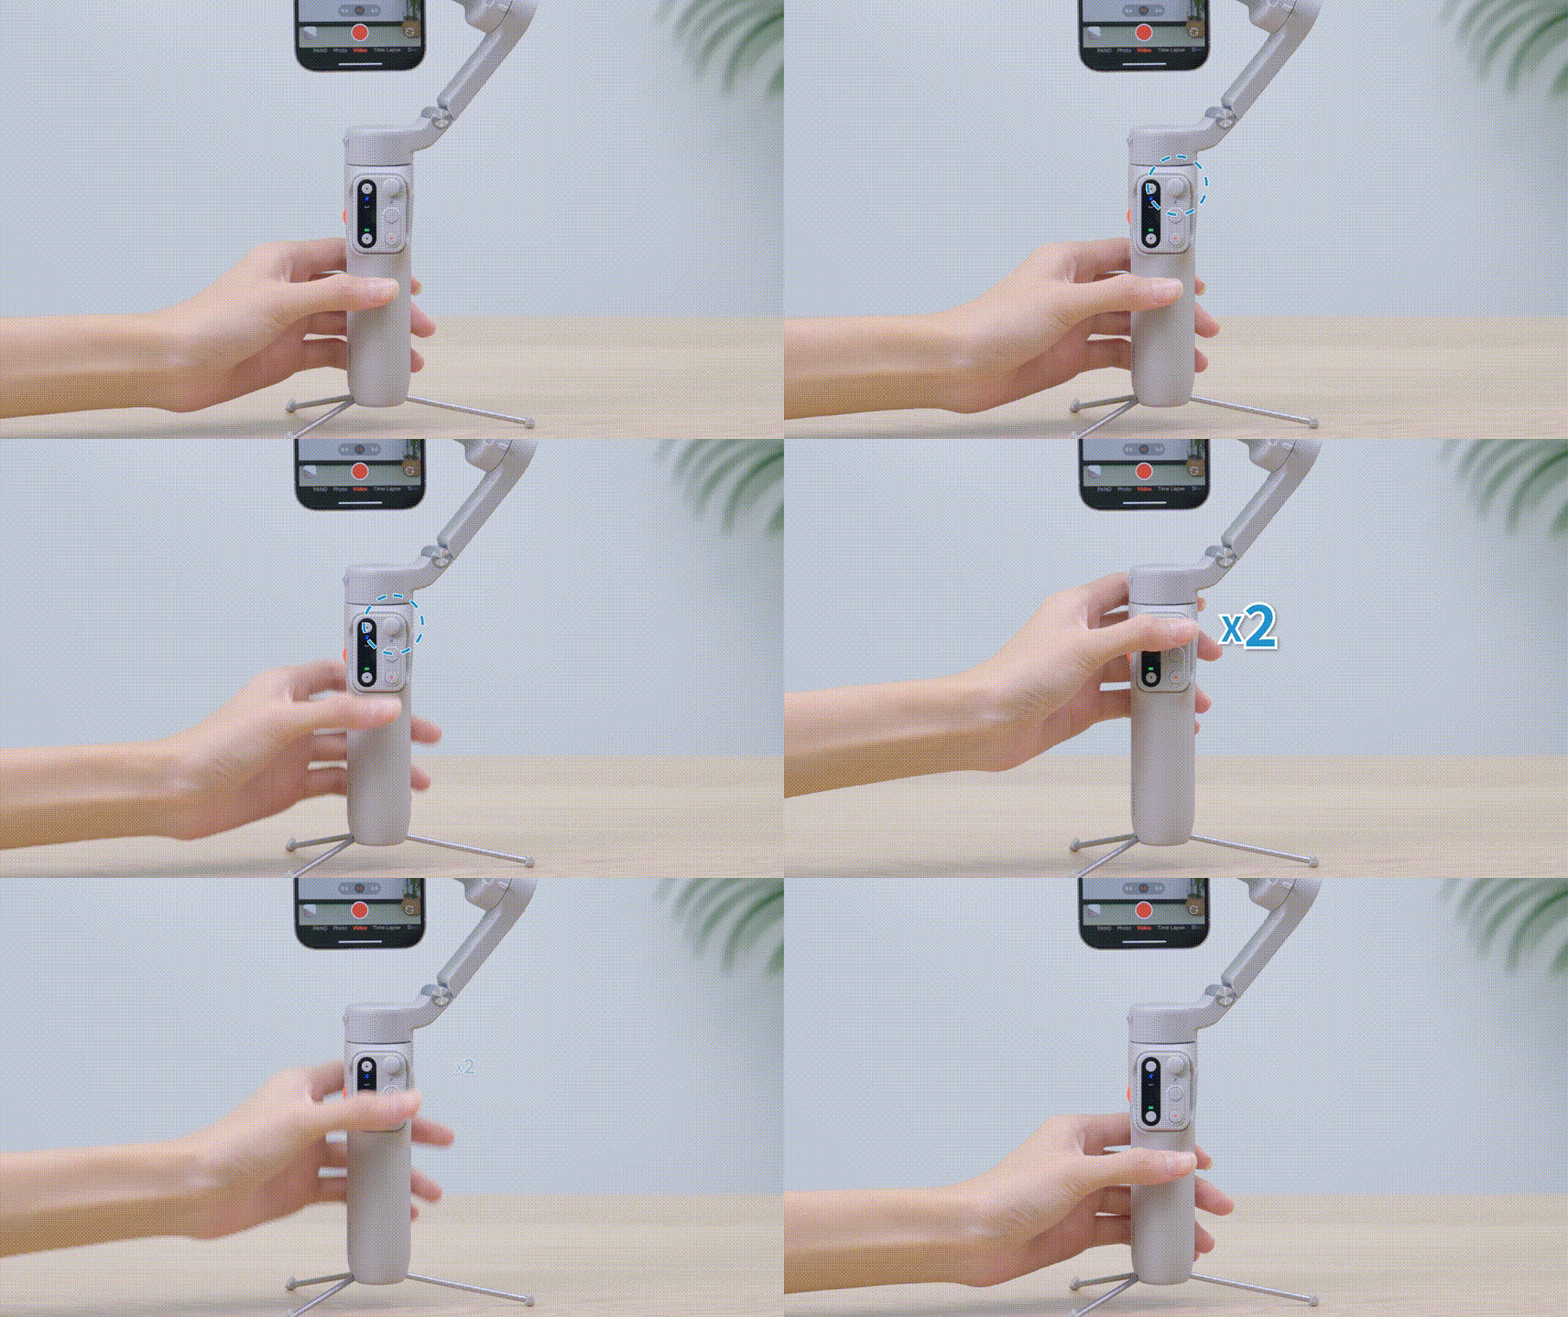
Double press to switch the fill light temperatures between warm, neutral and cool. Single press to increase or decrease brightness.
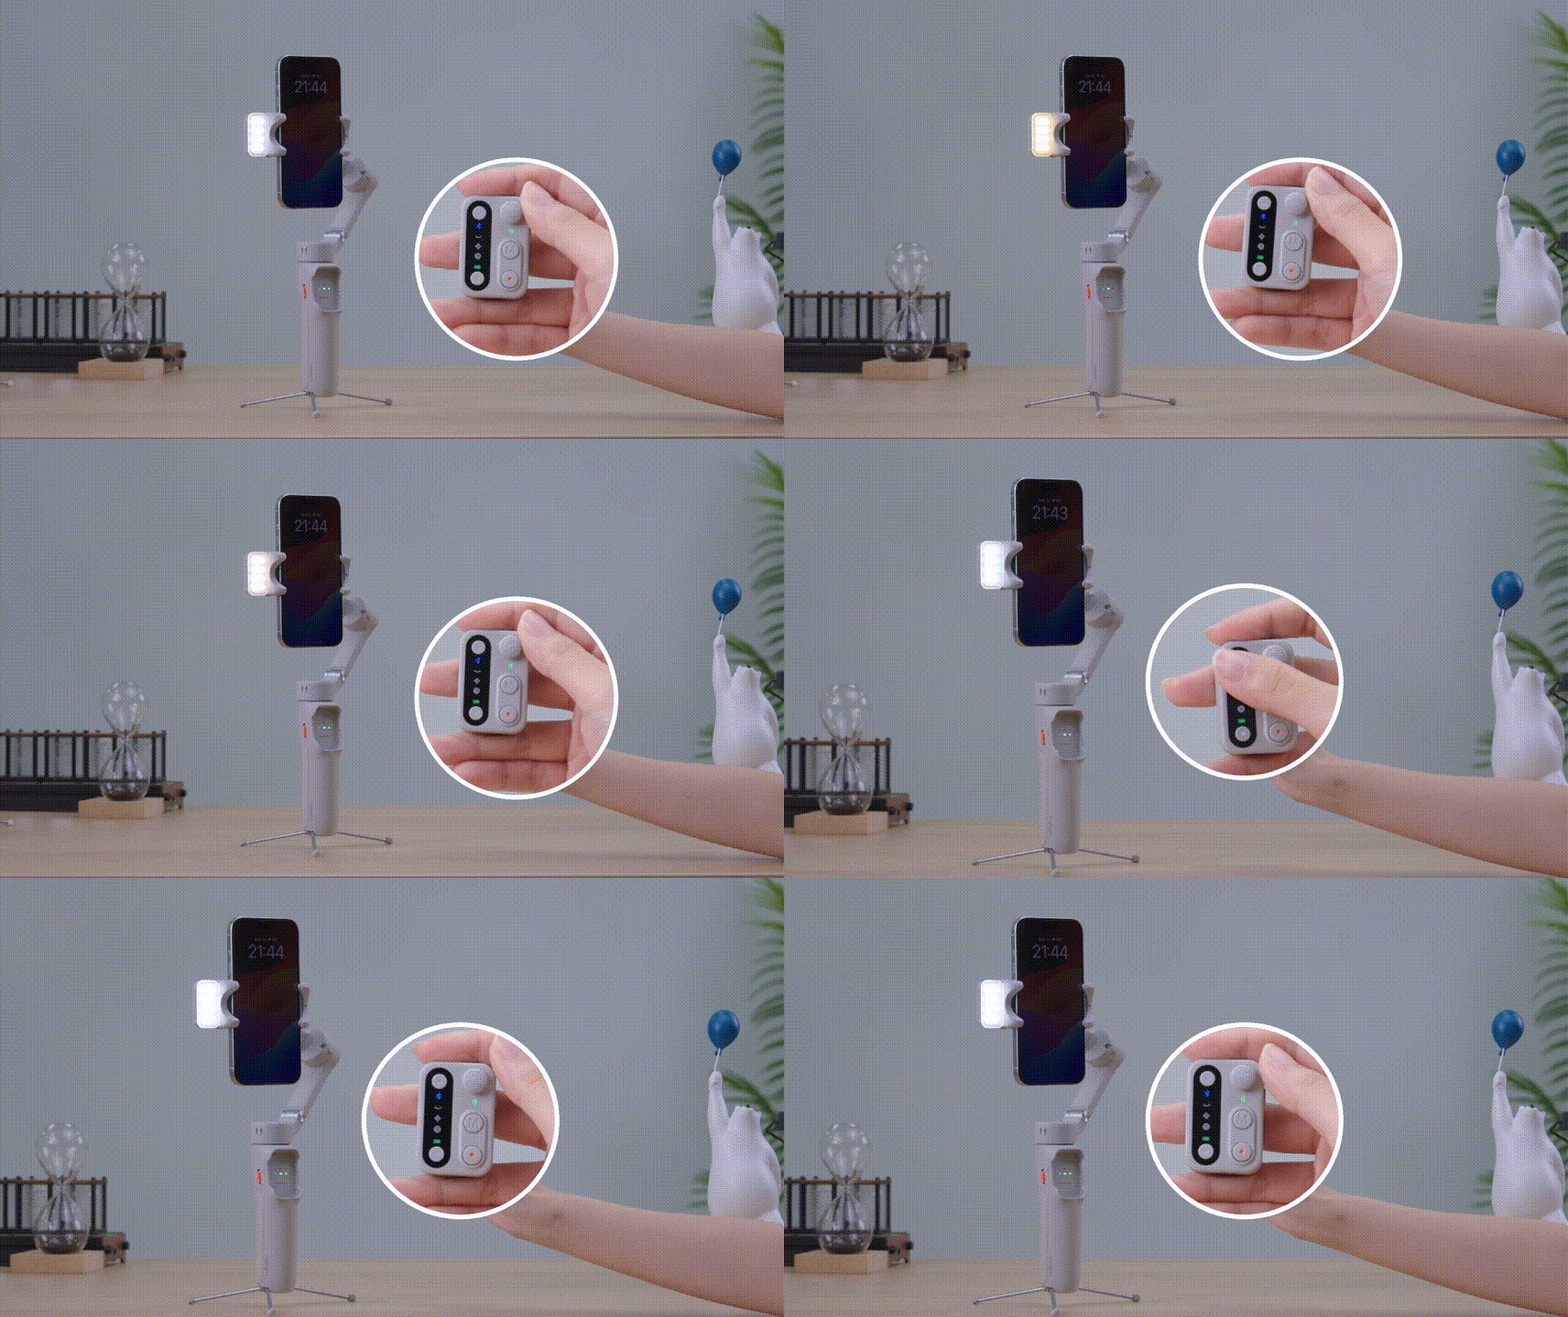
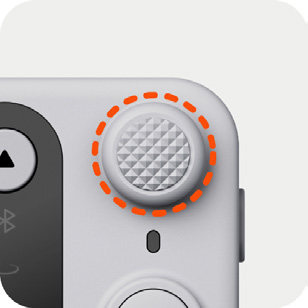
• Joystick
Push vertically and horizontally to change the tilt and pan axis directions.
Double press: Switch between zoom and roll control
Long press: Turn the fill light on or off
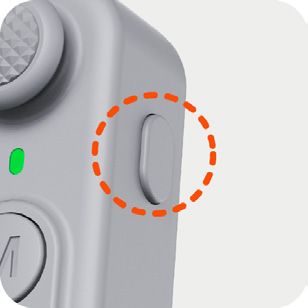
• Function Button
Double press: Recenter the gimbal
Triple press: Change the phone between forward-facing and backward-facing
Press seven times: Clear the connection between the gimbal and remote
Long press: Enter all lock mode(release button to exit)
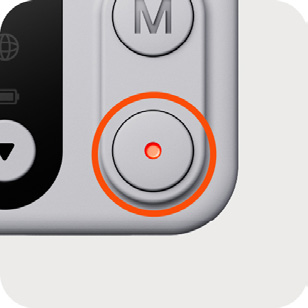
• Mode Button
Single press: Switch working modes
Double press: Switch between landscape and portrait mode
Triple press: Auto 180° roll rotation
Press five times: Enter auto calibration

• Shutter Button
Single press: Take a photo or start/stop recording [1]
Double press: Switch between photo/video mode [2]
Triple press: Switch between front/rear cameras [2]
Long press: Remote control power on/off [3]
*Notes:
1. This feature requires the gimbal to be connected to the smartphone via Bluetooth.
2. It is available exclusively through the Hohem Joy App after connecting via Bluetooth.
3. When the remote is attached to the gimbal, long press to power on/off both the gimbal and the remote.
Indicators on the Handle
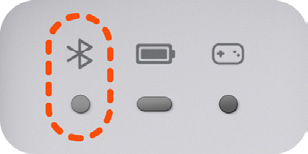
• Bluetooth Indicator
Solid: Bluetooth connected
Quick flash*3: Bluetooth pairing cleared (remote control power on/off)
Slow flash: Gimbal firmware updating
Off: Bluetooth disconnected
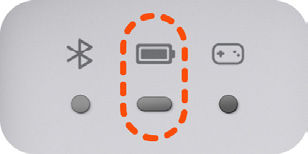
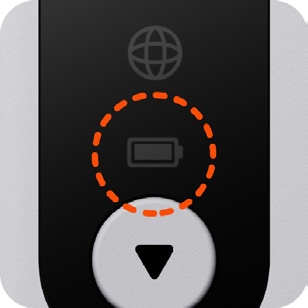
• Gimbal Battery Indicator
Solid green: Battery level 50%-100%
Solid yellow: Battery level 20%-50%
Solid red: Low battery
Quick flashing red: Shutting down soon
*Battery indicator light flashing slowly indicates charging (different colors correspond to the current battery level)
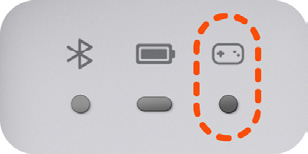
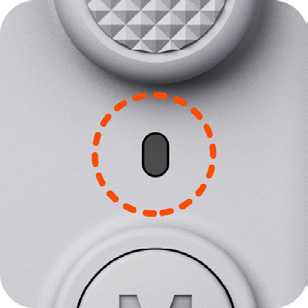
• Remote Connection Indicator
Solid green: Remote connected
Quick flashing green *3: Gimbal power on/off
Slow flashing red/green: Remote control re-pairing
Off: Remote control disconnected
Slow flashing red: Gimbal overloading
Solid red: Gimbal firmware anomaly
Pulsing yellow: Gimbal standby
Indicators on the Remote
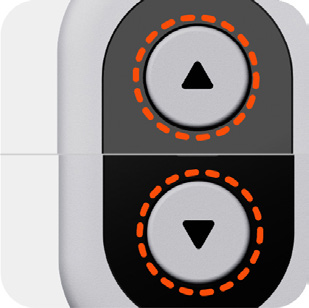
• Adjustment Indicator
Solid light: Roll rotation control
Flash: Fill light control
Off: Zoom in/out
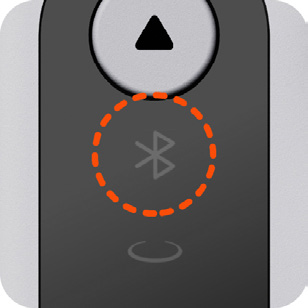
• Bluetooth Indicator
Solid light: Bluetooth connected
Quick flash *3: Bluetooth pairing cleared (remote control power on/off)
Slow flash: Gimbal firmware updating
Off: Bluetooth disconnected
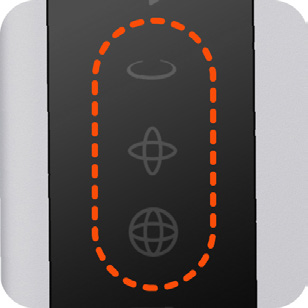
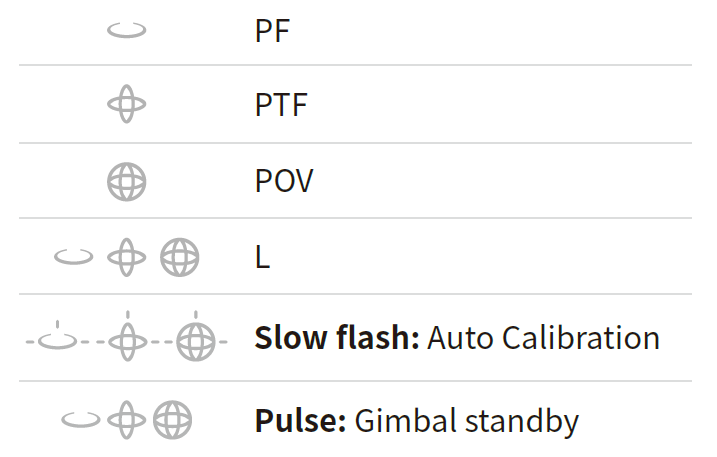
• Working Mode Indicator
• Gimbal Battery Indicator
Solid green: Battery level 50%-100%
Solid yellow: Battery level 20%-50%
Solid red: Gimbal Low battery
Quick flashing red: Gimbal Shutting down soon
*Battery indicator light flashing slowly indicates charging (different colors correspond to the current battery level)
• Remote Connection Indicator
Solid green: Remote connected/Charging complete
Slow flashing green: Charging/Firmware updating
Quick flashing green *3: Remote power on/power off/paired
Slow flashing red/green: Remote control repairing
Off: Remote control disconnected
Solid red: Remote low battery level
Slow flashing red: Remote shutting down soon
Working Modes
Three Axes
Pan Axis: Moves camera view left and right
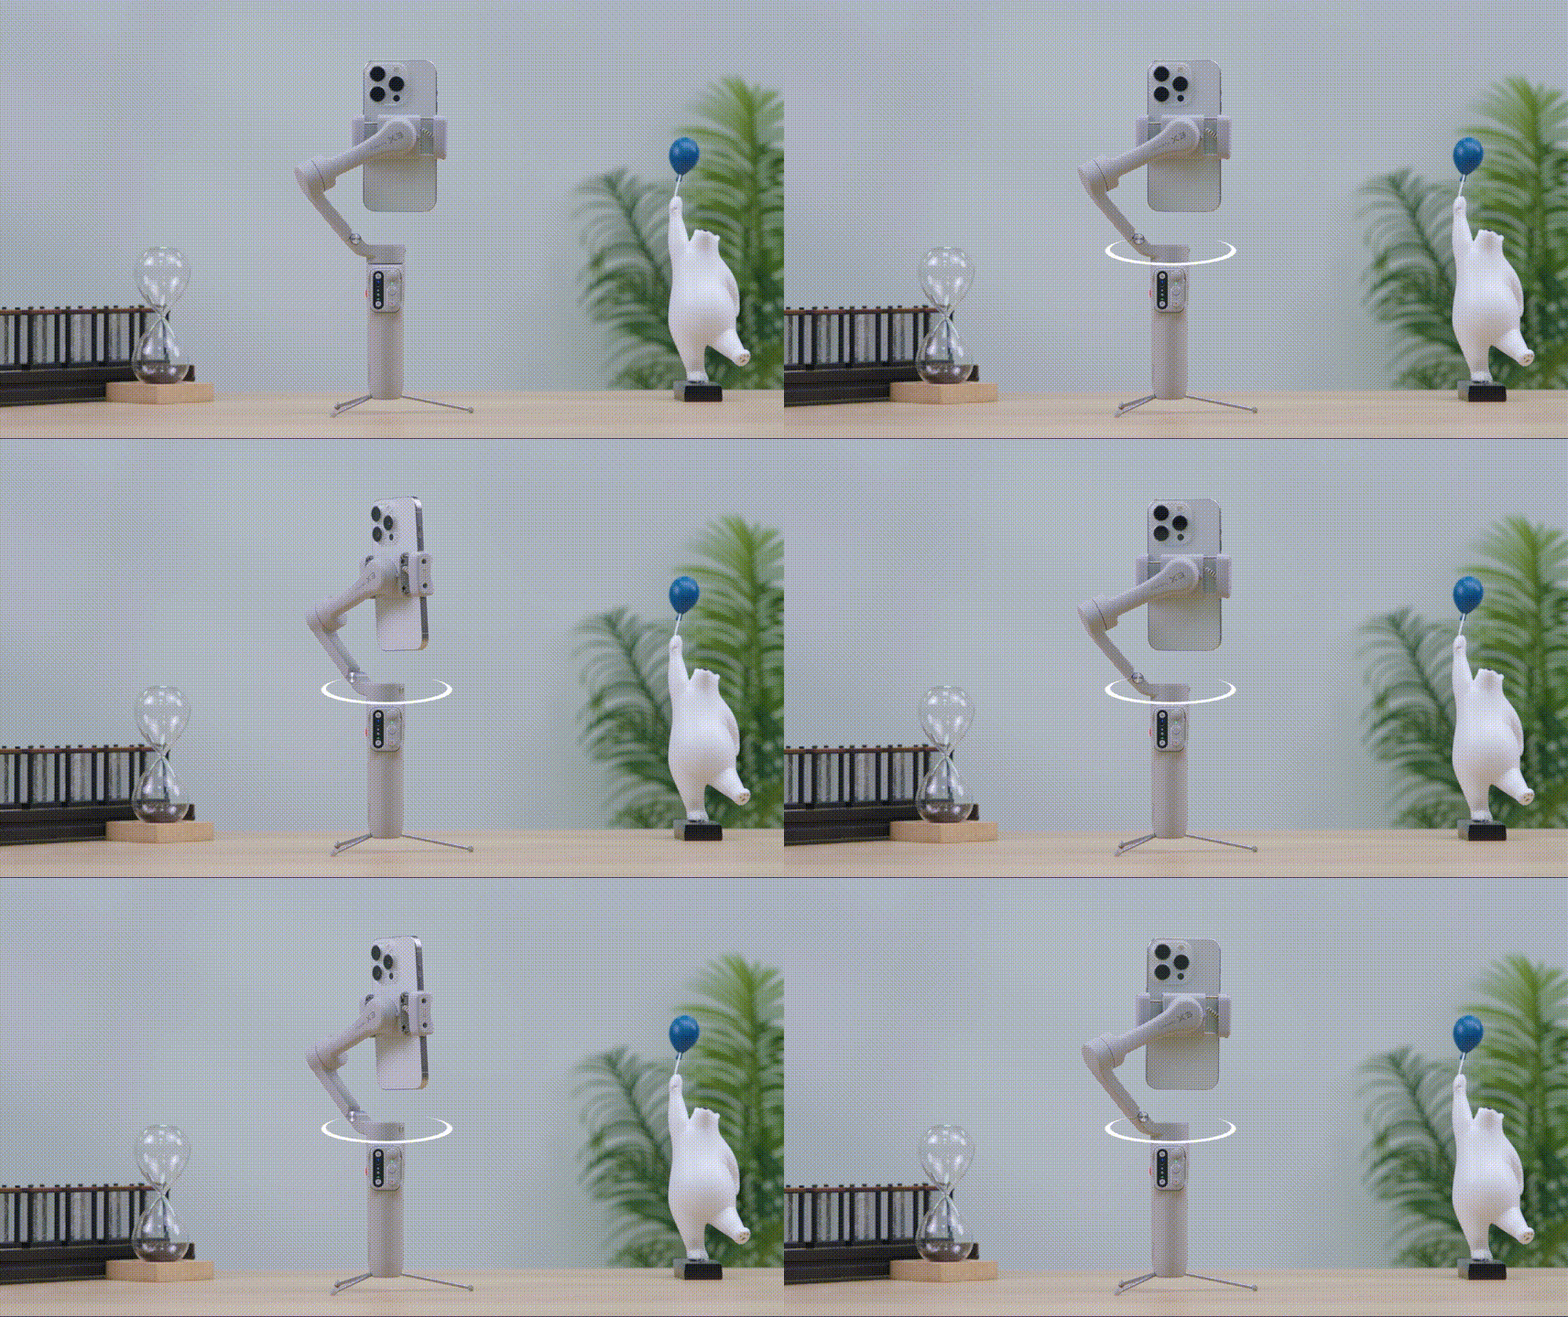
Tilt axis: Tilts smartphone up and down
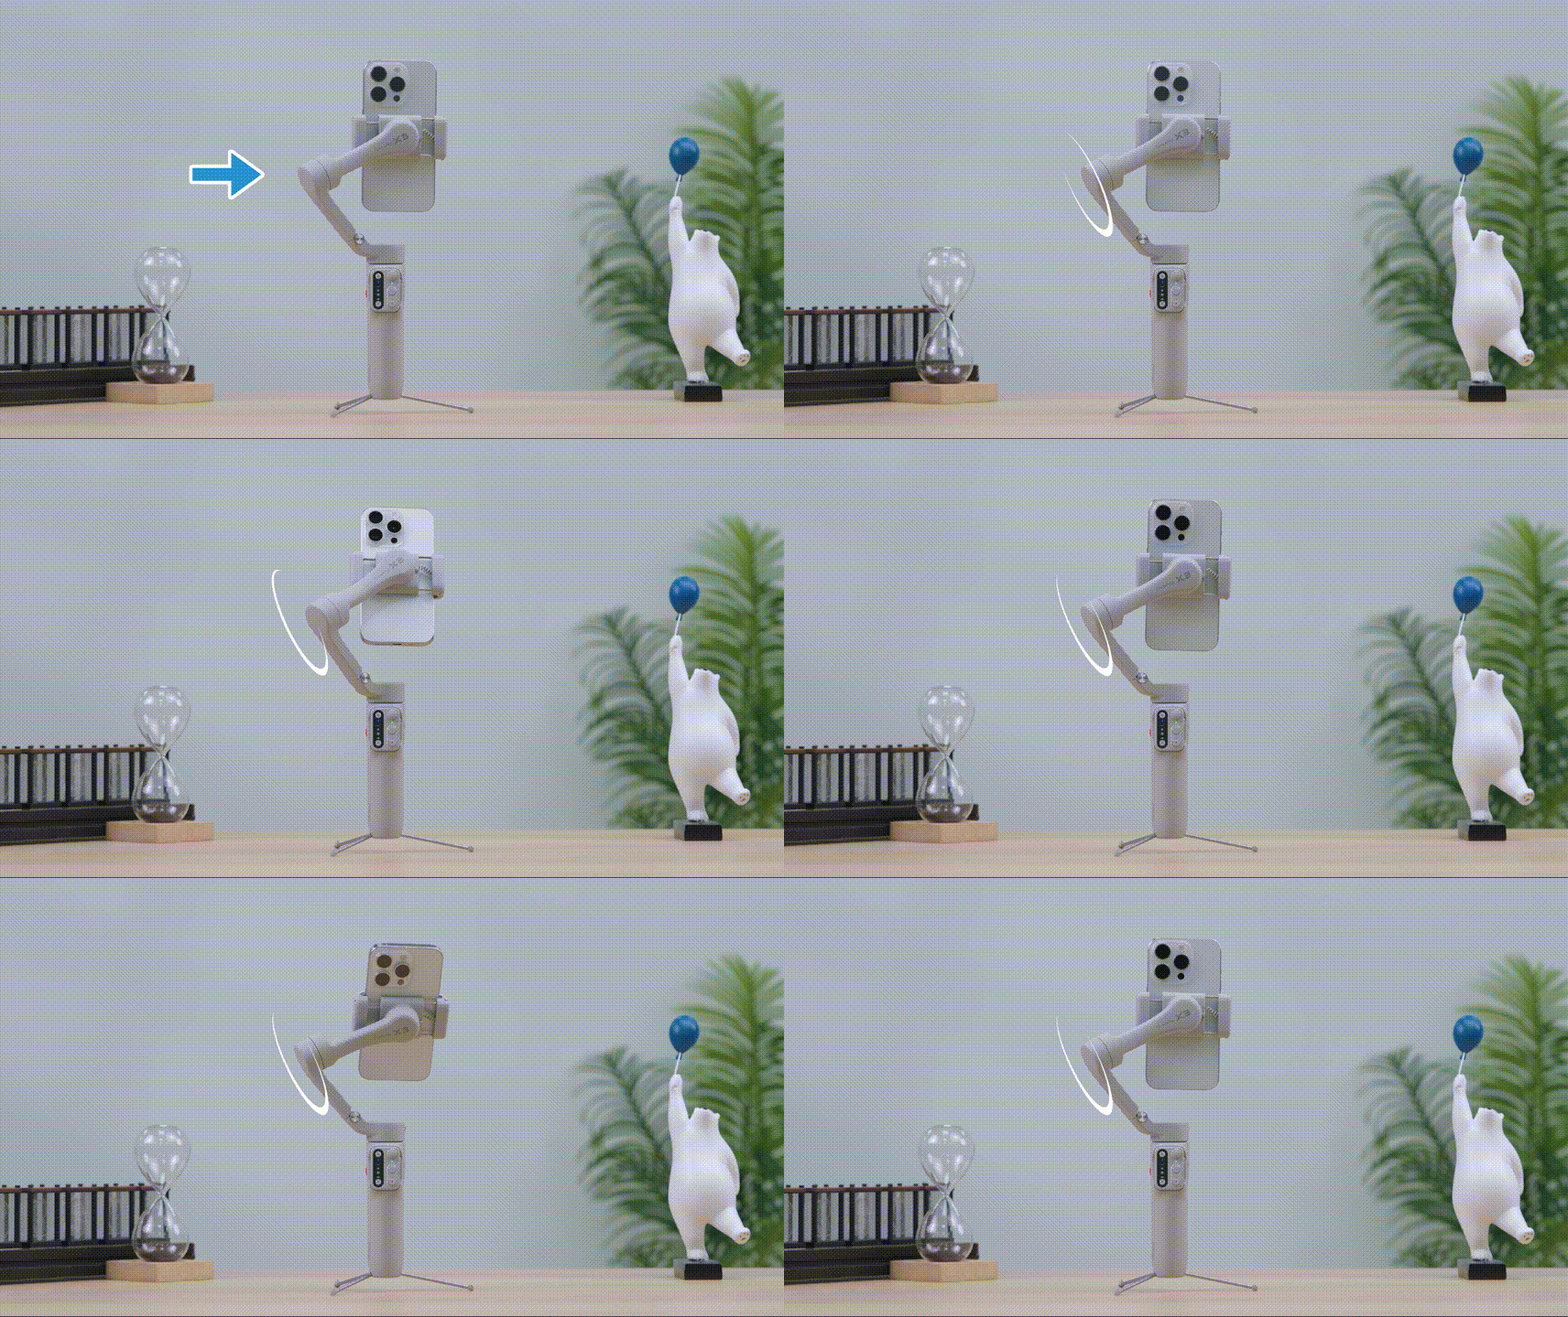
Roll axis: Rotates the smartphone vertically
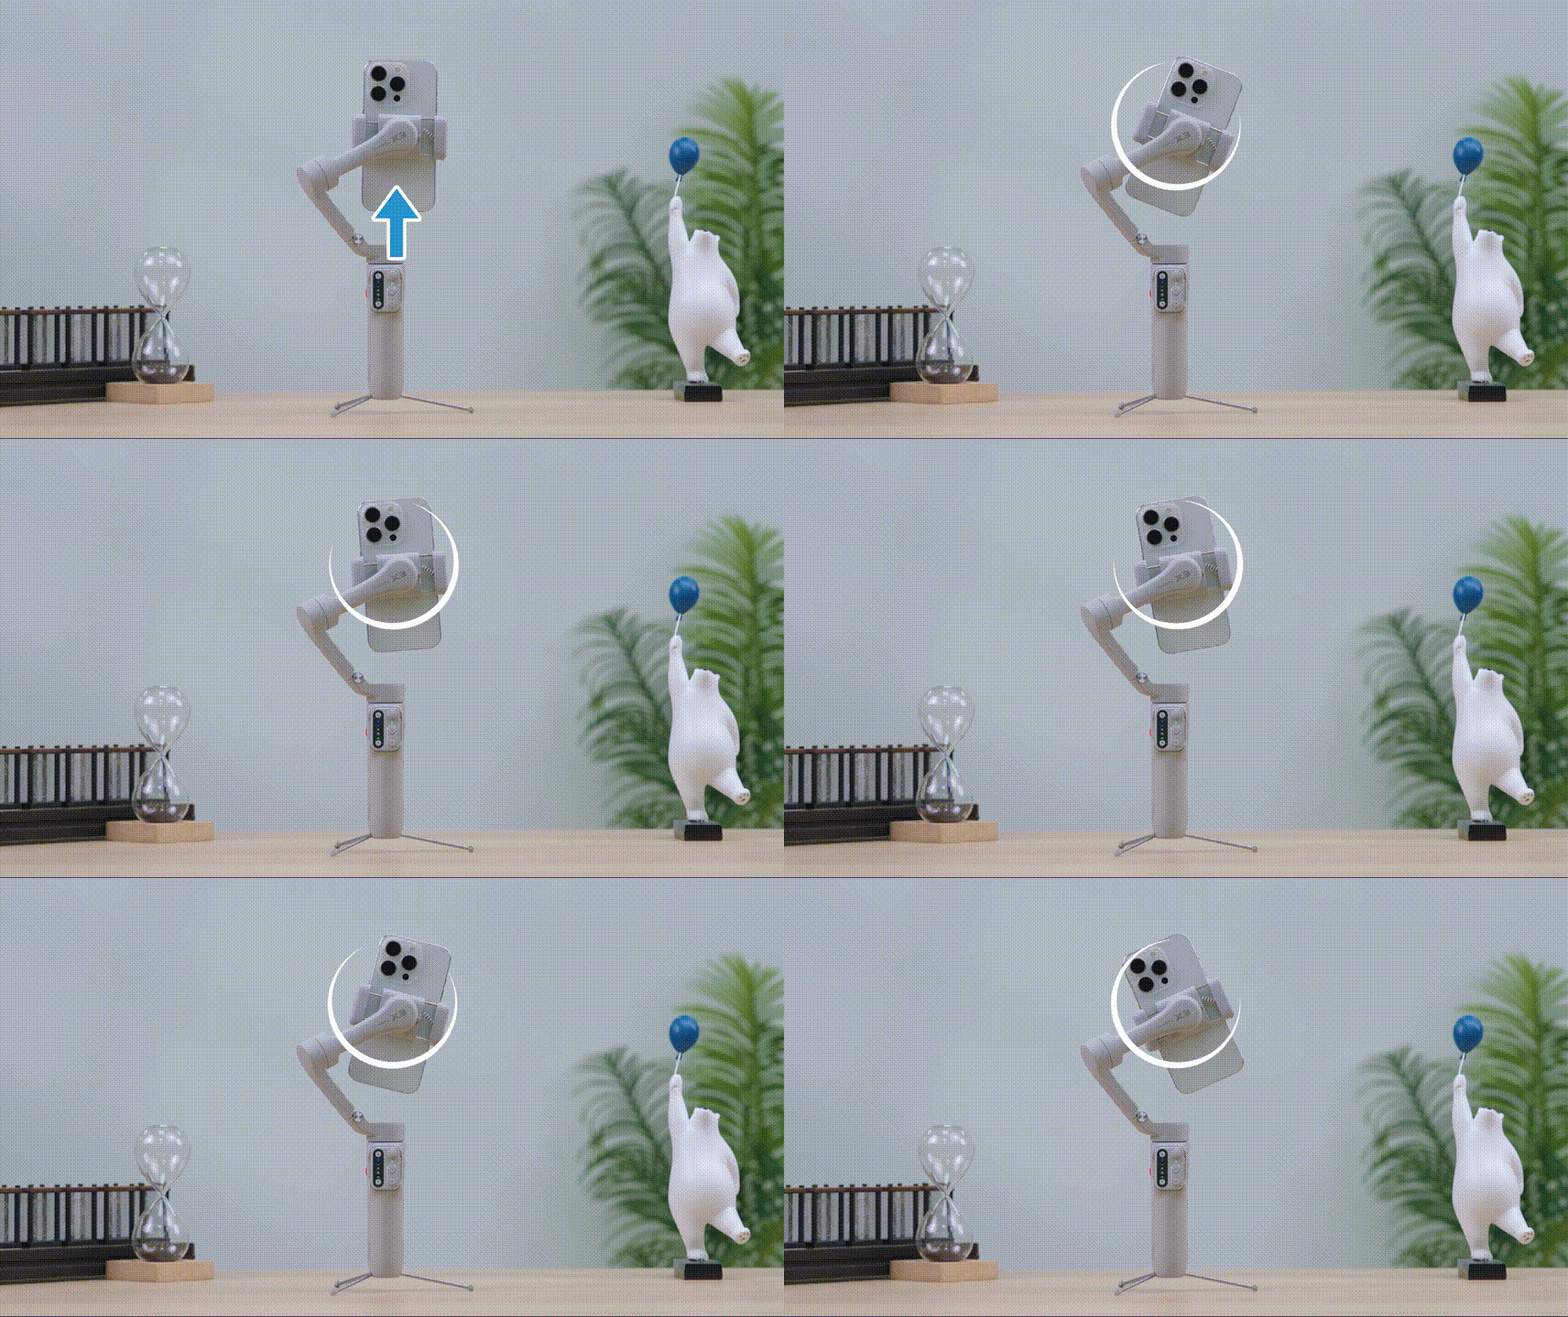
iSteady X3 offers 4 gimbal working modes, single press the mode button to switch working modes.
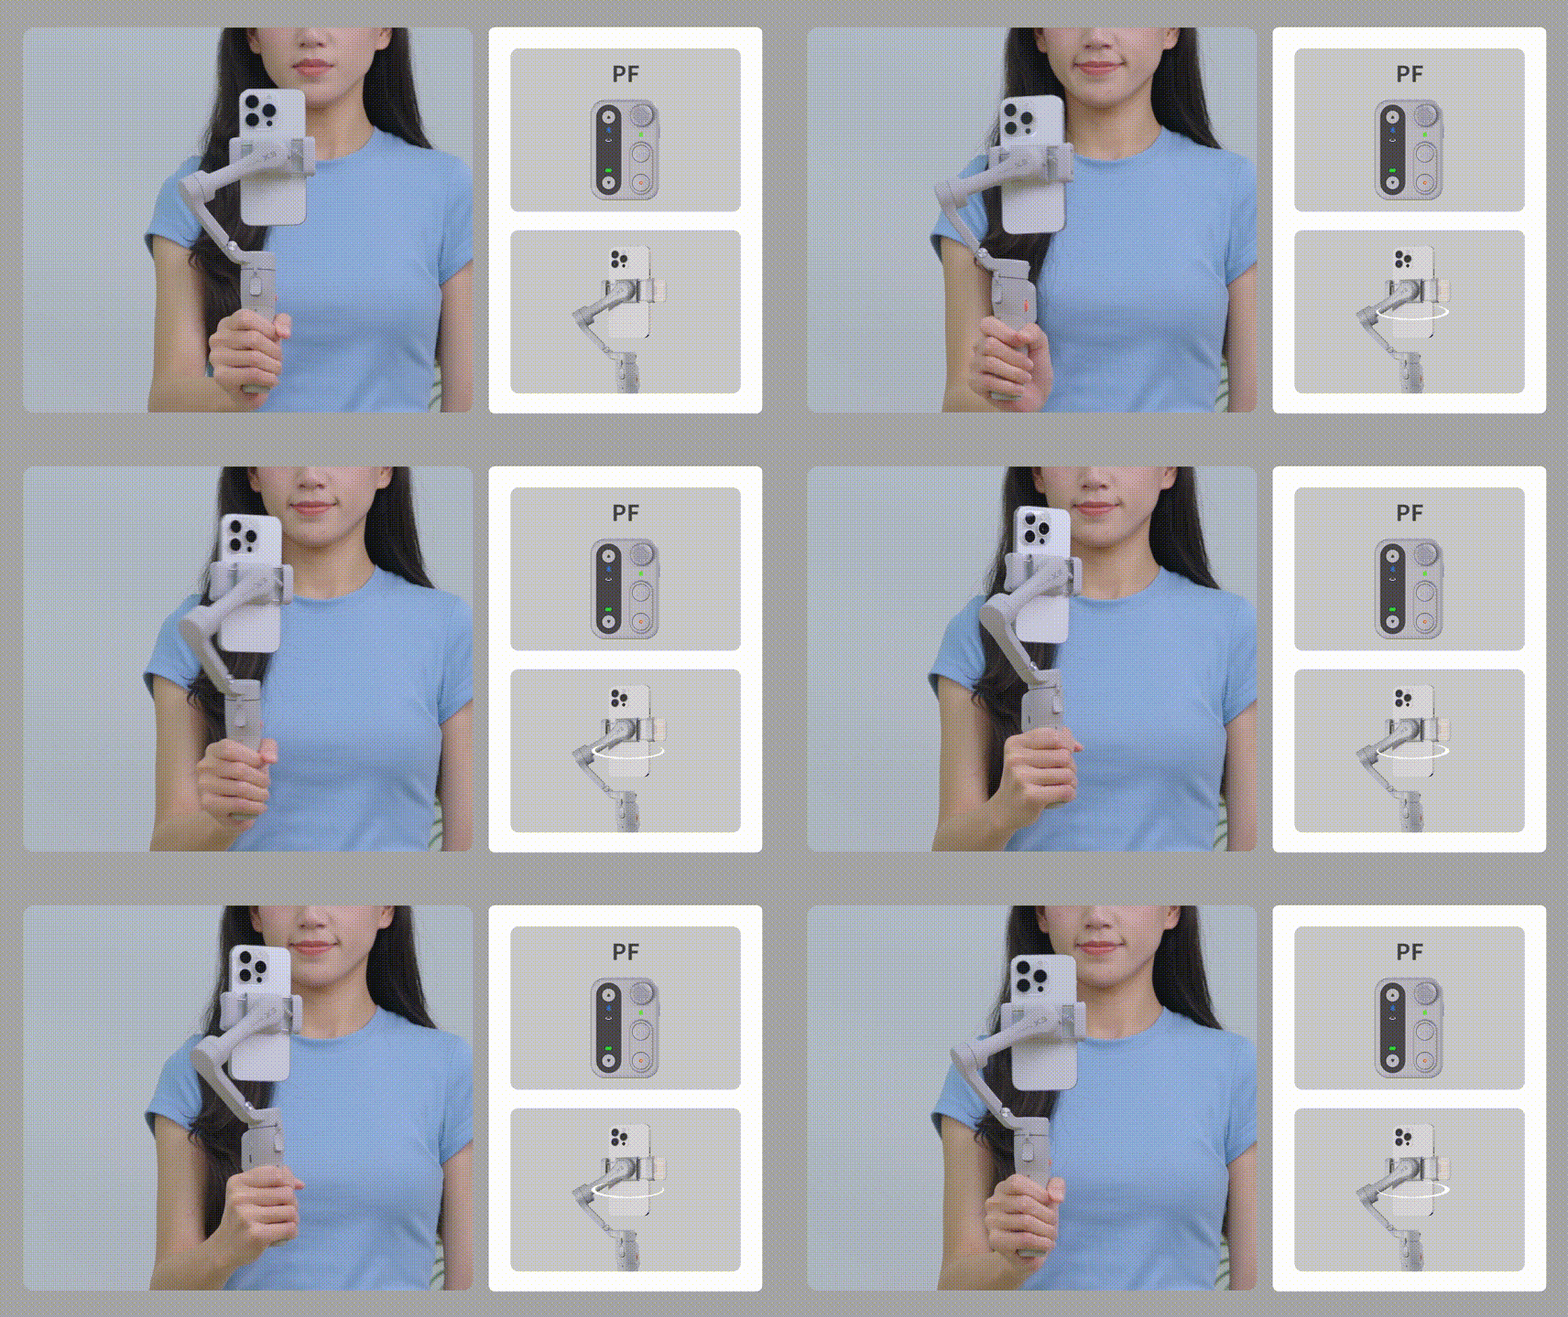
PF(Pan Follow Mode)
It allows the phone to pan left or right smoothly following the movements while maintaining a steady tilt and roll position.
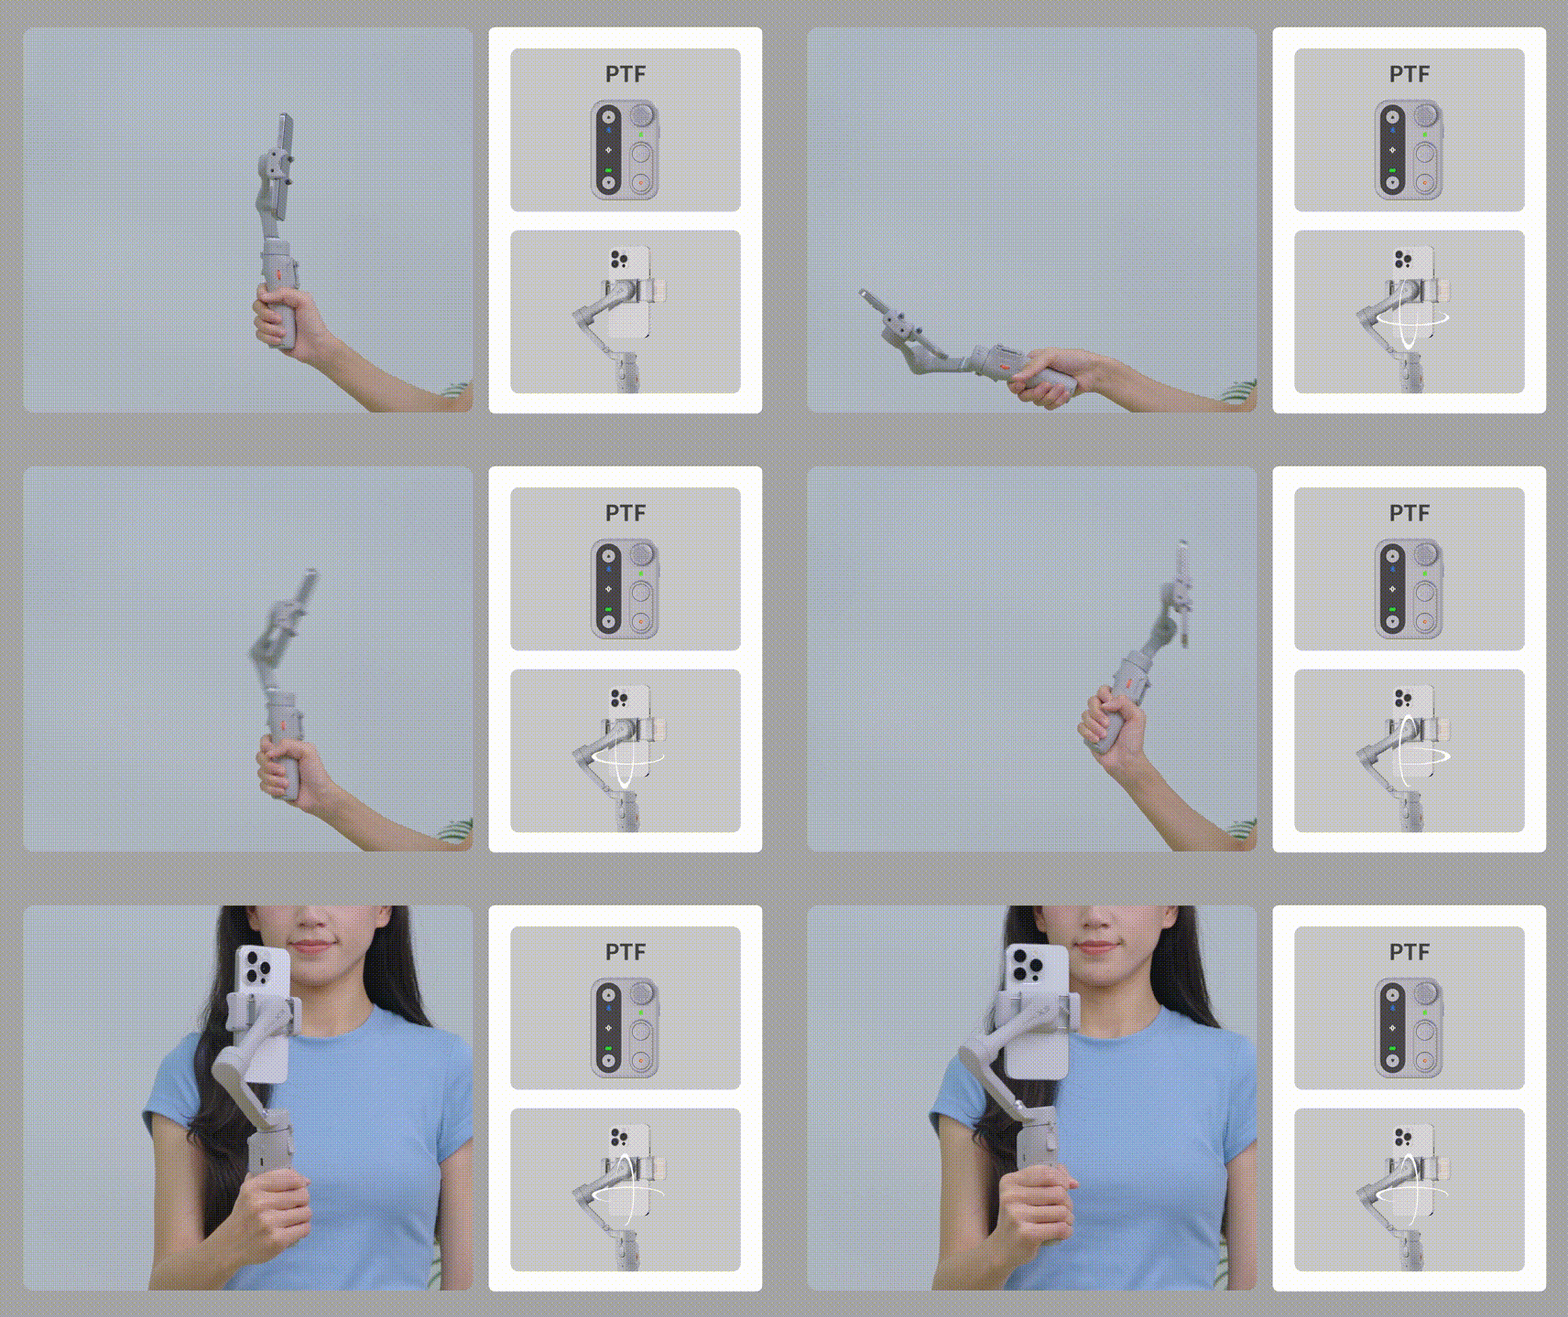
PTF(Pan and Tilt Follow Mode)
The roll axis remains locked to keep the horizon level. It allows the phone to follow the operator's pan (left/right) and tilt (up/down) movements.
POV(Point of View Mode)
This mode allows the phone to follow the movements in all directions. It offers a "first-person" perspective.

L(All Lock Mode)
The phone's orientation remains fixed regardless of the gimbal's movements.

While in this mode you can use the Joystick to adjust the phone direction.
Folding & Storage
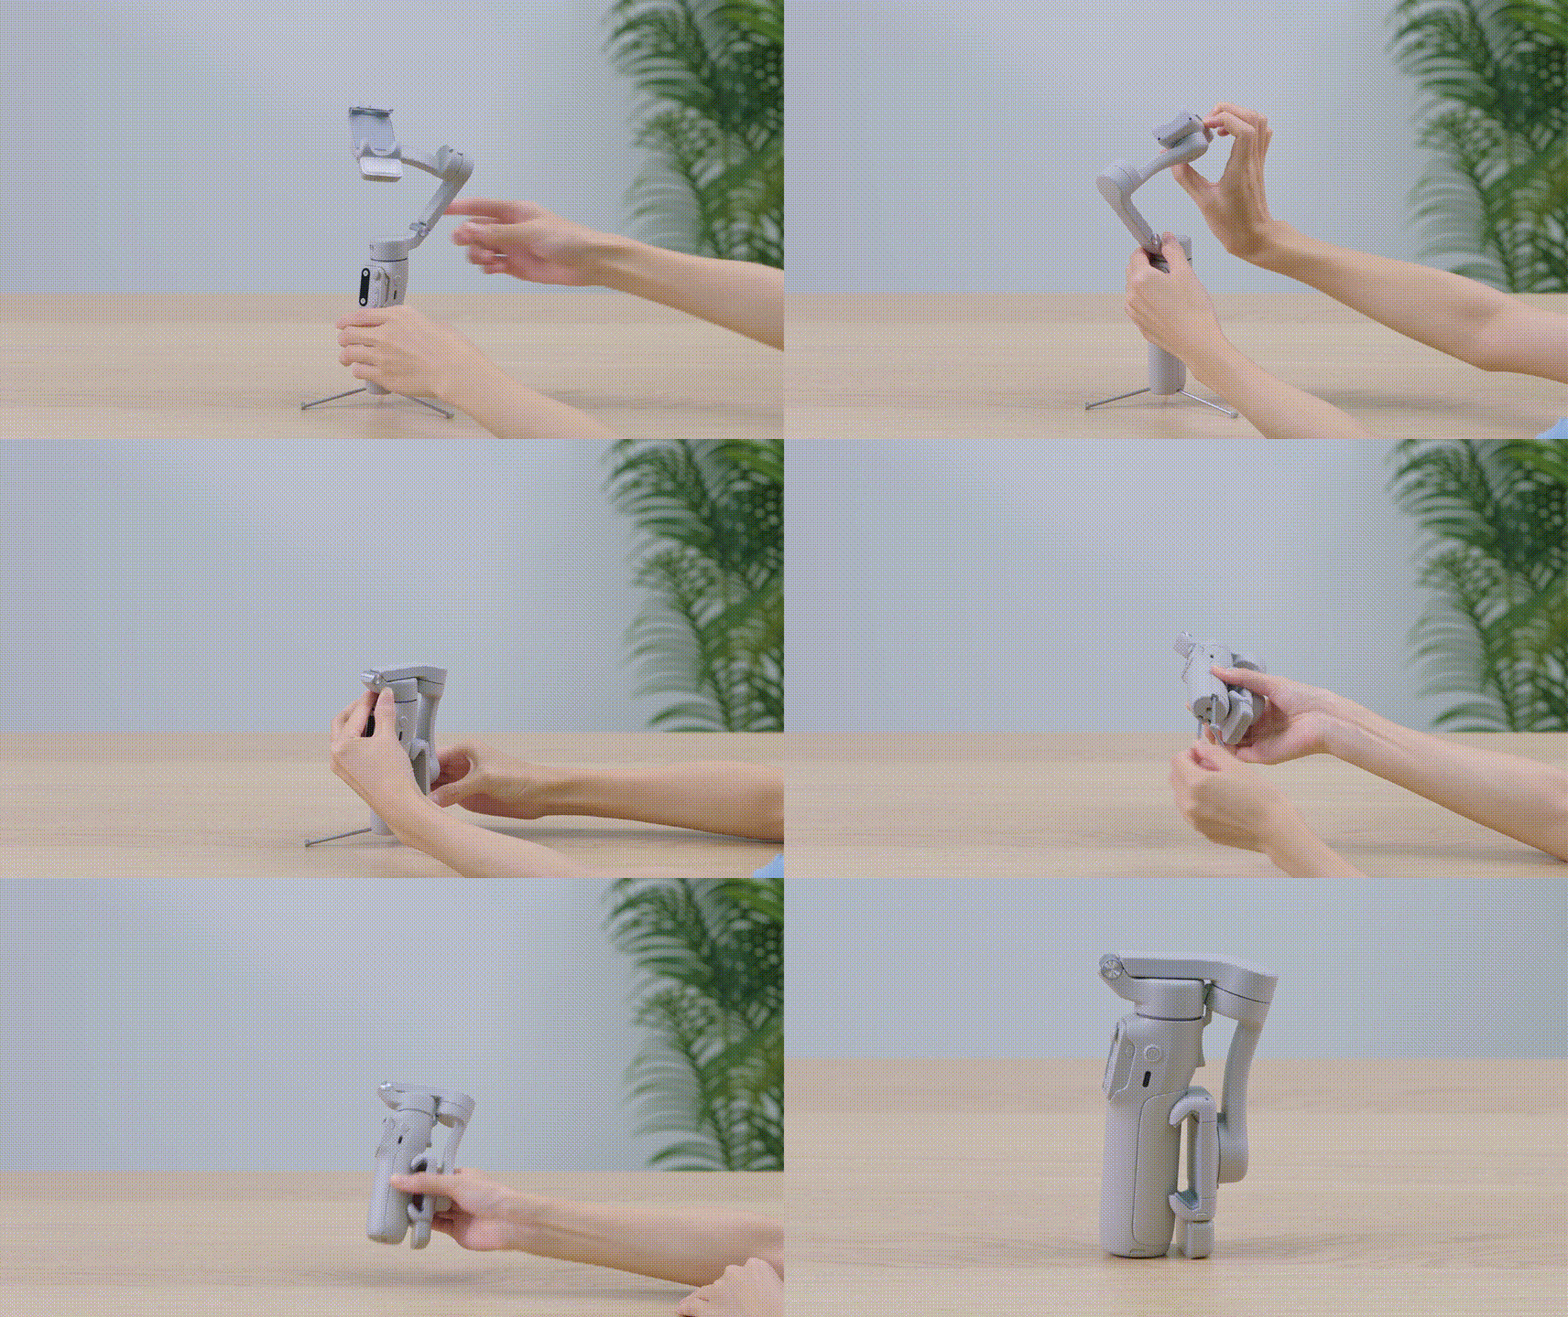
Long press the shutter button to power off the gimbal.
Detach the smartphone from the phone clamp.
Rotate the gimbal to a proper angle to fold the arm and push the legs in.
Bluetooth Connection & Remote Connection
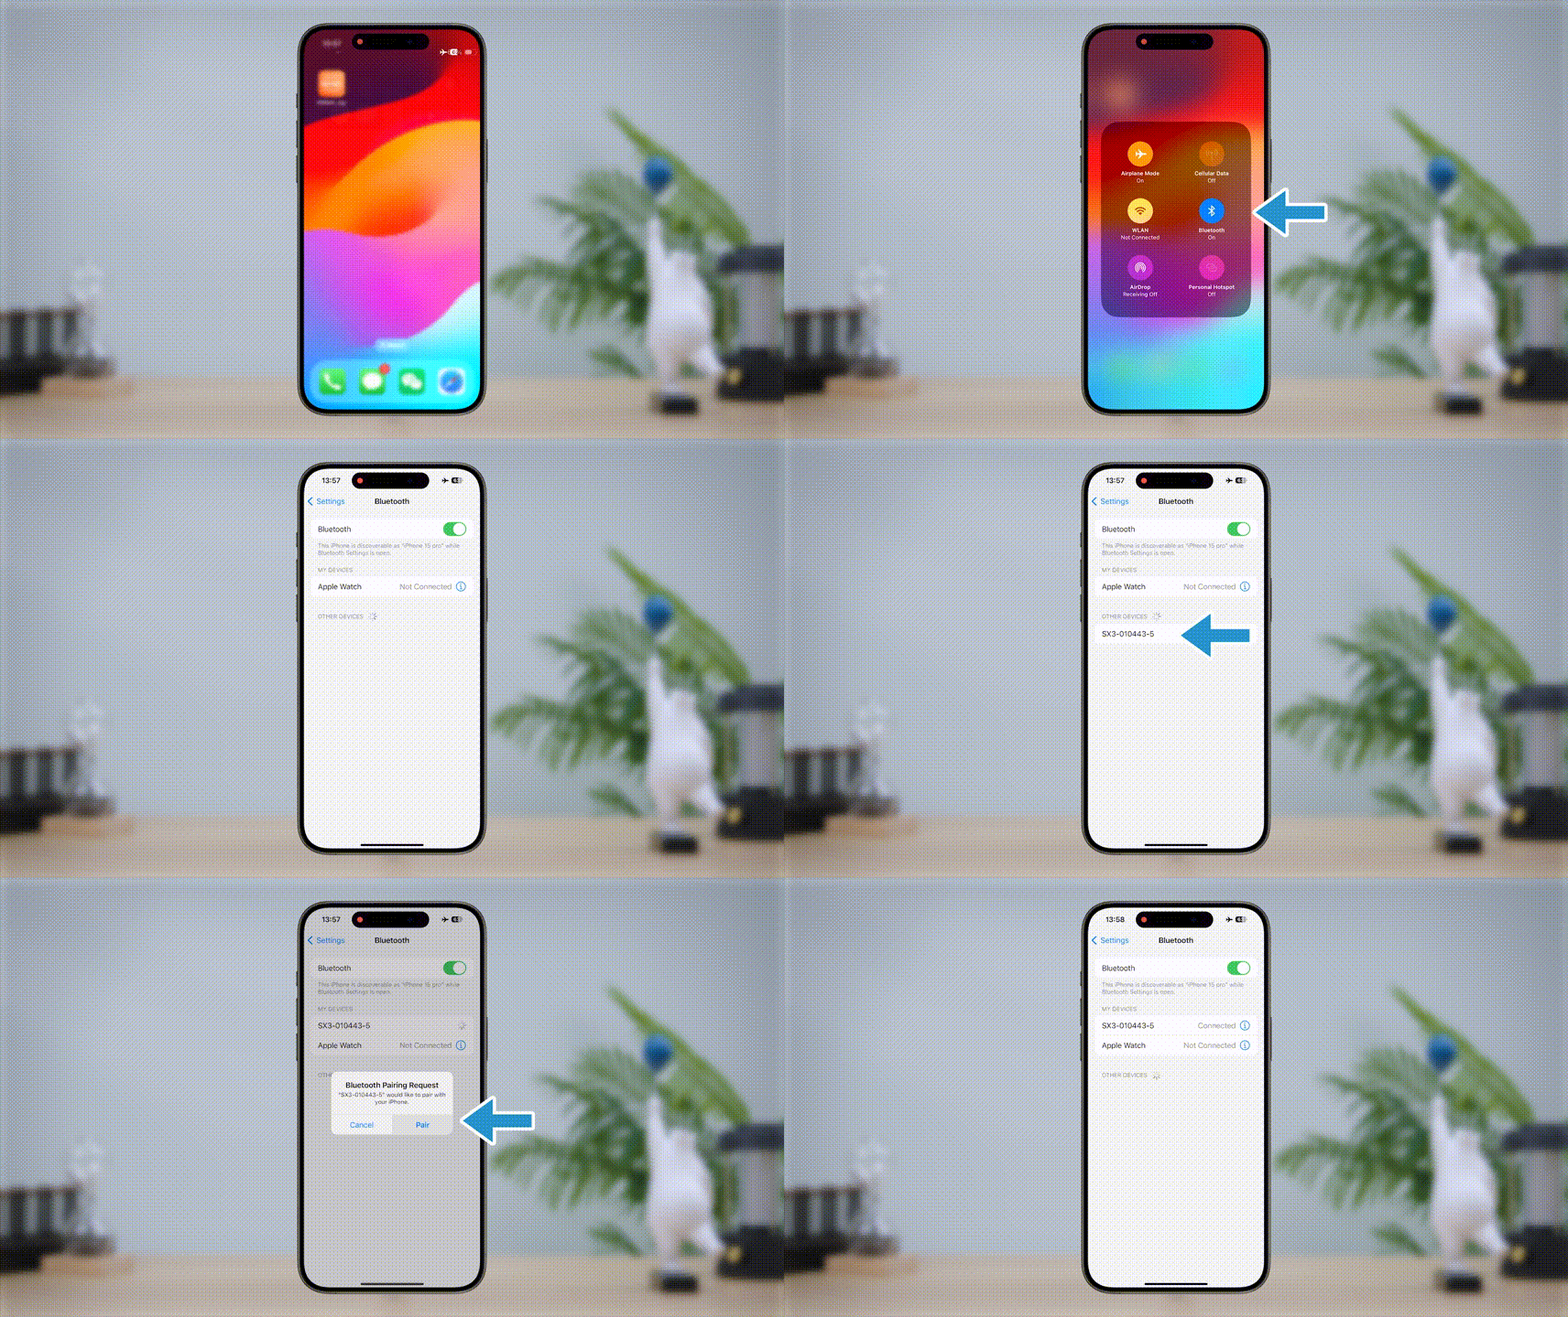
Bluetooth Connection with the Mobile Phone
Activate Bluetooth on your smartphone and select the device named "SX3-XXXXXX" from the list of available devices. Follow the on-screen instructions to connect and pair. A steady light on the Bluetooth indicator signifies a successful connection.
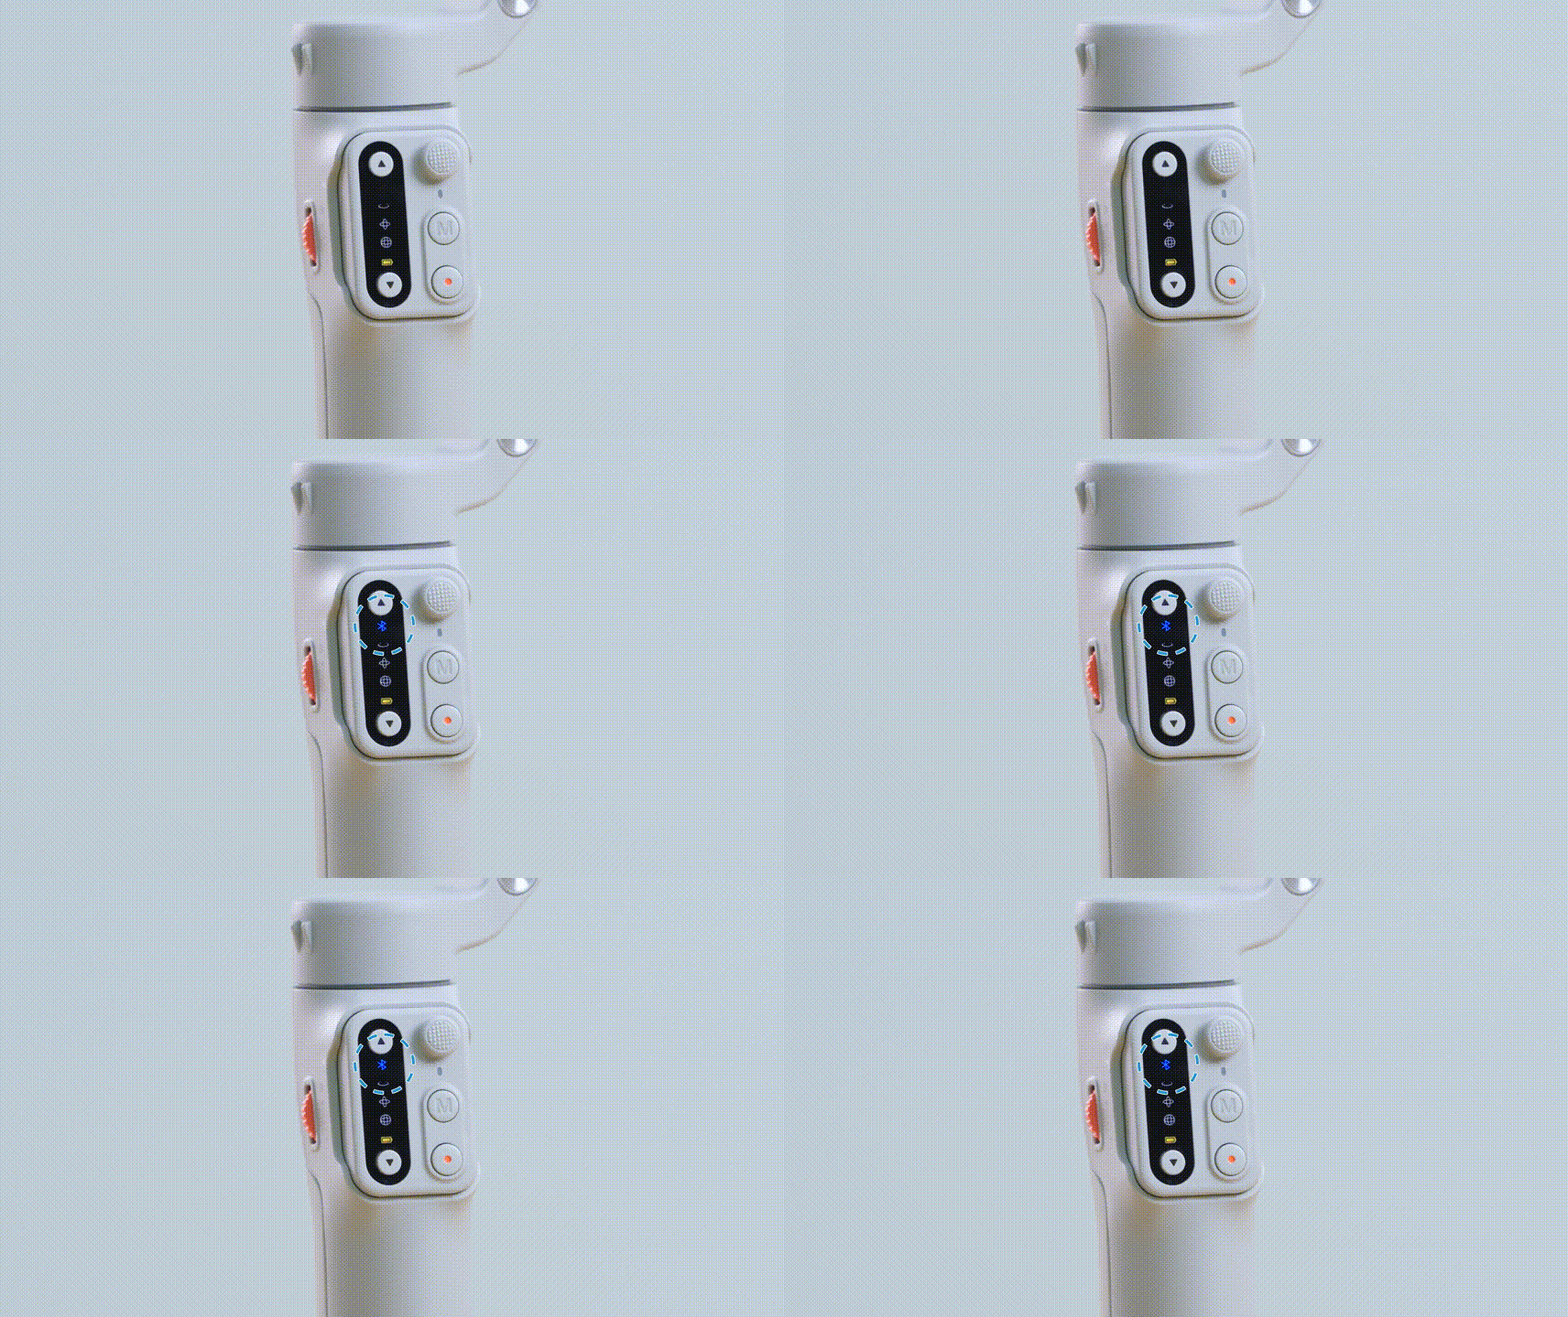
Clear the Connections
Press the side wheel seven times. The Bluetooth indicator and remote connection indicator will be off. It indicates that both the Bluetooth connection and remote connection of the gimbal are cleared.
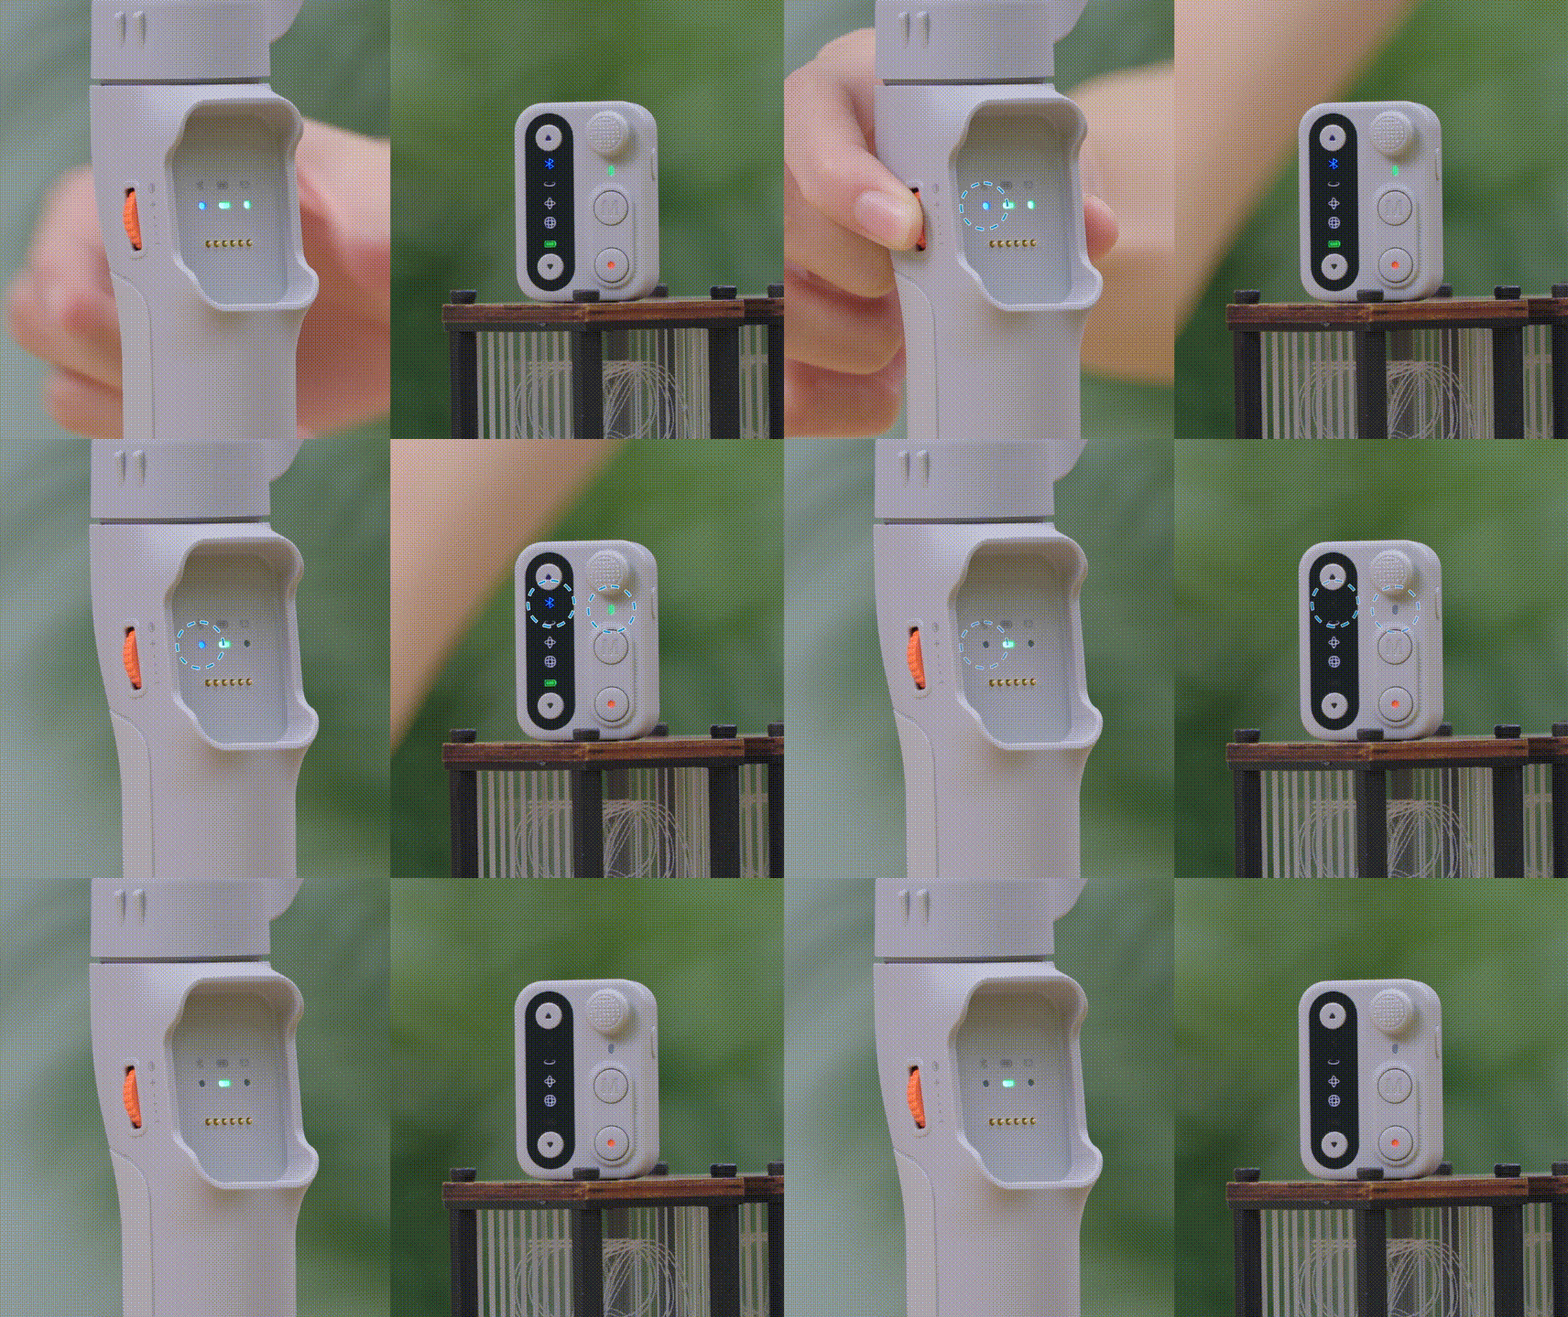
Re-pair the Remote
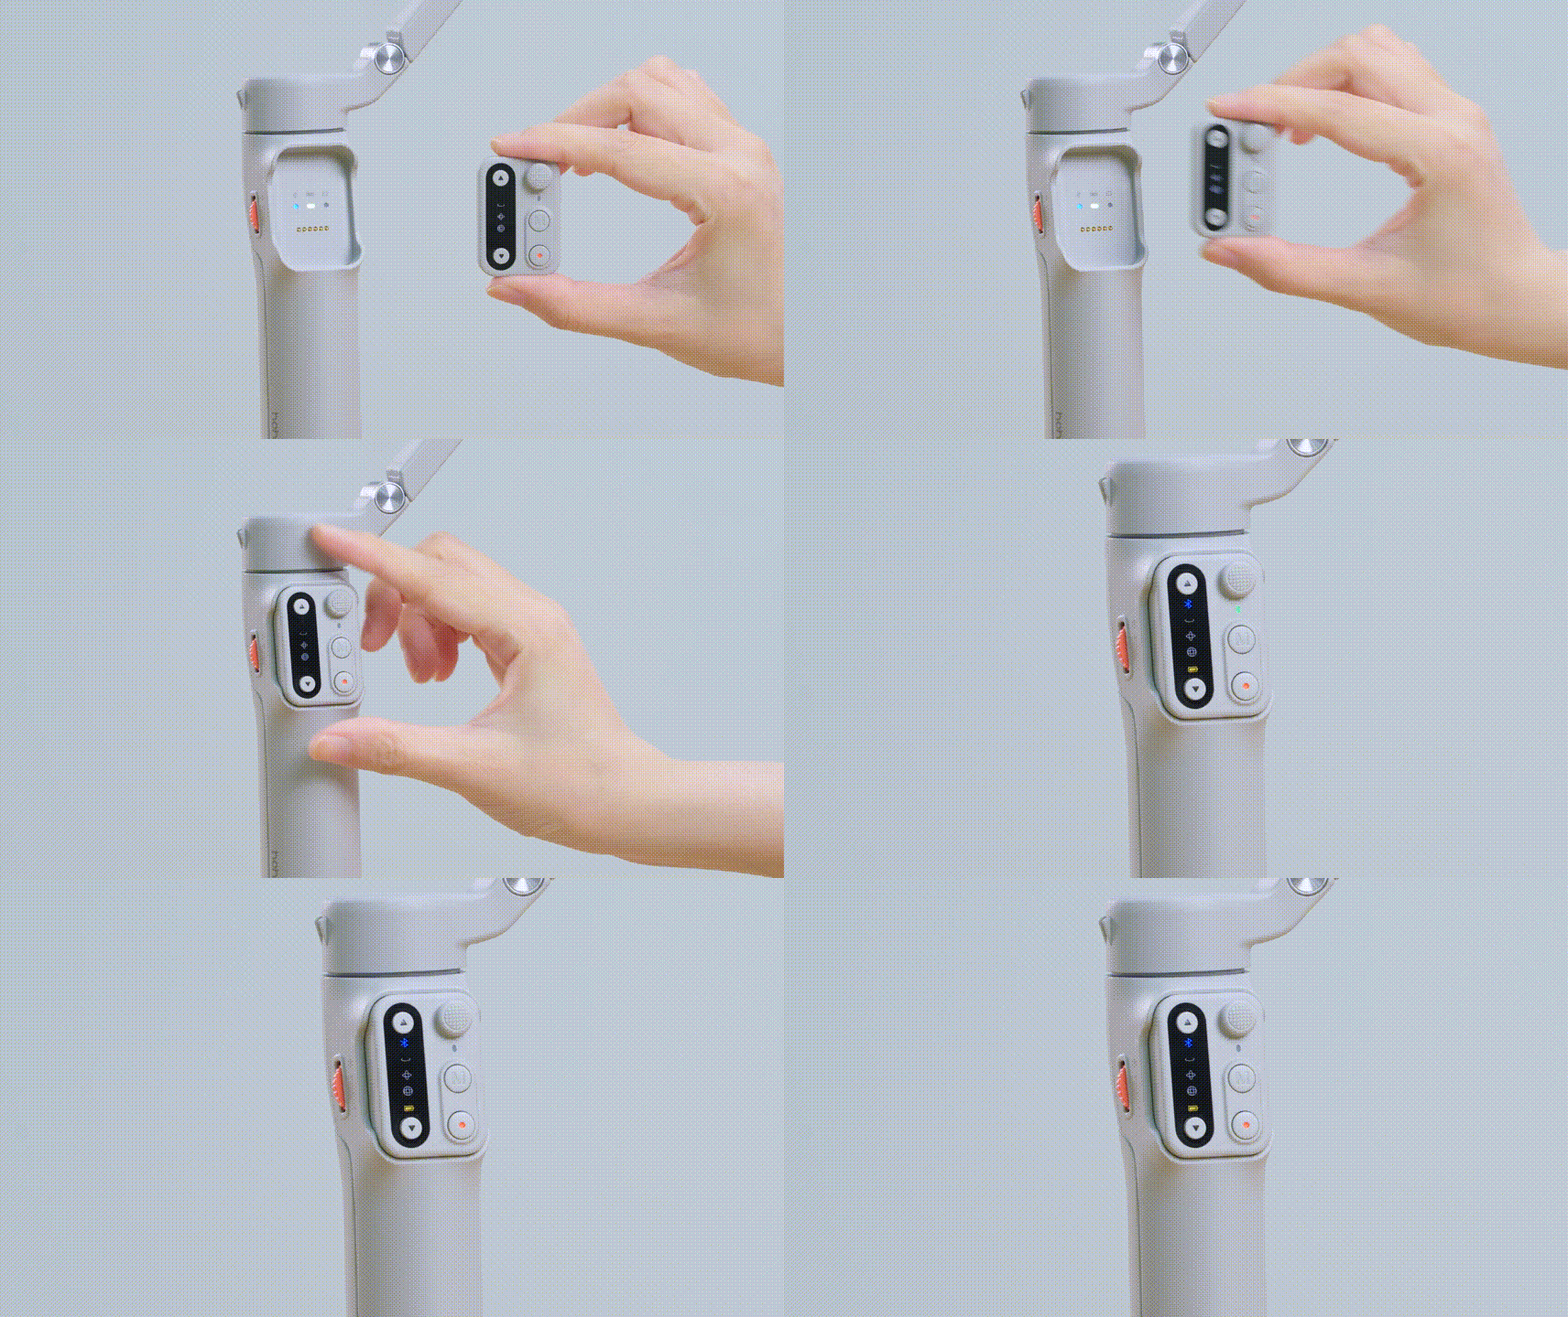
The remote controller is already paired with the X3 by default. If you clear all the connections, it will need to be re-paired.
Simply place the controller back into its slot, and it will automatically reconnect and pair.
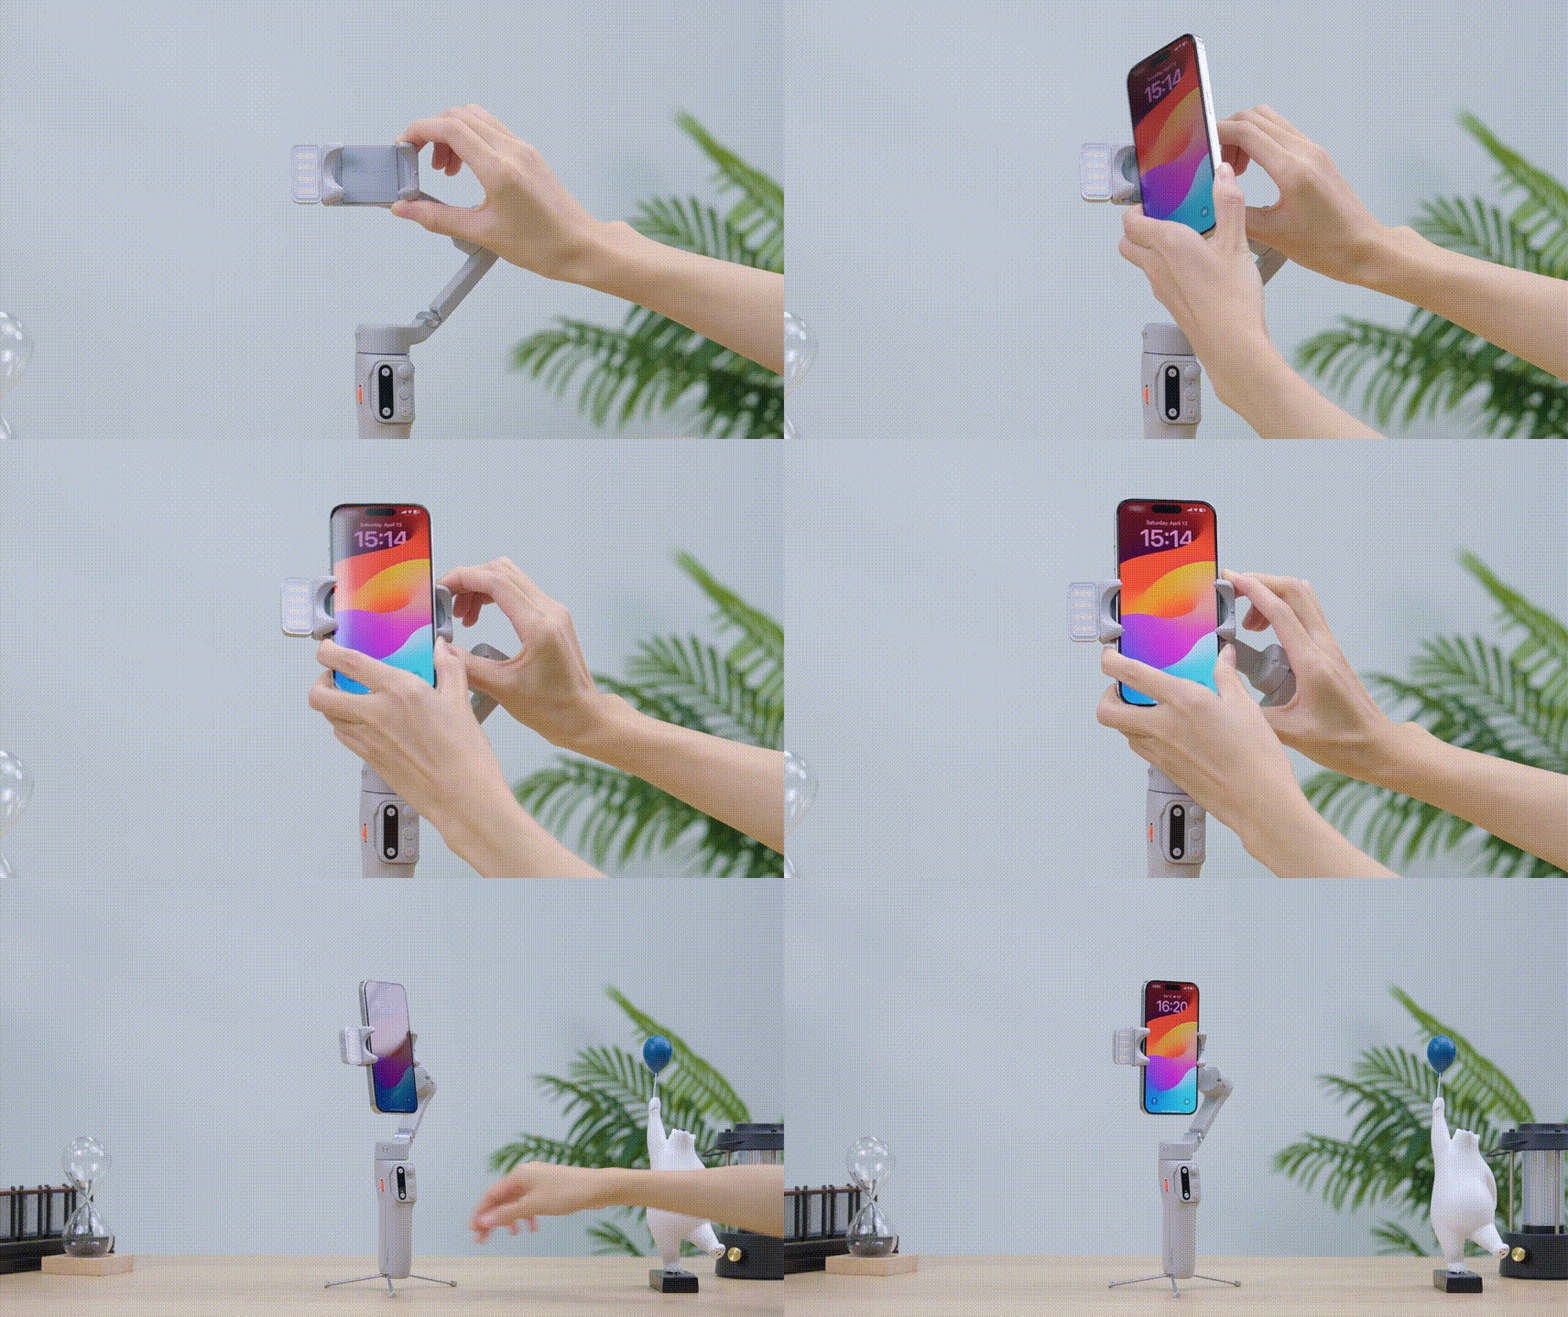
Startup Default Orientation
Start up with Portrait
Attach the smartphone with the fill light on the left. The iSteady X3 defaults to powering on in portrait mode.
Start up with Landscape
Ensure your mobile phone is connected to the gimbal via Bluetooth, then follow these steps in the Hohem Joy App:
① Tap "Settings"
② Go to "Gimbal Parameter Settings"
③ Select "Startup Shooting Orientation"
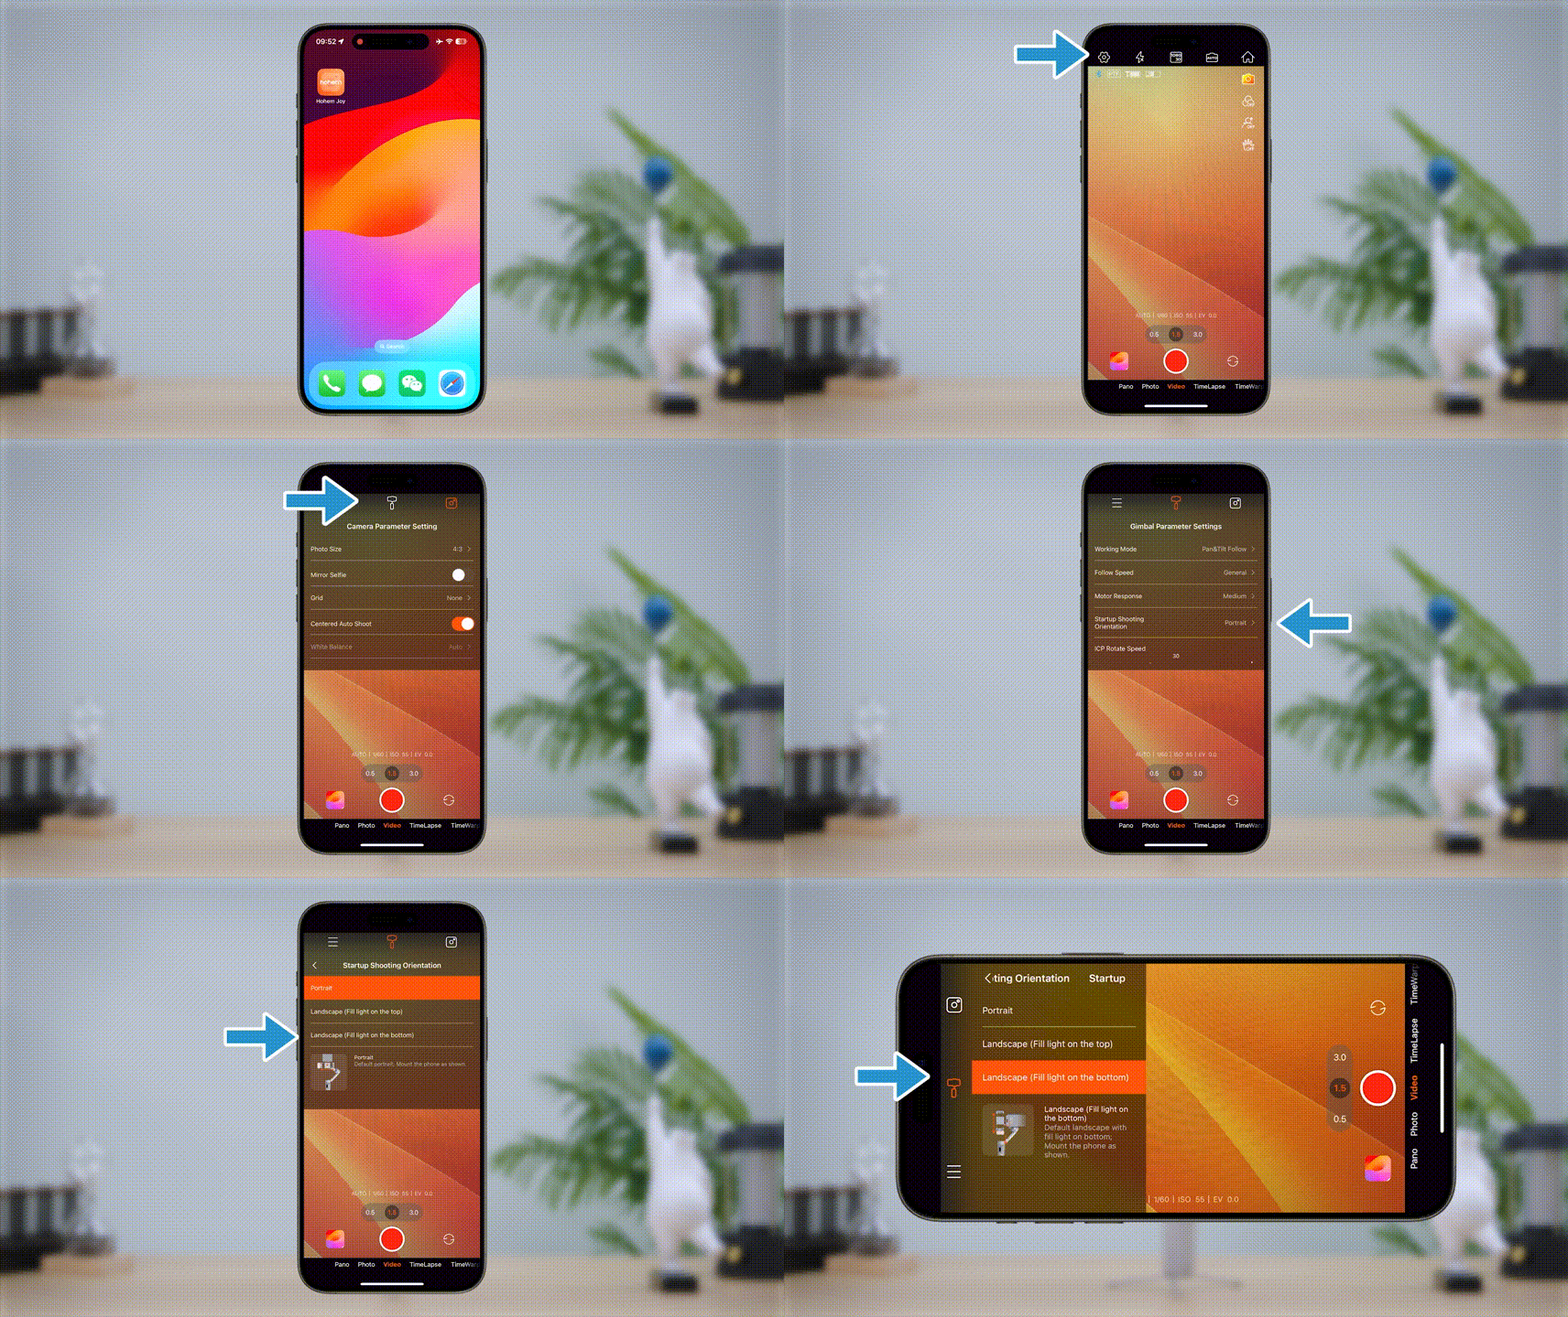
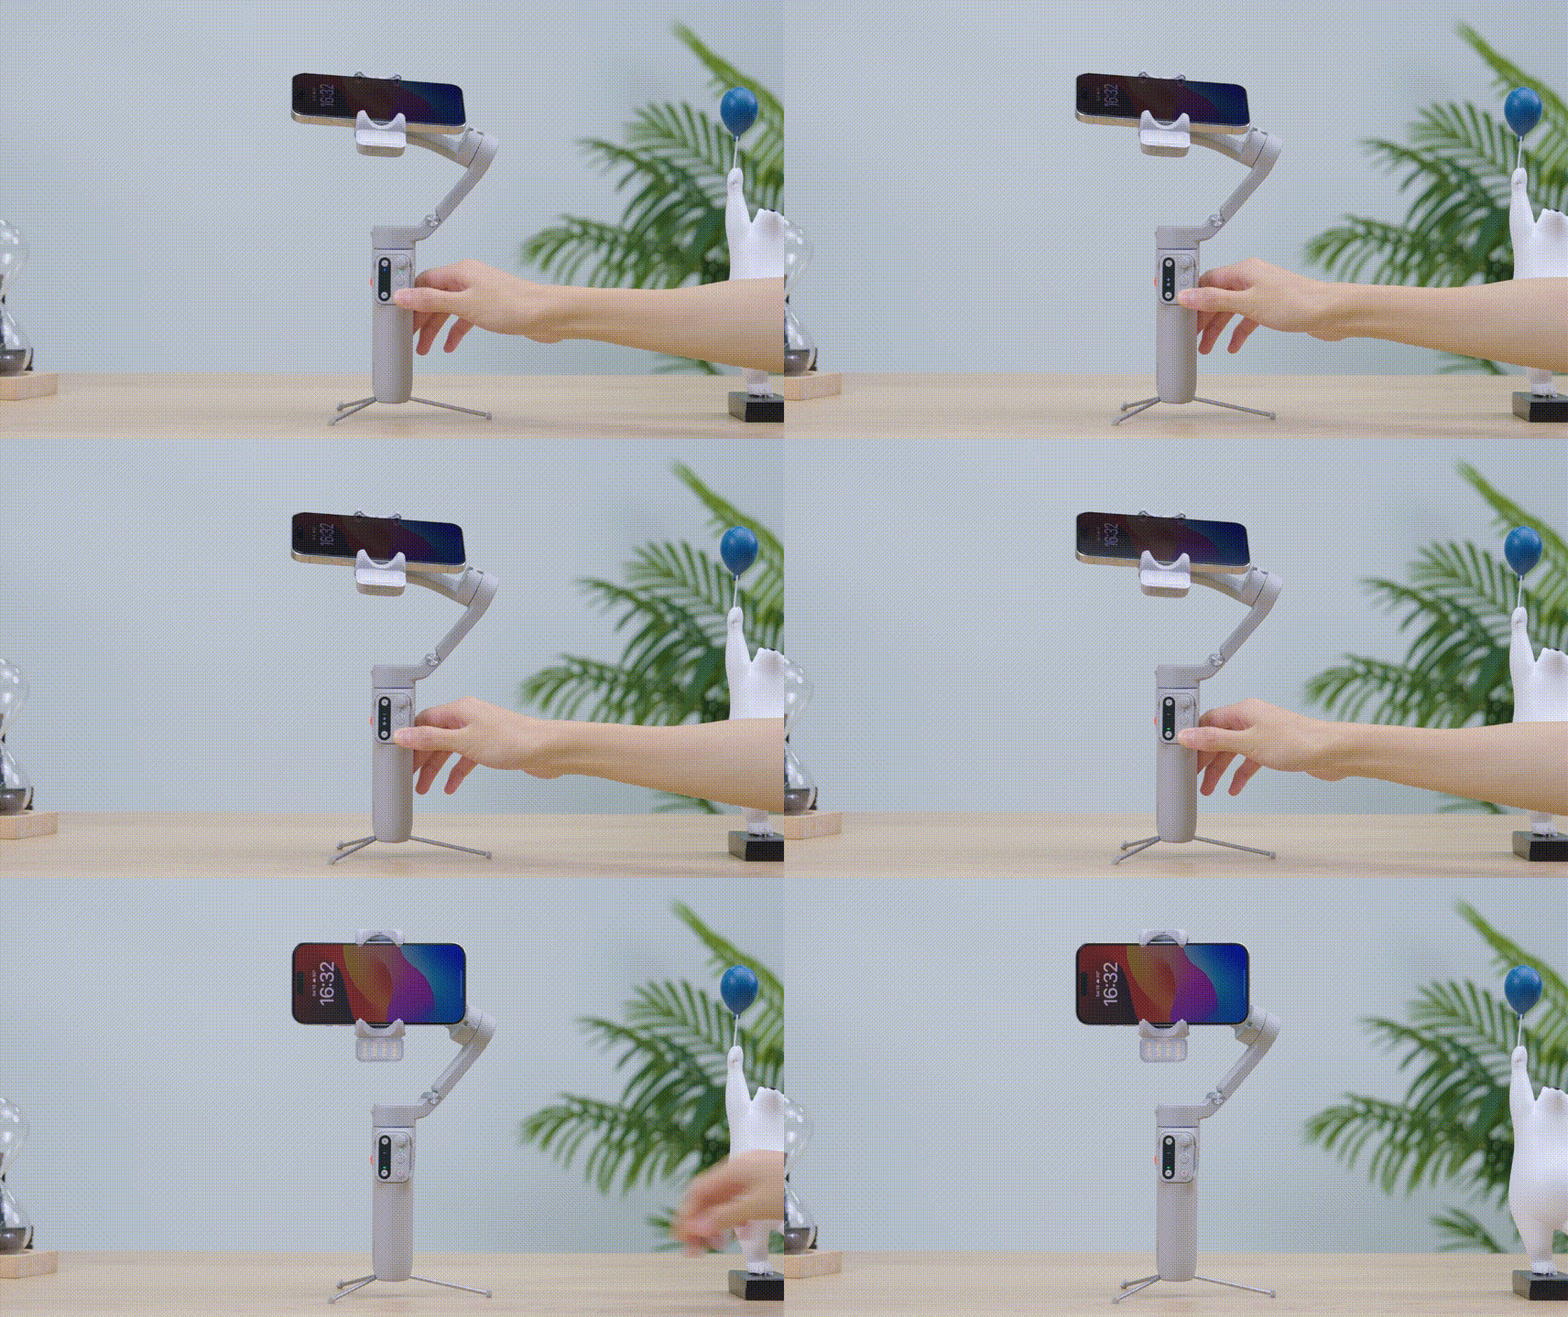
• Landscape (Fill Light on the Bottom)
Tap "Landscape (Fill light on the bottom)", iSteady X3 will default to this power-on orientation for the next time.
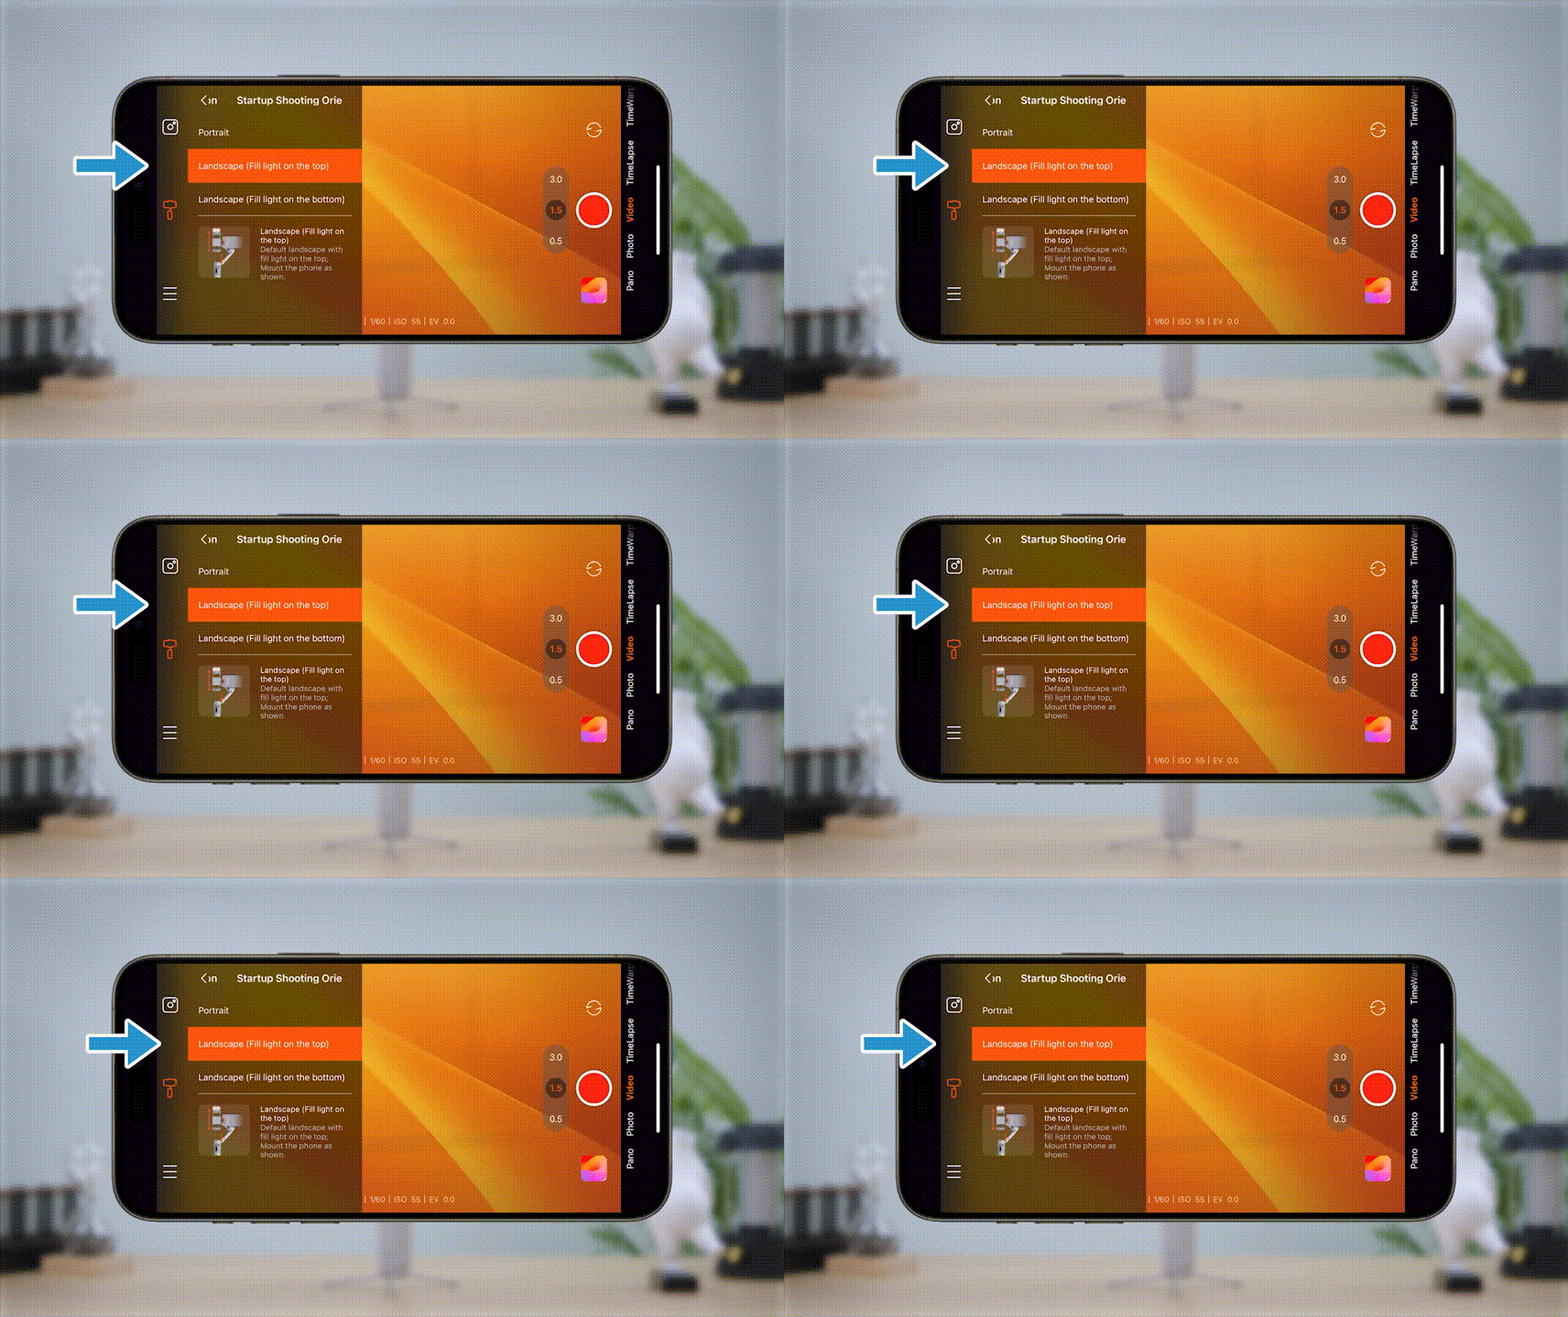
• Landscape (Fill Light on the Top)
Tap "Landscape (Fill light on the top)" to power on in the landscape mode with fill light on the top.
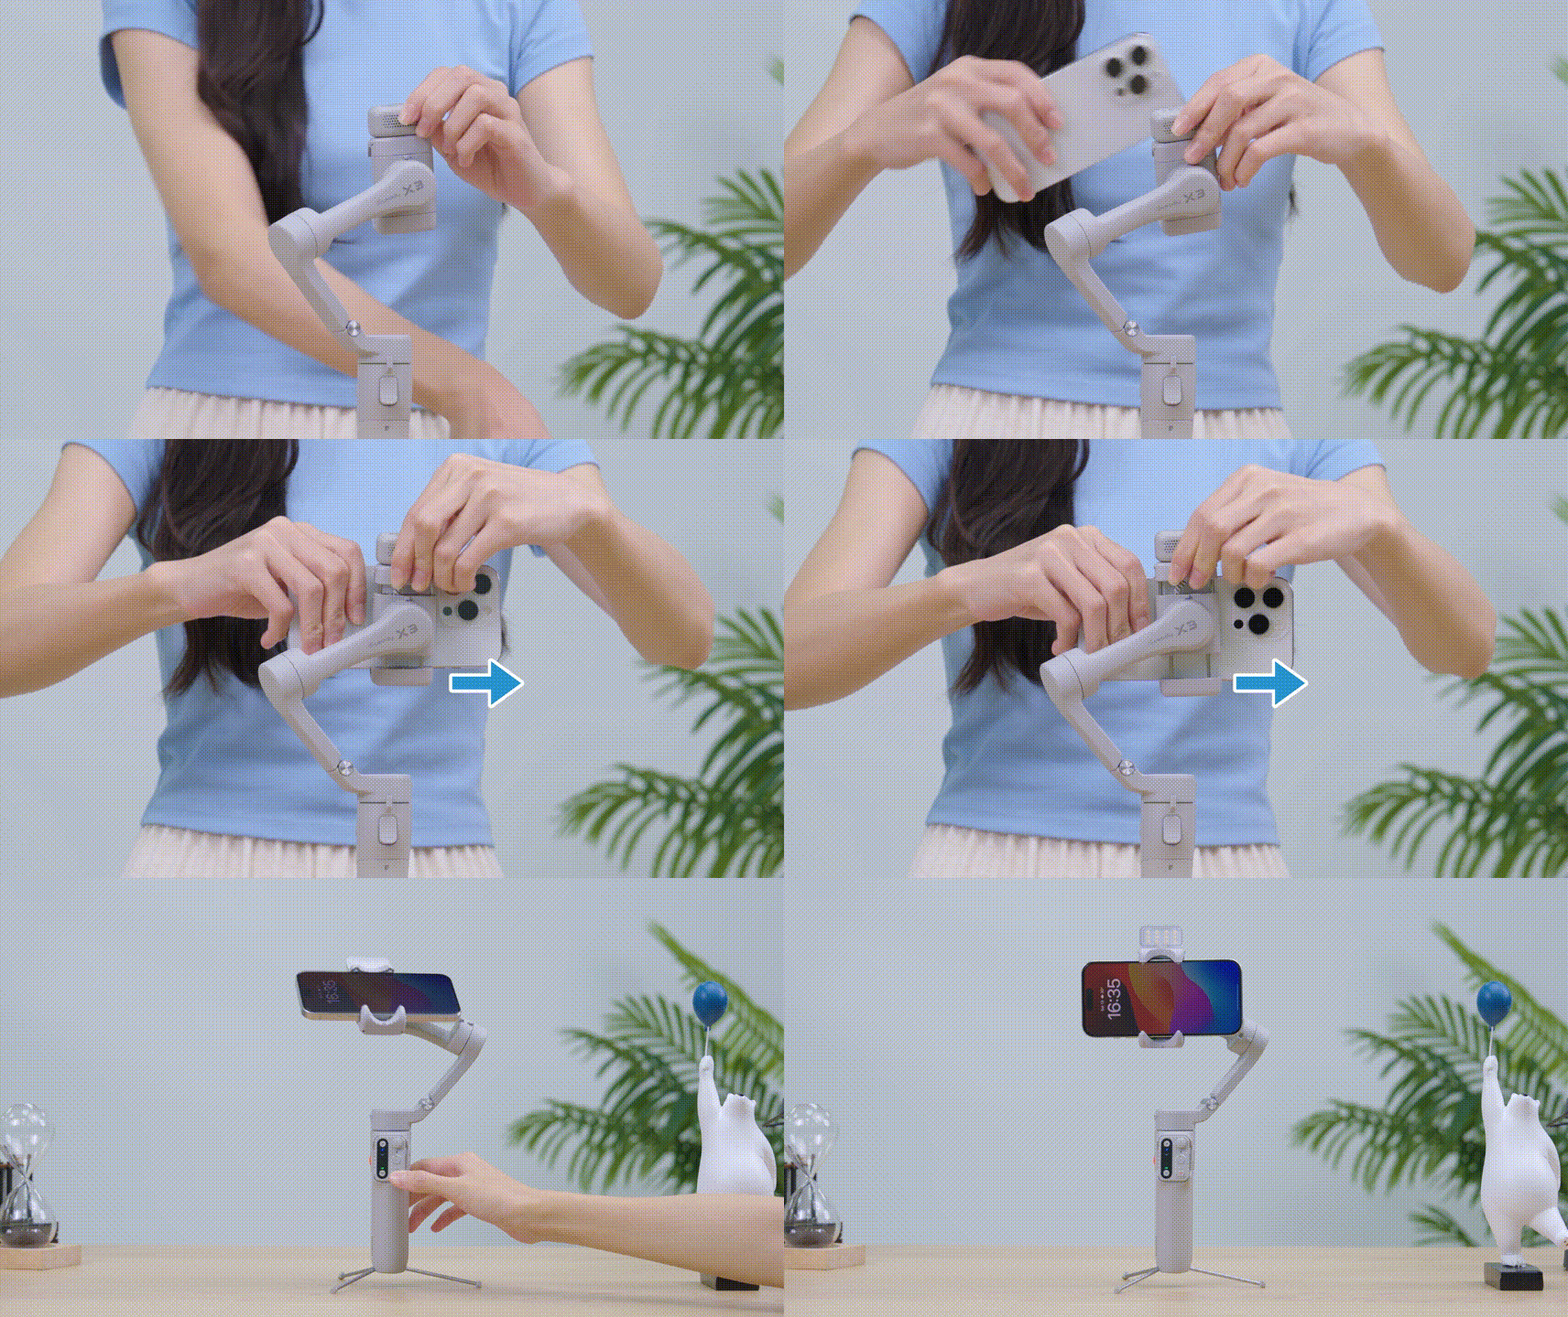
Attach the smartphone with the camera pointing left. The gimbal will default to this power-on orientation for the next time.


 Aliexpress
 Hohem Official Store


